
If you are wondering how to crimp spark plug wires, cut the wire to the correct length, slide the boot on first, strip only the amount of insulation required by the terminal, fold the exposed conductor back over the outer jacket when the terminal design calls for it, then use a proper spark plug wire crimping tool to secure the terminal firmly without crushing the wire. After crimping, pull-test the terminal, install the boot, and verify the finished wire before putting it on the engine.
A good spark plug wire crimp must accomplish two things at the same time. It must create a reliable electrical connection between the ignition terminal and the wire’s conductive core, and it must mechanically grip the outer insulation strongly enough that vibration and repeated boot removal do not pull the terminal off.
That sounds simple, but spark plug wires are not all constructed the same way. Carbon-core suppression wires, spiral-wound performance wires, and solid-core ignition wires use different conductor materials. Terminals also vary between straight, 90-degree, distributor-style, HEI-style, and coil-pack configurations.
Because of those differences, the stripping length and terminal orientation should always match the instructions supplied with your wire kit. A common universal-wire technique is to expose a short section of conductor, fold it back over the jacket, and crimp the terminal around both the folded conductor and insulation. However, you should not assume every aftermarket terminal uses exactly the same dimensions.
In this guide, I’ll explain how to crimp spark plug wires correctly, what tools you need, how to cut and strip the wire, how to position the conductor, how to crimp different terminal styles, how to test the finished wire, and how to avoid the mistakes that commonly lead to misfires or wires pulling apart.
How to Crimp Spark Plug Wires Step by Step
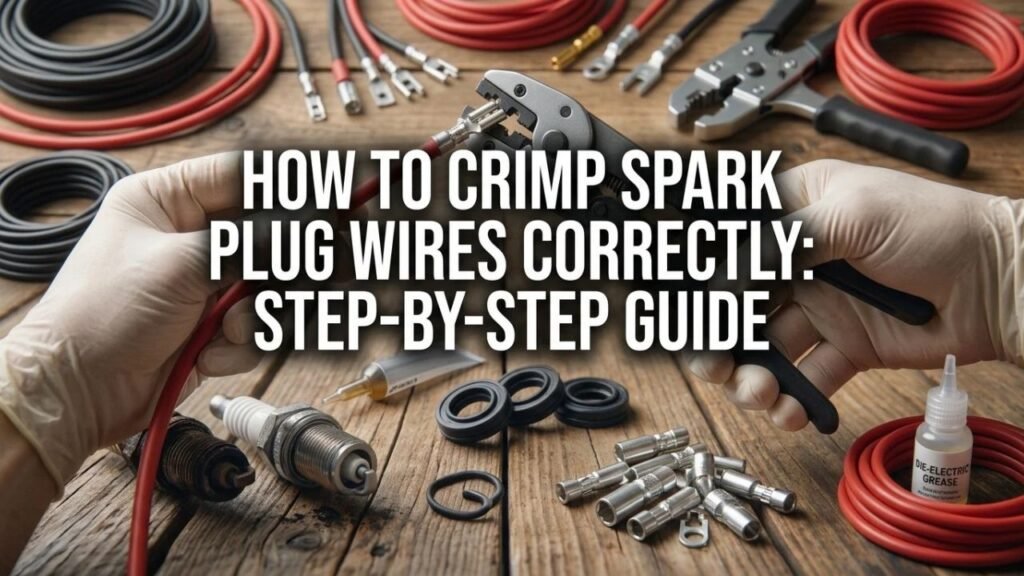
The basic process is straightforward once you understand the terminal design.
First, route and measure the wire so you know the finished length. Cut it cleanly. Slide the correct boot onto the cable before attaching the terminal. Strip the jacket carefully without cutting the conductive core. Position or fold the conductor according to the terminal design. Place the terminal in the correct spark plug wire crimping die and compress it firmly. Then check the mechanical connection and install the boot over the terminal.
The quality of each step matters.
A perfect-looking crimp can still misfire if the conductor is not actually touching the terminal, and a good electrical connection can still fail if the terminal is mechanically loose inside the boot.
What Tools Do You Need to Crimp Spark Plug Wires?
The most important tool is a dedicated spark plug wire crimper.
Many aftermarket ignition-wire kits include a simple crimping tool, while professional ratcheting crimpers provide more consistent results.
You will also need a sharp wire cutter and a stripping tool appropriate for ignition cable.
A small amount of dielectric grease can help when sliding boots over finished terminals, although you should use it sparingly.
A multimeter is useful for checking resistance after assembly, particularly with suppression or spiral-core wires.
Dedicated Spark Plug Wire Crimper
Spark plug wire terminals are larger and shaped differently from ordinary automotive electrical terminals.
A standard red-blue-yellow electrical crimper is usually not the right tool.
A spark plug wire crimper has dies shaped to roll or compress the terminal wings evenly around the insulation and conductor.
Some tools have separate cavities for stripping and crimping.
Others are designed to work in a bench vise.
For a complete set of custom wires, I recommend using a quality dedicated crimper because consistent terminal pressure matters.
The wire should be cut squarely.
A ragged or crushed end makes stripping and conductor positioning more difficult.
Use a sharp cable cutter rather than ordinary household scissors.
Wire Stripper
Some ignition-wire crimpers include a stripping section that cuts the jacket to the proper depth.
If yours does not, use a tool suitable for the wire diameter.
The key is removing insulation without nicking or cutting the conductor underneath.
Key Takeaways:
- Use a dedicated spark plug wire crimper rather than a generic electrical-terminal crimper.
- Cut the wire squarely and strip the jacket without damaging the core.
- The exact stripping length should match the terminal and wire-kit instructions.
Measure the Spark Plug Wire Before Cutting
If you are assembling a universal spark plug wire set, start with the longest wire positions first.
Route each cable from the distributor, coil pack, or ignition coil to its spark plug using the path you intend to keep permanently.
Allow enough length for engine movement and routing around hot or sharp components.
Do not stretch the wire tight.
A wire that barely reaches while the engine is cold may pull on its terminal when the engine moves under torque.
Leave Enough Slack
The wire should have a natural curve rather than a tight straight line.
At the same time, avoid excessive loops that can touch exhaust manifolds, headers, accessory belts, or other moving components.
If you use separators or loom holders, route the wire through those before making the final length decision.
Mark the Cut
Once you are satisfied with the routing, mark the wire at the point where the terminal needs to end.
Remember that the terminal itself adds a small amount of length inside the boot.
If you are uncertain, leave the wire slightly long.
You can always shorten it before crimping; you cannot put material back after cutting.
Slide the Spark Plug Boot On Before Crimping
This is one of the easiest steps to forget.
In many wire sets, the rubber boot cannot pass over the terminal once the terminal has been crimped.
Slide the boot onto the cable before installing the terminal.
Make sure the boot is facing the correct direction.
For a 90-degree spark plug boot, orientation matters because you want the wire to exit in the correct direction after installation.
Use a Small Amount of Dielectric Grease if Needed
Silicone boots can fit tightly around thick ignition cable.
A very small amount of dielectric grease inside the boot can help it slide down the cable.
Do not saturate the entire assembly.
The goal is simply to reduce friction and help the rubber move over the finished terminal later.
Strip the Spark Plug Wire Correctly
Most universal ignition-wire terminals require a section of the outer insulation to be removed so the conductive core can contact the terminal.
The exact strip length varies by manufacturer and terminal design.
A common aftermarket configuration exposes roughly a half inch or slightly more of conductor, but you should follow the instructions included with your wire set rather than relying on a universal measurement.
Do Not Cut the Conductor
This is especially important with carbon-core suppression wire.
The conductive core can be relatively fragile.
If you score or cut through it while stripping the jacket, the terminal may end up gripping only insulation.
Spiral-core wire can also be damaged if the stripping blade cuts deeply enough to sever the conductive winding.
Remove only the outer insulation.
Inspect the Exposed Core
After stripping, look closely at the conductor.
It should be continuous and undamaged.
If part of the conductor has been cut away, trim the damaged section off and strip the wire again.
Do not try to hide conductor damage inside the terminal.
Fold the Conductor Back When Required
Many spark plug wire terminals are designed so the exposed conductor folds backward over the outer insulation.
The terminal is then crimped around the jacket with the conductor trapped between the terminal and the wire.
This provides both electrical contact and mechanical strength.
How to Fold the Core
After stripping the jacket, bend the exposed conductor gently back along the outside of the insulation.
Keep it reasonably centered.
Do not twist it into a knot or bunch it into a thick lump.
The conductor should lie flat enough for the terminal wings to compress evenly around it.
Carbon-Core Wires
Carbon-core suppression wires often use a flexible conductive material rather than a metal strand.
Handle it gently.
The folded-back core needs to make solid contact with the terminal, but it can break if pulled or bent sharply.
Spiral-Core Wires
Performance ignition cables often contain a fine metal spiral wound around a core.
When the stripping procedure calls for fold-back contact, make sure the conductive spiral is actually positioned beneath the terminal.
If only the insulating core is captured, the wire may have an open circuit.
Position the Spark Plug Terminal Correctly
Spark plug wire terminals typically have two sets of wings or tabs.
The inner portion establishes electrical contact with the conductive core.
The outer wings grip the cable insulation to provide strain relief.
Both need to be positioned correctly before crimping.
Do a Dry Fit First
Place the terminal around the stripped end without crimping it.
Make sure the folded conductor lies under the contact area.
Check that the cable stops at the correct point inside the terminal.
The insulation-gripping wings should sit over intact jacket, not over the bare conductor alone.
Check Terminal Orientation
Before crimping a 90-degree terminal, visualize how it will sit inside the boot.
If you rotate the terminal incorrectly, the wire may leave the boot in an awkward direction after assembly.
On straight terminals, orientation is less critical but still worth checking.
How to Use a Spark Plug Wire Crimping Tool
Place the terminal in the crimper die recommended for that terminal size.
The open wings normally face the forming portion of the die so the tool rolls them inward around the cable.
Position the wire and terminal carefully before applying full pressure.
Crimp in One Controlled Motion
Close the crimper gradually.
Watch the terminal as the wings form around the wire.
A proper crimp should be tight and symmetrical.
You do not want one wing folded neatly while the other sticks out.
With a ratcheting tool, allow the mechanism to complete its cycle rather than stopping halfway.
Do Not Overcrimp
More pressure is not automatically better.
If you crush the cable so hard that the insulation splits or the terminal cuts into the conductor, reliability can suffer.
The terminal should grip firmly without destroying the internal structure of the wire.
Do Not Undercrimp
An undercrimped terminal may slide off when you pull the boot from the plug.
If you can rotate the terminal freely around the wire or move it lengthwise with little effort, the mechanical crimp is inadequate.
Crimping Straight Spark Plug Wire Terminals
Straight terminals are among the easiest styles to assemble.
After stripping and folding the conductor as required, place the terminal straight over the wire.
Make sure the terminal’s contact area captures the conductor and its larger wings surround the insulation.
Crimp the terminal evenly.
Then slide the boot over the crimped connection until the terminal sits in its correct final position.
Verify the Terminal Depth
The metal contact should be located where it can fully engage the spark plug or distributor terminal.
If the terminal is too deep inside the boot, it may not reach the mating connection.
If it sits too far out, the boot may not seal properly.
Use another factory-assembled wire as a reference if necessary.
How to Crimp 90-Degree Spark Plug Wire Terminals
A 90-degree boot is common on spark plug ends because it helps route the cable away from exhaust components.
The crimping process is similar to a straight terminal, but orientation matters more.
Before crimping, determine where you want the cable to exit the boot once installed.
Align the terminal appropriately.
After crimping, the terminal often needs to be pulled or pushed carefully into the boot’s internal bend.
Do Not Pull on the Conductor
When positioning the terminal inside the boot, grip the cable jacket rather than yanking on the exposed conductor or terminal.
If the terminal separates from the cable during boot installation, the crimp was not secure enough.
How to Crimp HEI Spark Plug Wires
HEI-style distributor terminals are commonly found on performance ignition systems and many older GM applications.
The distributor end often uses a male or female-style terminal depending on the cap design.
Make sure your wire kit includes the terminal type that matches your distributor.
The preparation remains similar: boot first, strip the jacket, fold the conductor when required, align the terminal, and crimp with the correct die.
Confirm Positive Engagement
HEI boots can sometimes hide whether the terminal is fully seated on the distributor tower.
After assembly and installation, push each boot firmly into place.
A loose distributor-terminal connection can cause intermittent ignition problems that resemble a bad spark plug.
Key Takeaways:
- Straight and 90-degree terminals use the same basic crimping principles, but orientation differs.
- HEI and other distributor terminals must match the cap design.
- A finished terminal should not rotate or pull off easily.
How Tight Should the Crimp Be?
A proper crimp should survive a moderate pull test.
Hold the cable by the insulation and pull firmly on the terminal.
You are not trying to destroy the wire, but the terminal should remain securely attached.
If it slides off easily, redo the connection.
Check the Terminal Shape
The crimped wings should wrap neatly around the cable rather than overlapping awkwardly or cutting through the jacket.
The conductor should remain trapped securely beneath the intended contact section.
If the crimp looks severely distorted, cut the terminal off and start again with a new one.
Terminals are cheap compared with diagnosing an intermittent ignition miss later.
How to Install the Boot After Crimping
Once the terminal is secure, move the boot over the connection.
A small amount of dielectric grease can make this easier.
Push or pull the boot carefully until the metal terminal sits in the correct internal position.
Some boots allow you to feel the terminal snap into a retaining feature.
Others simply rely on friction.
Check From the Terminal End
Look into the boot if possible.
The metal contact should be centered and accessible.
It should not be folded sideways or buried deep inside the rubber.
If it appears out of position, correct it before installing the wire on the engine.
How to Test a Crimped Spark Plug Wire
A visual inspection is useful, but electrical testing gives you additional confidence.
A digital multimeter set to resistance can be used on many suppression and spiral-core wires.
Place one meter probe on each terminal and note the reading.
Resistance Depends on the Wire Design
Do not use one generic resistance value for every spark plug wire.
Carbon-core wires usually have substantially more resistance than spiral-wound performance cables.
Some racing solid-core wires have extremely low resistance.
Compare your reading with the wire manufacturer’s specification or with other wires from the same set after accounting for differences in length.
Watch for an Open Circuit
If the meter shows an open circuit or a dramatically higher resistance than similar wires, the conductor may not be making contact with one terminal.
Reinspect the crimp.
A wire that passes a mechanical pull test but has no electrical continuity is still unusable.
Can You Crimp Spark Plug Wires Without a Special Tool?
You can sometimes assemble certain emergency or basic terminals with pliers or a simple crimping fixture included in the wire kit, but I do not recommend ordinary pliers for a permanent custom wire set.
Spark plug terminals need a controlled, symmetrical crimp.
Pliers tend to flatten the terminal rather than roll the wings uniformly around the wire.
That can produce a connection that looks tight but fails under vibration.
A dedicated tool is relatively inexpensive and gives much more repeatable results.
Can You Reuse Spark Plug Wire Terminals?
I generally recommend using a new terminal if a crimp must be redone.
Once the terminal wings have been compressed, opening and recrimping them can weaken the metal and make the final shape less reliable.
If the first crimp fails, cut the terminal off, trim the wire minimally, and use a replacement terminal.
For this reason, it is useful to buy a wire set that includes one or two extra terminals or obtain spares before beginning.
How to Crimp Spark Plug Wires With Carbon-Core Cable
Carbon-core suppression wire requires gentle handling because its conductor is not a conventional copper strand.
Do not pull hard on the exposed core.
Do not cut deeply while stripping.
Follow the terminal manufacturer’s folding method carefully.
The terminal needs to make broad, consistent contact with the conductor.
A poor crimp can create unusually high resistance or an intermittent open circuit.
Avoid Repeated Bending
The exposed core can deteriorate if folded back and forth repeatedly.
Position it once and crimp the terminal.
If the setup is wrong, cut back to undamaged cable and start over.
How to Crimp Spiral-Core Performance Wires
Spiral-core wires are common in aftermarket performance ignition systems because they can combine relatively low resistance with electromagnetic interference suppression.
The conductive spiral needs to make secure electrical contact with the terminal.
During stripping, make sure the winding remains intact.
When the kit calls for fold-back construction, fold the conductor over the jacket without unwinding excessive material.
Then crimp firmly enough to capture the conductor and insulation.
Don’t Assume Lower Resistance Is Always Better
The ignition system and electronic equipment may depend on suppression characteristics.
Use wire designed for your ignition system rather than replacing suppression cable with solid-core racing wire simply because solid core has lower resistance.
Should You Solder Spark Plug Wire Terminals?
Usually not unless the ignition-wire manufacturer specifically instructs you to.
A correctly designed crimp provides both electrical contact and mechanical strain relief.
Adding solder can make part of the conductor rigid, potentially concentrating vibration stress where the soldered section ends.
Solder can also complicate boot installation and future repairs.
For a wire kit designed to be crimped, I recommend making the crimp correctly rather than adding solder as insurance.
Common Spark Plug Wire Crimping Mistakes
The most common mistake is cutting the wire too short.
Once the terminal is installed, an overly tight wire pulls constantly against the connection.
Another frequent mistake is forgetting to slide the boot onto the cable before crimping the terminal.
That often means cutting off a perfectly good crimp just to install the boot.
Cutting Through the Core
If you strip the jacket too aggressively, you can sever the conductive core.
This can create a completely open circuit or an intermittent connection.
Not Folding the Conductor Back
On terminals designed for a folded-back conductor, leaving the core buried inside the insulation prevents proper terminal contact.
The wire may look professionally crimped yet fail electrically.
Wrong Terminal Position
If the terminal is positioned too far forward or backward before crimping, it may not sit correctly inside the boot.
That can prevent full engagement with the plug or distributor terminal.
Using the Wrong Crimper Die
A die that is too large leaves a loose crimp.
A die that is too small may crush or cut the terminal and wire.
Match the die to the terminal size.
Pulling the Wire Instead of the Boot
Once the finished wires are installed, remove them by gripping the boot rather than pulling on the cable.
Repeatedly yanking the wire can eventually separate even a good terminal crimp.
Key Takeaways:
- Most failed homemade plug wires come from poor stripping, poor conductor contact, or incorrect terminal placement.
- Never pull a finished wire by the cable when removing it from a spark plug.
- Test both mechanical strength and electrical continuity before installation.
How to Route Newly Crimped Spark Plug Wires
Correct routing protects the work you just completed.
Keep wires away from exhaust headers, manifolds, and sharp brackets.
Use spark plug wire separators or looms where appropriate.
Avoid allowing wires to rub continuously against engine components.
Avoid Tight Parallel Runs When Possible
On some ignition systems, long parallel runs between neighboring plug wires can contribute to inductive crossfire.
Following the factory wire-routing pattern or the ignition manufacturer’s recommendations is the safest approach.
Separators also keep the wires from touching very hot surfaces.
Label the Wires
When building a complete custom set, label each wire by cylinder number.
This reduces the chance of mixing up the firing order during installation.
A perfectly crimped wire connected to the wrong cylinder will still make the engine run poorly or not start.
What Happens If a Spark Plug Wire Is Crimped Incorrectly?
The symptoms can range from no start to an occasional high-load misfire.
A poor connection adds resistance or intermittently breaks the ignition circuit.
The engine may idle normally but stumble during acceleration.
You may also experience rough idle, hard starting, reduced power, or a check-engine light on vehicles capable of detecting misfire.
Arcing Can Develop
If a boot does not seat correctly because the terminal is poorly positioned, ignition voltage may arc to ground instead of reaching the spark plug.
At night or in a dark garage, severe external arcing may sometimes be visible around damaged wires or boots, although you should not handle high-voltage ignition components while the engine is running.
Heat Can Worsen the Problem
A marginal connection may behave normally when cold and become intermittent after engine heat changes the dimensions of the boot and terminal.
This is why a reliable mechanical crimp is essential.
Should You Replace or Repair a Damaged Spark Plug Wire?
If the wire is part of a cut-to-fit aftermarket set and the damage is near one end, recrimping with a fresh terminal may be practical.
If the insulation is burned, cracked, or damaged in the middle of the cable, replacing the wire is usually better.
Factory-molded ignition wires are generally intended to be replaced rather than cut apart and repaired.
A patched high-voltage ignition cable may create future leakage or reliability issues.
How Long Do Properly Crimped Spark Plug Wires Last?
There is no universal mileage figure because wire life depends on material quality, heat exposure, ignition voltage, routing, contamination, and engine design.
A properly crimped high-quality wire can last for years.
Heat is one of its biggest enemies.
Wires routed close to exhaust headers without suitable protection can deteriorate far faster than the same wire in a cooler location.
Periodic visual inspection is more useful than assuming a fixed lifespan.
Look for cracks, burn marks, stiff insulation, loose boots, corrosion, and arcing evidence.
Safety When Crimping and Installing Spark Plug Wires
Work with the engine switched off.
Modern ignition systems can produce tens of thousands of volts, so do not handle open spark plug terminals or ignition outputs while the system is operating.
Allow the engine to cool before routing wires near exhaust manifolds or headers.
Disconnect the battery when the vehicle’s service procedure calls for it, particularly if you will be working around exposed ignition wiring or other electrical components.
Keep the wires clear of belts, pulleys, fans, and other moving parts.
After installation, verify the firing order before starting the engine.
FAQs about how to crimp spark plug wires
How do you crimp spark plug wires?
Cut the cable to length, slide the boot on, strip the required amount of jacket, position or fold the conductor as specified, place the terminal over the wire, and crimp it using a proper spark plug wire crimping tool.
How much insulation should I strip?
It depends on the terminal and wire kit.
Many universal kits require roughly a half inch or slightly more, but follow the exact instructions supplied with your terminals.
Do you fold the spark plug wire core back?
Many aftermarket terminals require the exposed conductor to be folded back over the outer jacket before crimping.
Some designs differ, so follow your wire manufacturer’s instructions.
Can you crimp spark plug wires with regular pliers?
It is possible to deform a terminal with pliers, but I do not recommend it for a reliable permanent connection.
Use a dedicated ignition-wire crimper.
Do I put the boot on before crimping?
Yes, in most kits.
Slide the boot onto the cable before attaching the terminal because the boot may not fit over the finished terminal afterward.
Can I use dielectric grease when assembling spark plug wires?
Yes.
A small amount inside the boot can help it slide over the cable and terminal and improve moisture sealing.
Should I solder spark plug wire terminals?
Usually not.
If the wire kit is designed for crimped terminals, a correct crimp is normally all that is required.
How do I know if the crimp is tight enough?
The terminal should survive a firm pull test without sliding or rotating freely on the wire.
It should also show good electrical continuity.
Can a bad crimp cause a misfire?
Yes.
Poor conductor contact or a loose terminal can interrupt ignition voltage and cause intermittent or constant misfire.
Can a bad spark plug wire cause a misfire only under load?
Yes.
A marginal connection may work at idle but fail when ignition voltage demand increases during acceleration.
What type of crimper should I use?
Use a crimper specifically designed for spark plug wire terminals and the terminal size included with your kit.
A ratcheting professional-style crimper usually provides the most consistent result.
Can I reuse a crimped spark plug terminal?
I recommend replacing it.
Once the terminal wings have been formed, reopening and recrimping them may weaken the connection.
Can I shorten existing spark plug wires?
If they are cut-to-fit aftermarket wires with serviceable terminals, yes.
Factory-molded wires are generally better replaced rather than modified.
What is the difference between straight and 90-degree terminals?
The electrical principle is the same.
The difference is the direction in which the wire exits the boot and how the terminal must be oriented before crimping.
How do I crimp HEI spark plug wires?
Use the correct HEI terminal and boot, strip and position the conductor according to the kit instructions, then crimp with the appropriate die and verify that the terminal fully engages the distributor cap.
Can I use a multimeter to test spark plug wires?
Yes.
Measure resistance from terminal to terminal and compare it with the wire manufacturer’s specification or similar wires from the same set.
Why does my new wire show infinite resistance?
The conductor may have been cut during stripping or may not be contacting one of the terminals.
Inspect both crimps.
Should spark plug wires have zero resistance?
Not necessarily.
Many suppression wires are intentionally resistive.
The correct resistance depends on the wire design.
Can I repair a terminal that pulls off?
Yes, if the wire itself remains in good condition and the design is serviceable.
Trim the damaged end, use a new terminal, and recrimp it correctly.
How do I keep spark plug wires from touching headers?
Route them with wire separators, looms, and suitable heat protection while maintaining adequate clearance from hot exhaust components.
How can I tell if my crimped spark plug wire is working?
Check terminal security, continuity or resistance, proper boot seating, and engine operation after installation.
Conclusion
If you are learning how to crimp spark plug wires, the key is creating both a secure electrical connection and a strong mechanical attachment.
Measure and route the cable before cutting it. Leave enough slack for engine movement, but keep the wire away from exhaust components and moving parts. Slide the boot onto the cable before installing the terminal.
Strip only the amount of insulation required by your wire kit and be careful not to damage the conductive core. If the terminal design calls for it, fold the exposed conductor back over the outer jacket so it will be trapped securely beneath the terminal.
Then use a dedicated spark plug wire crimping tool to form the terminal evenly around the cable.
Do not rely on ordinary pliers, and do not assume crushing the terminal harder will improve the connection. The finished crimp should grip the wire firmly without cutting through the insulation or conductor.
After crimping, perform a moderate pull test and inspect the terminal position. If possible, use a multimeter to verify electrical continuity or resistance according to the wire manufacturer’s specifications.
For straight, 90-degree, HEI, and most other aftermarket ignition terminals, the same principle applies: the conductive core must make solid contact with the terminal while the terminal wings securely grip the insulation for strain relief.
Take your time with the first wire and use it as the standard for the rest of the set. A clean, properly crimped set of spark plug wires can provide reliable ignition for years, while one poor terminal connection can create a frustrating intermittent misfire that is difficult to diagnose.