
If you want to know how to install spark plug wires correctly, the safest method is to replace one wire at a time, match each new wire to the old wire’s length and position, push both boots firmly onto their terminals, and route the wire through the original clips away from exhaust heat and moving parts. Replacing the wires individually greatly reduces the chance of accidentally changing the engine’s firing order.
Spark plug wires carry high-voltage electricity from the distributor or remote ignition coil system to the spark plugs. If one wire is connected to the wrong cylinder, poorly seated, damaged, or routed against a hot exhaust manifold, the engine may misfire, run roughly, hesitate, or fail to start properly.
Installation is straightforward on many engines, but correct routing is just as important as connecting the two ends. Ignition wires should follow the factory path whenever possible because that routing is designed to keep them away from excessive heat, sharp edges, accessory belts, and other ignition wires that could contribute to electrical interference or crossfire.
It is also important to know whether your engine actually has replaceable spark plug wires. Many modern vehicles use coil-on-plug ignition, where an individual ignition coil sits directly over each spark plug. Those engines normally have coil boots rather than traditional high-voltage spark plug wires.
In this guide, I’ll explain how to install spark plug wires step by step, how to identify the correct firing order, how to match wire lengths, where dielectric grease goes, how to route wires safely, and what to check if the engine runs badly after installation.
What Are Spark Plug Wires?
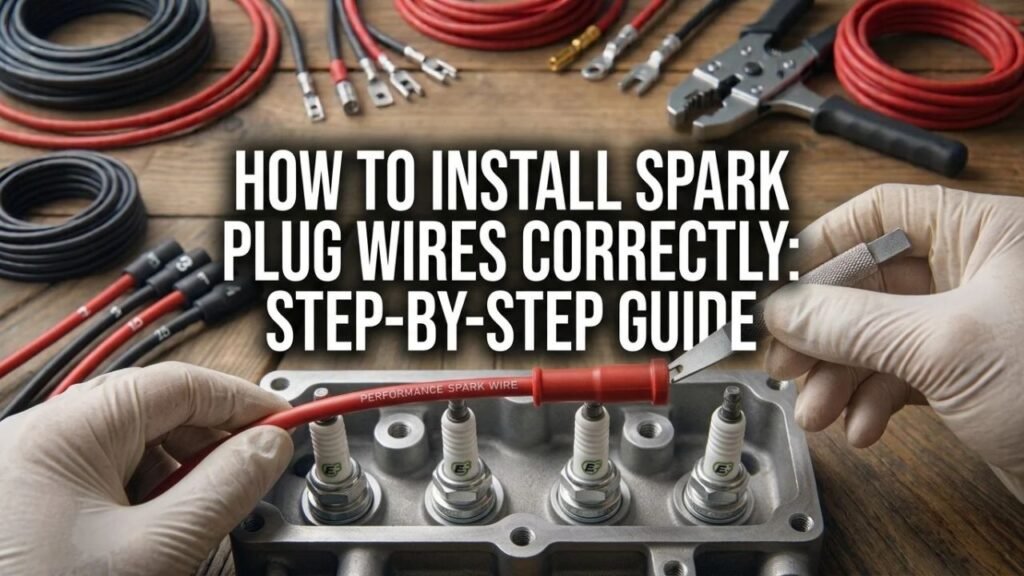
Spark plug wires, also called ignition wires, ignition cables, or high-tension leads, transfer the high voltage produced by the ignition system to the spark plugs.
Depending on the engine, the wire may connect each spark plug to:
- A distributor cap
- A remote ignition coil
- A coil pack
Modern coil-on-plug engines eliminate the long high-voltage wire by positioning an ignition coil directly above the spark plug.
If your engine has individual coils sitting on the plugs, a traditional spark plug wire replacement procedure does not apply.
What Is Inside a Spark Plug Wire?
A spark plug wire is more complicated than an ordinary electrical wire.
Inside the insulation is a conductive core designed to carry high-voltage ignition energy while controlling electromagnetic interference.
Modern automotive ignition wires commonly use suppression-type conductive cores rather than simple solid metal conductors.
The outer insulation protects the electrical path from heat, moisture, oil, and contact with grounded engine components.
Each end normally has a metal terminal covered by an insulating rubber or silicone boot.
One terminal attaches to the spark plug.
The other connects to the distributor cap, coil pack, or ignition coil, depending on the system.
Before Installing New Spark Plug Wires
Correct preparation prevents most installation mistakes.
Make sure the engine is switched off and completely cool before working around spark plugs, exhaust manifolds, and cylinder heads.
Keep the ignition key away from the vehicle or make sure the ignition cannot accidentally be turned on while your hands are around the ignition system.
Do not remove spark plug wires while the engine is running. Ignition systems produce very high voltage, and deliberately touching or disconnecting secondary ignition components while operating can expose you to electrical shock.
Make Sure You Bought the Correct Wire Set
Spark plug wire sets are usually vehicle- or engine-specific.
Confirm the:
Year, make, model, engine size, ignition system, and any relevant engine code.
A correct set should provide suitable wire lengths, terminals, resistance characteristics, and boot angles.
A wire that is too short may be pulled tightly against hot components.
A wire that is excessively long may sag onto exhaust parts or moving accessories.
Inspect the New Wires Before Installation
Take the new wires out of the package and inspect them.
Look for cracked boots, damaged insulation, bent terminals, or manufacturing damage.
If the wires are numbered or labeled, note those markings before installation.
Some replacement sets identify individual cylinder numbers, while others simply provide different lengths.
Tools and Supplies You May Need
Installing a preassembled spark plug wire set normally requires very few tools.
A spark plug boot puller or boot pliers can be useful when old wires are stuck.
You may also need dielectric grease if the wire manufacturer recommends it.
For complicated engines, masking tape and a marker are useful for labeling old wires before removal.
A flashlight can make it easier to see distributor-cap numbers, coil terminals, and routing clips.
You generally do not need to remove the spark plugs simply to replace the wires.
Key Takeaways:
- Replace spark plug wires only on engines that actually use traditional ignition cables.
- Verify the new wire set matches the exact engine before installation.
- Work with the engine off and cool, and never handle high-voltage ignition connections while the engine is running.
How to Install Spark Plug Wires Step by Step
The best general technique is to replace one wire at a time.
This preserves the original firing order automatically.
1. Study the Existing Wire Routing
Before removing anything, look carefully at how the existing spark plug wires are arranged.
Notice which wire connects each spark plug to the distributor or coil.
Also note where the wires pass through factory clips, brackets, separators, and heat shields.
Taking a few photos with your phone before beginning can be extremely useful.
Pay particular attention to areas near exhaust manifolds or headers.
The replacement wires should normally follow the same safe path.
2. Start With One Spark Plug Wire
Choose one wire and complete its replacement before touching another.
Some installers start with the longest wire because it is easy to identify, while others start with the most accessible cylinder.
Either approach works.
The important part is not removing the complete old set all at once unless you have clearly labeled every connection and verified the firing order.
Removing everything together is one of the easiest ways to create an engine that will not run correctly afterward.
3. Remove the Old Wire From the Spark Plug
Grip the boot, not the cable.
Gently twist the boot to break the seal between the rubber and spark plug ceramic.
Then pull the boot straight away from the plug.
If it is difficult to reach, use spark plug boot pliers or a dedicated boot removal tool.
Do not grab the ignition cable itself and yank.
Pulling the cable can separate the conductor from the metal terminal inside the boot, especially on an old wire.
If the old wire is already being discarded this may seem unimportant, but learning the correct technique also helps avoid damaging wires that may need to be temporarily removed during future maintenance.
4. Disconnect the Other End
Follow that same old wire to its distributor-cap, coil-pack, or ignition-coil terminal.
Grip its boot and remove it using the same gentle twisting technique.
Do not immediately move to another wire.
Keep the old wire in your hand so you can compare it with the replacement.
5. Match the New Wire to the Old Wire
Find the new wire that most closely matches the old wire’s length and boot configuration.
Vehicle-specific wire sets often contain several noticeably different lengths.
The correct wire should reach comfortably without being stretched tight or leaving a large uncontrolled loop.
Compare both ends as well.
Some wire sets use straight spark plug boots on certain cylinders and 90-degree boots on others.
If the wires are labeled by cylinder number, use those labels rather than relying only on length.
Why Correct Length Matters
A spark plug wire should not be stretched tightly between the plug and coil or distributor.
Engine movement can pull on the terminal and eventually loosen the connection.
At the opposite extreme, excessive slack may allow a wire to touch an exhaust manifold, pulley, belt, or sharp metal edge.
Use the replacement wire intended for that location.
6. Apply Dielectric Grease if Recommended
A small amount of dielectric grease may be applied inside the spark plug boot when recommended by the wire or vehicle manufacturer.
The grease helps reduce moisture intrusion and prevents the rubber boot from bonding to the spark plug’s ceramic insulator.
Use only a small amount around the inside sealing area.
Dielectric Grease Is Not Conductive
Dielectric grease is an electrical insulator.
You do not need to fill the metal terminal with a large amount of grease to improve conductivity.
The terminal conducts electricity because it makes physical metal-to-metal contact with the spark plug terminal.
A thin coating around the boot opening or ceramic-contact area is normally sufficient when grease is recommended.
Do not put dielectric grease on spark plug threads.
7. Push the New Boot Onto the Spark Plug
Align the spark plug terminal and push the boot firmly into place.
Many wire terminals provide a noticeable click or snap when fully engaged.
Others simply develop a positive seated feel.
Do not assume the connection is complete merely because the boot covers the plug.
A boot can appear installed while the metal terminal inside has not actually engaged the spark plug terminal.
After installation, give the boot a gentle check to make sure it is secure.
Do not pull strongly on the wire itself.
8. Connect the Other End to the Correct Terminal
Route the wire toward the distributor or ignition coil using the original path.
Push the second boot firmly onto its correct terminal.
Again, look or feel for positive engagement.
On distributor ignition systems, connecting this end to the wrong cap tower changes the firing order and can cause severe misfiring or a no-start condition.
If you are replacing only one wire at a time, the correct terminal should be obvious because it is the one you just disconnected.
9. Route the Wire Through the Original Clips
Reinstall the wire into the factory separators, clips, and retainers.
These pieces are not merely for appearance.
They keep the ignition wires separated and positioned safely away from damaging components.
Make sure the new wire does not rest against:
Exhaust manifolds, headers, sharp metal edges, accessory belts, pulleys, cooling fans, throttle linkages, or other moving components.
Hot exhaust parts can quickly damage spark plug wire insulation.
Once the insulation is compromised, ignition voltage may arc to the engine instead of reaching the spark plug.
10. Repeat the Process for Each Cylinder
Once the first wire is completely installed and routed, move to the next one.
Follow the same process until the entire set is replaced.
By doing one wire at a time, you preserve the correct firing order without needing to memorize every distributor position.
If your wire set includes a separate coil wire for a distributor ignition system, replace that wire after completing the plug wires, following the wire manufacturer’s instructions.
11. Perform a Final Inspection
Before starting the engine, inspect every connection.
Check that all boots are fully seated and every wire is secure in its routing clips.
Look for wires touching hot or moving parts.
Make sure nothing was accidentally disconnected while you worked.
Then start the engine and listen to its idle.
A correctly installed set should allow the engine to run normally.
If the engine immediately runs rough, misfires, backfires, or will not start, shut it off and recheck the firing order and terminal connections.
Key Takeaways:
- Replacing one wire at a time is the easiest way to preserve the firing order.
- Always pull an old wire by its boot rather than by the cable.
- Seat both ends securely and restore the factory routing clips before moving to the next wire.
How to Install Spark Plug Wires if All the Old Wires Are Already Removed
If someone has already removed every wire, you can no longer use the simple one-at-a-time method.
You must identify:
The cylinder numbering system, the engine firing order, the distributor rotation direction if applicable, and the correct number-one distributor-cap position.
Do not guess.
Different engines use different cylinder numbering and firing orders.
Two V8 engines can physically look similar while using completely different wire arrangements.
Find the Engine’s Correct Firing Order
Use reliable service information for the exact engine.
The firing order may also be printed on an under-hood emissions label, intake manifold, engine decal, or service manual.
A firing order such as:
1-8-4-3-6-5-7-2
is commonly associated with certain Chevrolet V8 applications, but you should never assume that sequence applies to an unrelated V8.
Identify Cylinder Numbers
Cylinder numbering differs among manufacturers.
One engine may number cylinders sequentially along each bank.
Another may use odd cylinders on one side and even cylinders on the other.
Knowing the firing order without knowing cylinder numbering is not enough.
Find the Number-One Distributor Terminal
On some engines, the distributor cap may identify number one.
On others, the distributor position may have changed because the distributor was previously removed or installed differently.
If the distributor position is unknown, locating the number-one terminal can require positioning cylinder number one at top dead center on its compression stroke and identifying where the distributor rotor points.
This is more advanced than ordinary wire replacement.
If you are not comfortable confirming compression TDC and rotor position, use vehicle-specific repair information or professional help instead of guessing.
What Is the Correct Spark Plug Wire Firing Order?
There is no universal firing order.
The firing order is determined by engine design and crankshaft/camshaft configuration.
It specifies the sequence in which cylinders produce their power strokes.
On a distributor engine, the plug wires must connect the distributor towers to the corresponding cylinders in that exact sequence.
If two wires are swapped, each affected cylinder receives its ignition spark at the wrong time.
Possible symptoms include:
Severe rough running, backfiring, no start, poor acceleration, and Check Engine warnings on electronically monitored engines.
The easiest way to avoid this problem is still to replace only one wire at a time.
How Should Spark Plug Wires Be Routed?
Correct routing does more than make the engine compartment look organized.
Spark plug wires carry extremely high voltage and operate next to very hot engine components.
They need separation, support, and protection.
Keep Wires Away From Exhaust Heat
Exhaust manifolds and headers can become hot enough to burn or melt ignition-wire insulation.
Maintain the factory clearance wherever possible.
If the vehicle originally uses heat shields or protective sleeves, reinstall them.
High-performance engines with aftermarket headers may require additional heat-resistant boots or sleeves.
Avoid Moving Parts
Never allow a wire to hang close to a serpentine belt, pulley, cooling fan, or throttle mechanism.
A rotating belt can cut through a wire quickly.
Use all available retainers to keep the wires stationary.
Avoid Sharp Edges
Repeated engine vibration can make a wire rub against brackets or sheet-metal edges.
Eventually, the insulation may wear through.
Route the wire so it has adequate clearance.
Don’t Bundle Certain Wires Tightly Together
Ignition-wire routing can affect electrical behavior.
When high voltage travels through a spark plug wire, it creates an electromagnetic field.
Two wires routed closely and parallel for a long distance can sometimes experience inductive crossfire, where voltage from one wire contributes to an unwanted spark in another cylinder.
This is especially important when two physically adjacent cylinders also fire consecutively in the engine’s firing order.
Following factory separators and routing normally prevents this issue.
Should Spark Plug Wires Touch Each Other?
They can cross briefly when necessary, but I would not tightly bundle several wires together over long distances unless the factory routing is designed that way.
Wire separators help maintain spacing and reduce rubbing.
When wires do cross, crossing at an angle is generally preferable to running them tightly parallel for a long distance.
High-quality modern suppression wires are designed to reduce electromagnetic interference, but good physical routing remains important.
Can Spark Plug Wires Touch the Engine?
Contact with relatively cool engine surfaces is not always immediately harmful, but you should avoid unnecessary rubbing or direct contact with very hot metal.
A wire repeatedly rubbing against a valve-cover edge can eventually wear through its outer jacket.
A wire resting against an exhaust manifold can fail much faster.
Use the original clips and brackets wherever possible.
How Tight Should Spark Plug Wires Be?
The boots need to be fully seated, but the cables themselves should not be under tension.
You should have enough slack to accommodate normal engine movement without allowing the wire to sag into hazards.
Never solve a routing problem by pulling a short wire tight.
That may place constant stress on the boot terminal and eventually loosen the electrical connection.
If a wire cannot follow the original path without stretching, verify that you are using the correct wire for that cylinder.
Where Does Dielectric Grease Go on Spark Plug Wires?
When recommended, place a small amount inside the rubber boot where it seals around the spark plug’s ceramic insulator.
You can also use it at appropriate boot-sealing areas on the coil or distributor side if specified.
Do not intentionally coat the external metal conductor with a thick layer.
The metal terminal must make secure contact with its mating terminal.
A little dielectric grease can be displaced as the connection seats, but filling the entire boot provides no electrical advantage.
Don’t Use Anti-Seize as Boot Grease
Anti-seize and dielectric grease serve completely different purposes.
Anti-seize is intended for certain threaded connections when specified.
Dielectric grease is an insulating silicone compound used around electrical seals and boots.
Do not substitute one for the other.
What If a Spark Plug Boot Will Not Click Into Place?
First make sure the wire is matched to the correct plug and the boot is aligned straight.
Sometimes the terminal inside the boot is slightly recessed, making the connection feel less obvious.
Press steadily rather than hammering or striking the boot.
If it still will not seat, remove it and inspect inside.
The terminal may be bent or damaged.
Also inspect the spark plug terminal itself.
Some spark plug designs use removable terminal nuts, and certain ignition-wire terminals require the terminal nut to be installed while others are designed for a threaded stud.
Make sure the spark plug configuration matches the wire set.
How Do You Know the New Spark Plug Wires Are Fully Seated?
A correctly seated wire normally feels secure and will not easily lift away from the plug.
Many terminals produce a click.
At the distributor or coil, the boot should sit fully over the terminal rather than hovering above it.
After installation, start the engine.
A loose wire commonly causes an immediate misfire.
If you hear a snapping sound, see visible arcing, or notice severe roughness, turn the engine off and inspect the installation.
Do not place your hands near suspected ignition leakage while the engine is running.
How to Install Universal Cut-to-Fit Spark Plug Wires
Universal wire sets require more work than direct-fit sets.
One end may arrive with the spark plug boot already installed while the distributor or coil end must be cut and terminated.
Route each wire before cutting it.
Leave enough length for a smooth path with some movement allowance, but avoid unnecessary loops.
Then cut the wire according to the kit instructions.
Most universal kits require you to strip a precise amount of outer insulation without damaging the conductive core.
The core is then folded or positioned according to the terminal design, and the terminal is crimped with the specified tool.
Finally, the boot is installed over the terminal.
Correct Crimping Is Critical
A poorly crimped universal wire can look perfect from the outside while having an unreliable electrical connection inside.
Use the crimping tool and dimensions specified by the wire manufacturer.
Do not crush the terminal randomly with ordinary pliers unless the manufacturer specifically permits that method.
For most DIY owners, a vehicle-specific preassembled wire set is easier and less error-prone.
Key Takeaways:
- Factory routing protects wires from heat, abrasion, moving parts, and electrical crossfire.
- Dielectric grease belongs around the boot sealing area when recommended—not on spark plug threads.
- Universal wire sets require accurate cutting, stripping, and terminal crimping; direct-fit sets are easier for most DIY installations.
Should You Replace Spark Plugs at the Same Time as the Wires?
Not necessarily, but servicing them together can make sense if both are due.
Replacing spark plug wires does not require new plugs if the existing plugs are still within their service interval and operating correctly.
However, old wires and old plugs often age together.
An excessively worn spark plug gap requires higher ignition voltage.
That increased voltage demand can put additional stress on aging wires and boots.
If you are replacing old ignition wires because of misfires, inspect the plugs as well.
Conversely, when installing new spark plugs on an engine with traditional wires, inspect the wires for cracks, burned areas, hardened boots, corrosion, and carbon tracking.
How Often Should Spark Plug Wires Be Replaced?
There is no universal mileage interval that applies to every wire set.
Wire life depends on:
Engine heat, wire construction, routing, climate, oil contamination, exhaust proximity, and vehicle maintenance.
Some wires last for many years.
Others deteriorate earlier because they run close to exhaust manifolds or have been contaminated by oil.
Instead of replacing them based solely on mileage, inspect them whenever you service the plugs or ignition system.
Replace wires that show cracking, burned insulation, damaged boots, corrosion, carbon tracking, internal-terminal damage, or confirmed excessive electrical resistance.
Follow the vehicle manufacturer’s maintenance recommendations when a specific replacement interval is provided.
Symptoms of Incorrectly Installed Spark Plug Wires
If the engine ran correctly before the wire replacement but runs poorly immediately afterward, suspect the installation before assuming another component suddenly failed.
A wrong firing order can produce severe roughness or prevent starting.
A boot that is not fully seated can cause a single-cylinder misfire.
A wire resting against an exhaust manifold may not fail immediately, but it can develop heat damage after driving.
An improperly crimped universal wire can create intermittent ignition loss.
A scan tool may show cylinder-specific misfire codes when one or more connections are wrong.
Why Does My Engine Run Rough After Changing Spark Plug Wires?
Start by checking the simplest possibilities.
Make sure every boot is fully seated.
Then compare the wire connections with the correct firing-order diagram.
Do not rely solely on how the wires look. One incorrectly crossed pair can make the engine run very badly.
Inspect the wires for any terminal that may have pulled out of its boot during installation.
If you installed universal wires, recheck the crimps.
Also confirm that no vacuum hose, electrical connector, or sensor was accidentally disconnected while reaching around the engine.
If the wires are correctly installed but the misfire remains, diagnosis may need to include spark plugs, ignition coils, distributor components, injectors, compression, or other engine systems.
Can You Install Spark Plug Wires Backward?
With many conventional wire sets, the cable itself does not have an electrical “direction” from one end to the other.
However, the boots and terminals may be designed for specific ends.
A spark plug end may use a 90-degree boot while the distributor end uses a straight socket-style terminal.
Therefore, you should install the wire according to its intended terminal configuration rather than assuming the ends are interchangeable.
Certain specialty wires may also have manufacturer-specific installation requirements.
Follow the instructions supplied with the set.
Do Spark Plug Wires Need to Be in a Specific Order?
Yes.
Each wire must connect the correct ignition output to the correct cylinder.
On a distributor engine, this means maintaining the firing order around the distributor cap.
On remote coil-pack systems, each coil tower must connect to its assigned cylinder or cylinder pair.
The wires do not necessarily need to be physically arranged from shortest to longest.
Length is simply determined by how far each cylinder is from its ignition source.
The electrical connection order is what matters.
Can You Replace Only One Spark Plug Wire?
Yes, if an individual wire is damaged and an exact compatible replacement is available.
However, if the entire set is old, replacing all of them at once may be more practical.
Wires exposed to the same age, temperature cycles, and environment often deteriorate at similar rates.
Replacing one cracked wire in a 15-year-old set may simply lead to another failure later.
For relatively new wires damaged by accidental contact with an exhaust manifold or another isolated event, individual replacement can make more sense.
Common Spark Plug Wire Installation Mistakes
The biggest mistake is removing all the old wires before recording where they go.
Replacing one wire at a time almost completely eliminates that risk.
Another mistake is pulling the cable instead of the boot during removal. This can separate the internal conductor from its terminal.
Poor routing is equally common. New wires should not hang over exhaust manifolds simply because that route is shorter.
Using the wrong wire length can produce either excessive tension or dangerous slack.
Excessive dielectric grease is unnecessary, and putting it on the spark plug threads is incorrect.
Finally, do not assume a boot is connected just because it looks seated. Push until the terminal positively engages the spark plug, distributor, or coil terminal.
FAQs About How to Install Spark Plug Wires
How do you install spark plug wires correctly?
Replace one wire at a time, match the new wire to the old one’s length and position, firmly seat both boots, and follow the original routing through the factory retainers.
Should I replace spark plug wires one at a time?
Yes. This is the easiest way to avoid mixing up the firing order.
What happens if spark plug wires are installed in the wrong order?
The spark will reach cylinders at the wrong time, potentially causing severe misfires, backfiring, poor running, or a no-start condition.
How do I know which spark plug wire goes where?
Use the existing wire as a guide when replacing one at a time. If all wires are removed, consult the exact engine’s cylinder numbering and firing-order diagram.
Should spark plug wires click onto the plugs?
Many terminals produce a noticeable click or snap when properly seated. In all cases, the connection should feel firm and secure.
Do I pull spark plug wires by the wire or boot?
Always grip the boot. Pulling directly on the cable can damage the internal connection.
Should I twist a spark plug boot before removing it?
A gentle twist can help break the seal between the boot and spark plug ceramic, making removal easier.
Should I use dielectric grease on spark plug wires?
A small amount inside the boot sealing area can be used when recommended. It helps exclude moisture and makes future boot removal easier.
Does dielectric grease improve electrical conductivity?
No. Dielectric grease is nonconductive. The electrical connection comes from direct contact between the metal terminals.
Can spark plug wires touch each other?
They may cross, but long parallel runs should generally be avoided when possible. Use the factory separators and routing clips.
Can spark plug wires touch the exhaust manifold?
No. Exhaust heat can burn or melt the insulation and cause ignition failure.
Can a spark plug wire touch the valve cover?
Occasional contact with a relatively cool surface may not immediately cause trouble, but avoid unnecessary rubbing and use the original wire retainers.
How tight should a spark plug wire be?
The boot should be securely connected, but the wire itself should not be stretched tight. Leave enough slack for normal engine movement.
Can bad spark plug wire routing cause a misfire?
Yes. Heat damage, abrasion, and electrical crossfire between poorly routed wires can all contribute to ignition problems.
How do I know the firing order?
Check service information, the owner’s or repair manual, an under-hood label, or reliable information for the exact engine.
Can I install new wires with all the old ones removed?
Yes, but you must correctly identify cylinder numbers, firing order, coil/distributor terminals, and potentially number-one distributor position.
Do coil-on-plug engines have spark plug wires?
Usually not. Each ignition coil sits directly over its spark plug and connects through a short boot instead of a traditional high-voltage wire.
Do spark plug wires have a direction?
The conductor itself is often electrically bidirectional, but boot styles and terminals can differ between the spark plug and distributor/coil ends. Install each wire according to its intended configuration.
Can I replace only one spark plug wire?
Yes, but if the complete set is old and deteriorated, replacing all the wires is usually more practical.
Why is my car misfiring after installing new spark plug wires?
The most likely installation-related causes are crossed wires, an incorrect firing order, loose boots, poor universal-wire crimps, or a terminal that is not fully engaged.
Conclusion
Learning how to install spark plug wires correctly is mostly about preserving the firing order, making secure terminal connections, and routing the wires exactly where the ignition system expects them to be.
For most DIY replacements, the best technique is simple: change only one wire at a time. Remove the old wire by gripping and twisting the boot, compare its length with the replacement, install the new wire onto the same spark plug and distributor or coil terminal, and then place it back into the factory routing clips.
A small amount of dielectric grease inside the boot may be useful when recommended, but remember that dielectric grease is not a conductive paste and does not belong on spark plug threads.
Pay just as much attention to routing as you do to firing order. Keep ignition wires away from hot exhaust manifolds, headers, belts, pulleys, sharp brackets, and unnecessary long parallel runs beside other ignition wires. Factory separators and heat shields are there for a reason.
If all the old wires have already been removed, do not guess where the replacements go. Identify the engine’s cylinder numbering, firing order, distributor or coil terminal arrangement, and number-one distributor position when applicable.
After installation, start the engine and verify that it idles smoothly. If it immediately develops a misfire, backfire, or rough idle, shut it off and check the firing order and every terminal connection before driving.
The practical rule is straightforward: install one spark plug wire at a time, seat both boots firmly, follow the original routing, and verify the engine runs normally when you’re finished. Done correctly, replacing spark plug wires is a manageable maintenance job that can restore reliable ignition without creating new misfire problems.