
To connect spark plug wires to a distributor correctly, identify cylinder No. 1, find the No. 1 terminal on the distributor cap, determine the engine’s firing order and distributor rotation direction, then connect each remaining wire in firing-order sequence around the cap.
Learning how to connect spark plug wires to distributor terminals correctly is essential because every cylinder must receive a spark at exactly the right time. Installing even two wires in the wrong positions can cause a rough-running engine, backfiring, misfires, poor starting, or an engine that will not start at all.
The process is usually straightforward when the original wires are still installed because you can replace them one at a time. It becomes more challenging when all the wires have already been removed, the distributor cap has been replaced, or you do not know which terminal belongs to cylinder No. 1.
The key is not to guess. You need four pieces of information: cylinder numbering, engine firing order, distributor rotation direction, and the correct No. 1 distributor terminal. These specifications vary by engine, so a firing order that works on one V6 or V8 may be completely wrong for another.
This guide explains how to identify each connection, install spark plug wires correctly, avoid common mistakes, and troubleshoot the engine if it runs poorly after the wires have been installed.
How to Connect Spark Plug Wires to Distributor Correctly
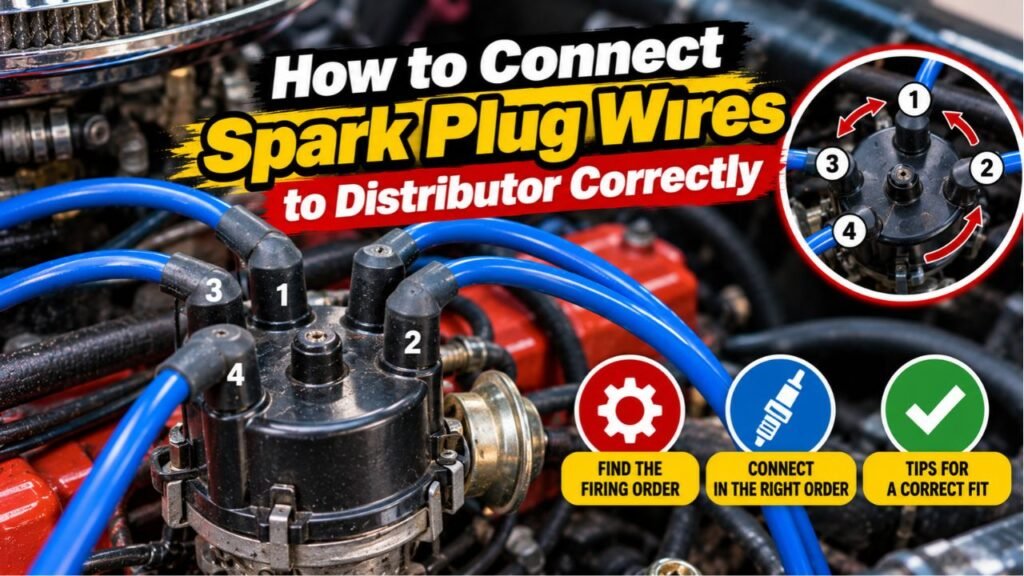
To connect spark plug wires to distributor terminals, first identify cylinder No. 1 and the distributor terminal that fires that cylinder. Then follow the engine’s specified firing order around the distributor cap in the same direction that the distributor rotor rotates.
The general process is:
- Find the engine’s cylinder numbering.
- Find the correct firing order.
- Determine distributor rotor rotation.
- Identify the No. 1 terminal on the distributor cap.
- Connect the No. 1 spark plug wire.
- Follow the firing order around the cap.
- Connect each remaining wire to its corresponding cylinder.
- Route the wires neatly and keep them away from hot or moving parts.
- Start the engine and verify smooth operation.
Never assume the distributor terminals simply correspond to cylinder numbers in numerical order.
The wires must follow the firing order, not necessarily 1-2-3-4 or another simple numerical sequence.
What Is a Distributor?
A distributor is part of the ignition system found on many older gasoline engines.
Its job is to distribute high-voltage electricity from the ignition coil to the correct spark plug at the correct time.
Inside the distributor, a rotating component called the rotor passes beneath electrical contacts inside the distributor cap.
Each contact connects to a spark plug wire.
As the rotor turns, it directs ignition voltage to:
- Cylinder No. 1
- Then the next cylinder in the firing order
- Then the next
- And so on
This process repeats continuously while the engine is running.
Modern vehicles usually use distributorless ignition systems or individual coil-on-plug ignition coils, but distributors remain common on many older cars, trucks, classic vehicles, marine engines, and some industrial engines.
Why Spark Plug Wire Order Matters
Each cylinder fires at a specific point in the engine’s operating cycle.
The distributor must send spark to each cylinder in the correct sequence.
If the wires are connected incorrectly, a cylinder may receive spark while its piston is in the wrong position.
This can cause:
- Engine cranking but not starting
- Rough idle
- Severe misfire
- Backfiring through the intake
- Backfiring through the exhaust
- Poor acceleration
- Engine shaking
- Reduced power
- Strong fuel smell
- Check engine light on some vehicles
Two swapped spark plug wires can sometimes make an engine run extremely poorly even though every individual ignition component is functioning correctly.
Find the Engine’s Firing Order First
Before connecting wires, determine the correct firing order for your exact engine.
The firing order is the sequence in which the engine’s cylinders produce their power strokes.
Examples of firing orders used on different engines may look like:
- 1-3-4-2
- 1-5-3-6-2-4
- 1-8-4-3-6-5-7-2
These are only examples.
Do not use any firing order unless it is confirmed for your specific:
- Vehicle year
- Make
- Model
- Engine displacement
- Engine family
Even engines from the same manufacturer can use different firing orders.
You may find the firing order:
- In the owner’s or service manual
- On an under-hood emissions label
- Cast or printed on the intake manifold
- In factory service information
Correct identification is critical before you start moving wires.
Identify the Cylinder Numbers
You also need to know which physical cylinder is No. 1, No. 2, and so on.
Cylinder numbering varies significantly between manufacturers.
On an inline engine, cylinders are usually arranged sequentially from one end of the engine to the other, but you still need to confirm which end starts with No. 1.
On V-shaped engines, numbering can be more complicated.
Some manufacturers number one cylinder bank:
1-3-5-7
and the other:
2-4-6-8.
Others may use:
1-2-3-4
on one bank and:
5-6-7-8
on the other.
Do not assume a cylinder numbering pattern based only on engine shape.
Verify the correct layout for the specific engine.
Find Cylinder No. 1
Cylinder No. 1 is the reference point for distributor wiring and ignition timing.
Locate cylinder No. 1 according to the engine manufacturer’s numbering system.
Once identified, trace its spark plug location and prepare the appropriate wire.
If the old wires are still installed, marking the No. 1 wire before removal can save considerable time.
How to Find the No. 1 Terminal on the Distributor Cap
Some distributor caps have the No. 1 terminal marked.
You may see:
- The number “1”
- A molded mark
- A notch
- A service-manual diagram
If the distributor has not been moved and the old wiring is available, simply trace the wire from cylinder No. 1 to the cap.
If all wires are missing and the cap has no markings, you may need to position the engine at top dead center (TDC) on the compression stroke for cylinder No. 1 and observe where the distributor rotor points.
That rotor position identifies the terminal that should supply cylinder No. 1.
Understanding Top Dead Center on Cylinder No. 1
A four-stroke engine reaches top dead center twice during a complete operating cycle:
- Once between the compression and power strokes
- Once between the exhaust and intake strokes
For ignition setup, you need TDC on the compression stroke.
This matters because setting the distributor 180 degrees out can place the rotor at the wrong point in the firing cycle.
A simplified method is:
- Remove the No. 1 spark plug.
- Rotate the engine in its normal direction.
- Confirm compression pressure beginning at cylinder No. 1.
- Continue rotating until the timing mark reaches the specified TDC position.
- Remove the distributor cap.
- Observe where the rotor is pointing.
The terminal directly above or corresponding to that rotor position is typically the No. 1 distributor terminal when the distributor is installed correctly.
If you are unfamiliar with manually rotating an engine or setting ignition timing, consult service information or a qualified technician.
Determine Distributor Rotation Direction
After identifying the No. 1 terminal, you need to know whether the distributor rotor turns:
- Clockwise
- Counterclockwise
This determines the direction in which the firing order progresses around the cap.
Distributor direction depends on engine design.
Do not assume that all distributors rotate clockwise.
You can find the correct direction in service information or, when appropriate, observe rotor movement while the engine is manually rotated in its normal direction.
Connect the No. 1 Spark Plug Wire
Start with the No. 1 cylinder.
Install one end of the wire firmly onto the spark plug.
Push the boot until you feel or hear it seat properly over the spark plug terminal.
Connect the other end to the distributor’s No. 1 terminal.
Make sure both boots are fully seated.
A loose connection can create:
- Misfire
- Arcing
- Hard starting
- Intermittent ignition problems
Do not pull on the wire itself when installing or removing it. Grip the boot.
Follow the Firing Order Around the Distributor Cap
Once cylinder No. 1 is connected, move to the next distributor terminal in the rotor’s direction of rotation.
Suppose, only as an example, an engine has the firing order:
1-8-4-3-6-5-7-2
and the distributor rotates clockwise.
The terminals would be connected clockwise in this sequence:
1 → 8 → 4 → 3 → 6 → 5 → 7 → 2
If the distributor rotates counterclockwise, the same firing order would be arranged in that direction instead.
The sequence remains the engine’s specified firing order; only the physical direction around the cap depends on distributor rotation.
Simple Distributor Wiring Example
Imagine a four-cylinder engine with a firing order of:
1-3-4-2
If the distributor turns clockwise, start at the verified No. 1 terminal.
Then connect the wires clockwise:
- First terminal → Cylinder 1
- Second terminal → Cylinder 3
- Third terminal → Cylinder 4
- Fourth terminal → Cylinder 2
Again, this is only an example.
Your actual engine may use a completely different firing order and distributor direction.
Connect the Coil Wire if the System Uses One
Many traditional distributor systems have a central terminal in the distributor cap.
This center connection usually receives high voltage from the ignition coil.
A thicker ignition wire commonly runs from:
Ignition coil → center distributor-cap terminal
The outer cap terminals then connect to the individual spark plugs.
Do not confuse the center coil wire with a cylinder spark plug wire.
Some distributor systems integrate the ignition coil into the distributor assembly, so not every vehicle has an external coil wire.
Should You Replace Spark Plug Wires One at a Time?
Yes, when the existing wiring is correct.
Replacing wires one at a time is one of the easiest ways to avoid mixing them up.
Use this method:
- Remove one old wire.
- Compare its length with the replacement wires.
- Install the matching new wire in the same position.
- Confirm both ends are fully seated.
- Move to the next wire.
This approach preserves the existing firing order.
If all the wires have already been removed, you will need to identify cylinder numbering, firing order, No. 1 terminal, and distributor direction before reconnecting them.
Match Spark Plug Wire Lengths
Replacement spark plug wire sets often contain wires of different lengths.
The length usually corresponds to the physical distance between a specific spark plug and the distributor.
Do not automatically install the longest wire on cylinder No. 1.
Instead, first determine which distributor terminal belongs to each cylinder, then choose the wire that reaches comfortably without:
- Excessive slack
- Stretching
- Sharp bends
- Contact with hot exhaust components
Using the appropriate wire length helps keep the engine compartment organized.
Route the Spark Plug Wires Correctly
Correct routing is almost as important as correct firing order.
Spark plug wires carry thousands of volts and should be protected from heat, abrasion, and electrical interference.
Route them away from:
- Exhaust manifolds
- Headers
- Sharp metal edges
- Belts
- Pulleys
- Cooling fans
- Throttle linkages
Use the original:
- Wire separators
- Clips
- Brackets
- Looms
whenever possible.
These components keep the wires organized and away from damage.
Keep Wires Away From Exhaust Components
Exhaust manifolds and headers can become extremely hot.
If a spark plug wire touches a hot exhaust surface, the insulation can melt or burn.
Damaged insulation may allow high voltage to arc to the engine instead of reaching the spark plug.
This can cause an intermittent or constant misfire.
Use appropriate heat shields or high-temperature boots if specified for the vehicle.
Avoid Running Certain Wires Parallel for Long Distances
High-voltage spark plug wires can create electromagnetic fields.
On some traditional ignition systems, routing certain wires tightly parallel for long distances can contribute to inductive crossfire, where voltage in one wire induces unwanted voltage in another.
Factory wire separators help maintain proper spacing.
Follow the original routing pattern whenever possible rather than bundling every wire tightly together.
Make Sure Each Boot Clicks Into Place
A wire that appears connected may not actually be seated fully.
At the spark plug end, the internal metal terminal should make firm contact with the spark plug tip.
At the distributor cap, the terminal should fully engage the cap post.
After installation, gently check each boot.
Do not yank on the ignition wire itself because that can separate the conductor from the terminal inside the boot.
Can Spark Plug Wires Be Connected in Any Position on the Distributor?
Not randomly.
The important relationship is between:
- Distributor rotor position
- No. 1 cylinder
- Firing order
- Distributor direction
On some engines, a distributor can physically be installed in several orientations and still function if the spark plug wires and ignition timing are arranged correctly.
However, factory positioning is usually preferable because it provides:
- Proper wire routing
- Correct adjustment range
- Better component clearance
- Easier future service
If the distributor has been removed or repositioned, simply copying a generic distributor-cap diagram may not work because the No. 1 terminal position can change.
What Happens If You Connect Spark Plug Wires Wrong?
Incorrect wiring can prevent the engine from firing at the right time.
Possible symptoms include:
- Engine will not start
- Engine starts but runs roughly
- Severe shaking
- Backfiring
- Popping from exhaust
- Intake backfire
- Loss of power
- Poor throttle response
- Strong fuel smell
- Misfire
If these problems begin immediately after spark plug wires were replaced, check the firing order before replacing additional parts.
A crossed pair of wires is a very common cause.
What Does It Mean if the Engine Backfires After Reconnecting Wires?
Backfiring after spark plug wire service strongly suggests that one or more cylinders may be firing at the wrong time.
Check:
- Correct cylinder numbering
- Correct firing order
- Correct No. 1 distributor terminal
- Correct distributor rotation
- Whether two wires were accidentally swapped
A distributor installed 180 degrees out can also produce major starting or backfiring problems.
Do not repeatedly crank or run an engine that is severely backfiring without correcting the ignition setup.
Common Mistakes When Connecting Spark Plug Wires
Assuming Cylinder Numbers Are in Simple Order
Cylinder numbering differs between manufacturers.
Confirm the engine layout.
Guessing the Firing Order
Never guess.
Use the specification for the exact engine.
Starting at the Wrong Distributor Terminal
Knowing the firing order is not enough if the No. 1 terminal is wrong.
Following the Firing Order in the Wrong Direction
A correct firing order arranged counterclockwise on a clockwise distributor will still be wrong.
Mixing Up Similar-Length Wires
Label each wire when necessary.
Leaving a Boot Partially Connected
A loose terminal can cause intermittent misfires.
Routing Wires Against the Exhaust
Heat can quickly damage wire insulation.
Pulling on the Wire Instead of the Boot
This can damage the internal conductor.
How to Label Spark Plug Wires Before Removal
If you are preparing to replace a complete set, labeling can prevent unnecessary confusion.
You can mark the wires with:
- Numbered tape
- Permanent labels
- Preprinted wire markers
Label both:
- Cylinder end
- Distributor end
For example:
- 1
- 2
- 3
- 4
and so forth.
Taking a clear photo of the distributor cap and wire routing before disassembly is also useful.
How to Check Spark Plug Wire Connections After Installation
Before starting the engine, inspect every connection.
Verify:
- Correct firing order
- Correct distributor direction
- No. 1 terminal position
- All boots fully seated
- Coil wire connected
- Wires clear of exhaust
- Wires clear of belts and fans
- No wires stretched tightly
- Distributor cap installed securely
Then start the engine.
A properly wired engine should normally idle smoothly if no other ignition or mechanical problem is present.
What if the Engine Still Misfires?
If you have verified the spark plug wire order and the engine still misfires, another ignition component may be faulty.
Possible causes include:
- Damaged spark plug wire
- Worn spark plug
- Cracked distributor cap
- Carbon tracking inside the cap
- Burned distributor rotor
- Weak ignition coil
- Incorrect ignition timing
- Fuel injector problem
- Vacuum leak
- Low cylinder compression
Do not assume every misfire after ignition work is caused by the spark plugs.
Systematic diagnosis prevents unnecessary parts replacement.
Inspect the Distributor Cap and Rotor
If you are already replacing spark plug wires, inspect the distributor cap and rotor.
Look inside the cap for:
- Cracks
- Burned terminals
- Heavy corrosion
- Carbon tracks
- Moisture
- Excessive wear
Inspect the rotor for:
- Burning
- Cracks
- Corrosion
- Worn contact surfaces
A new set of spark plug wires cannot compensate for a badly damaged distributor cap or rotor.
Can a Bad Distributor Cap Cause Misfires?
Yes.
A cracked or worn distributor cap can allow high voltage to travel to the wrong terminal or escape to ground.
This may cause:
- Random misfire
- Hard starting
- No-start condition
- Rough running
- Problems in damp weather
Carbon tracking is especially important.
A carbon track can create a conductive path that allows spark energy to travel where it should not.
Can One Bad Spark Plug Wire Cause a Misfire?
Yes.
Spark plug wires contain conductive material surrounded by high-voltage insulation.
A damaged wire can:
- Develop excessive resistance
- Leak voltage
- Arc to ground
- Create intermittent ignition failure
Common signs include:
- Rough idle
- Misfire under acceleration
- Visible arcing in darkness
- Check engine light on electronically monitored vehicles
If the wires are old and one has failed due to age, replacing the complete wire set may be practical.
Should Spark Plug Wires Touch Each Other?
Brief contact between properly insulated wires is not automatically a problem, but factory separators and routing should still be maintained.
Avoid tightly bundling long sections of high-voltage ignition wires together.
Proper spacing helps reduce:
- Heat exposure
- Abrasion
- Electrical interference
- Crossfire risk
Use the original wire retainers whenever possible.
Do Spark Plug Wires Have Resistance?
Yes.
Most modern suppression-style spark plug wires are intentionally designed with electrical resistance.
This resistance helps control electromagnetic and radio-frequency interference produced by the ignition system.
A resistance test with a digital multimeter can sometimes identify an open or badly damaged wire, but acceptable resistance varies depending on:
- Wire design
- Length
- Manufacturer
Do not use one universal resistance value for every spark plug wire.
Should You Use Dielectric Grease on Spark Plug Wire Boots?
A small amount of dielectric grease may be used inside spark plug boots when recommended by the wire or vehicle manufacturer.
Dielectric grease can help:
- Prevent moisture intrusion
- Reduce boot sticking
- Protect rubber components
It should normally be applied to the inside sealing area of the boot rather than used as an electrical conductor between the metal terminals.
Use only a small amount.
Safety Tips When Working With Spark Plug Wires
Traditional ignition systems can produce very high voltage.
Before servicing the system:
- Turn the engine off.
- Remove the key.
- Allow hot engine components to cool.
- Keep hands away from belts and fans.
- Do not handle ignition wires while the engine is running.
- Work in a well-ventilated area.
- Keep loose clothing away from rotating components.
Do not intentionally hold a spark plug wire while cranking or running the engine to “feel” whether it has spark.
Use appropriate diagnostic equipment instead.
FAQs About How to Connect Spark Plug Wires to Distributor
How do I know which spark plug wire goes where on the distributor?
Start by identifying cylinder No. 1 and the distributor’s No. 1 terminal. Then connect the remaining wires around the cap according to the engine’s firing order and distributor rotation direction.
Does the No. 1 spark plug wire always go in the same place on the distributor?
Not necessarily.
Its physical position depends on the engine and how the distributor is installed. Some caps mark the No. 1 terminal, while others require you to determine it from rotor position at cylinder No. 1 compression TDC.
How do I know which way the distributor rotates?
Check the service information for the exact engine.
Distributor rotors can turn either clockwise or counterclockwise depending on the engine design.
What happens if two spark plug wires are switched?
The affected cylinders can fire at the wrong time, causing severe misfires, rough running, backfiring, or a no-start condition.
Is firing order the same as cylinder numbering?
No.
Cylinder numbering identifies each physical cylinder.
The firing order specifies the sequence in which those cylinders produce their power strokes.
For example, an engine numbered 1 through 8 may have a firing order that does not follow numerical sequence.
How do I find No. 1 on a distributor if all the wires were removed?
Identify cylinder No. 1, bring that cylinder to top dead center on its compression stroke, remove the distributor cap, and observe where the rotor points.
That position identifies the No. 1 terminal when the distributor is installed and timed correctly.
Can wrong spark plug wire order damage the engine?
Incorrect wire order usually causes immediate misfiring, backfiring, or a no-start condition. Continuing to run a severely misfiring engine can cause additional problems, including unburned fuel entering the exhaust and potentially overheating the catalytic converter on vehicles equipped with one.
Correct the wiring before continued operation.
Should I replace the distributor cap when replacing spark plug wires?
Not automatically, but inspect it carefully.
If the cap has cracks, burned contacts, corrosion, carbon tracking, or significant wear, replacement is appropriate. The rotor should also be inspected at the same time.
Conclusion
Learning how to connect spark plug wires to distributor terminals correctly comes down to four key pieces of information: cylinder numbering, firing order, distributor rotation, and the correct No. 1 terminal.
Connect cylinder No. 1 first, then move around the distributor cap in the rotor’s direction while following the engine’s exact firing order. Route each wire away from exhaust components and moving parts, make sure every boot is fully seated, and verify the complete layout before starting the engine.
If the engine immediately runs rough, backfires, or refuses to start after the wires have been changed, recheck the wire order before replacing additional components. In many cases, one crossed wire or an incorrectly identified No. 1 terminal is all it takes to create a major ignition problem.