
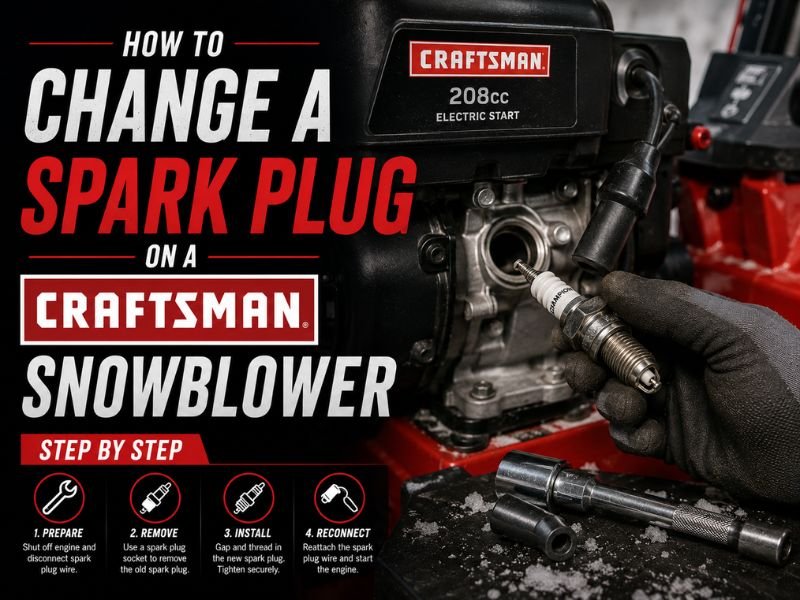
To change a spark plug on a Craftsman snowblower, let the engine cool, disconnect the spark plug wire, remove the old plug with the correct spark plug socket, verify the replacement plug and gap, then thread and tighten the new plug correctly. The exact spark plug type, gap, and tightening specification vary by Craftsman model and engine, so check your model-specific manual before installation.
The job itself is usually straightforward, but using the wrong plug or over-tightening it can create a much bigger problem than the old spark plug. CRAFTSMAN specifically recommends locating the product by model number and using its individual manual for correct maintenance information.
First, Identify Your Craftsman Snowblower Model
Do this before buying a spark plug.
CRAFTSMAN has sold many different snowblower configurations over the years, and even current models use different engine sizes. For example, the current CMXGBAM213101 uses a 208cc four-cycle OHV engine, while the CMXGBAM213102 uses a 243cc four-cycle OHV engine.
That means you should not assume that a spark plug recommended for one Craftsman snowblower automatically fits another.
CRAFTSMAN’s official manual system instructs owners to find the machine’s model number, search for that specific product, and download the appropriate manual from the product page.
The model number is therefore the best starting point for determining:
- The correct spark plug part number
- Required spark plug gap
- Plug-access procedure
- Maintenance interval
- Tightening specification
CRAFTSMAN currently sells several different replacement spark plugs for outdoor equipment, including F6RTC, F5TRC, and RC12YC-family plugs, which is another reason not to select one by appearance alone.
What You Need to Change the Spark Plug
For most Craftsman snowblowers, the tool list is short.
You generally need the correct replacement plug, a ratchet, spark plug socket, suitable extension if access is recessed, and a spark plug gap gauge if the manual requires the gap to be checked.
CRAFTSMAN offers a 5/8-inch spark plug socket, but this should not be taken to mean every Craftsman snowblower necessarily uses a 5/8-inch plug hex. Match the socket to your actual spark plug.
A torque wrench is useful when the engine manual specifies an exact tightening torque.
Avoid substituting ordinary deep sockets when a proper spark plug socket is available. A spark plug socket is designed to grip and remove the plug while providing better protection around the ceramic insulator.
Step 1: Shut the Snowblower Down and Let It Cool
Park the snowblower on a firm, level surface and turn the engine completely off.
Do not replace the plug immediately after clearing snow. The engine, muffler, cylinder head, and spark plug can remain hot enough to cause burns.
A cool engine is also preferable when working with threaded components in the cylinder head.
Remove the ignition key if your snowblower uses one, and make sure nobody can accidentally start the machine while you are working.
Step 2: Disconnect the Spark Plug Wire
Find the spark plug boot, which is normally attached to the end of the ignition wire and pushed over the top terminal of the plug.
Grip the boot rather than yanking on the wire itself.
Pull the boot straight off, using a slight twisting motion if necessary.
Disconnecting the plug wire helps prevent accidental ignition while your hands and tools are around the engine.
Move the boot aside so it cannot accidentally reconnect to the plug.
Step 3: Clean Around the Spark Plug
Before removing the spark plug, look around its base.
Snowblowers can accumulate dirt, dust, rust particles, and other debris around the engine. If that material falls into the combustion chamber after the plug is removed, it can create unnecessary engine wear.
Brush or blow loose contamination away from the plug area before opening the hole.
Be especially careful when using compressed air. Wear eye protection and direct debris away from yourself.
The goal is simple: when the spark plug comes out, the area immediately around the opening should be clean.
Step 4: Remove the Old Spark Plug
Place the correct spark plug socket over the plug and make sure it is seated fully.
Turn the ratchet counterclockwise to loosen the plug.
Once it breaks free, you can usually unscrew it the rest of the way with light ratchet pressure or by turning the extension by hand.
If the plug feels unusually difficult to remove, do not immediately apply excessive force.
A plug can become difficult because of corrosion, damaged threads, or years of service. Forcing it can damage the cylinder-head threads.
If resistance remains abnormal after the plug begins moving, professional assistance may be safer than risking a damaged head.
Step 5: Inspect the Old Plug Before Throwing It Away
The removed plug can tell you something about how the engine has been operating.
A plug with moderate normal wear is different from one that is wet with fuel, coated in oil, covered with heavy black deposits, physically damaged, or severely eroded.
If your snowblower was difficult to start, looking at the plug may help determine whether replacement is likely to solve the problem.
For example, a heavily fouled plug may explain weak ignition, but repeated fouling can indicate another issue such as improper fuel mixture, extended low-temperature operation, or an engine condition.
Do not assume every starting problem is caused by the plug.
Old fuel, carburetor problems, blocked fuel passages, ignition faults, and compression problems can also prevent a snowblower engine from starting.
Step 6: Confirm the New Spark Plug Is Correct
Compare the replacement plug with the engine specification rather than simply matching the old plug visually.
The correct spark plug needs the proper:
Thread diameter, thread reach, seat type, heat range, resistor configuration, and electrode design.
CRAFTSMAN currently lists an F6RTC replacement plug for engines using part numbers such as 951-10292/751-10292 and an RC12YC-family replacement plug for a different group of engine applications.
That does not mean either one is universally correct for a Craftsman snowblower.
Use the exact plug number specified for your machine.
Step 7: Check the Spark Plug Gap
The spark plug gap is the distance between the center electrode and ground electrode.
That distance affects how much voltage is needed to create a reliable spark.
Use a proper gap gauge and compare the measurement with the specification in your Craftsman or engine manual.
Do not assume a common gap value applies to every Craftsman snowblower.
If adjustment is necessary, move only the ground electrode using the appropriate tool. Do not pry against the ceramic insulator or delicate center electrode.
If the plug uses a fine-wire precious-metal center electrode, careless gap adjustment can damage it.
If the replacement plug arrives with the correct gap and the manufacturer does not call for adjustment, avoid unnecessary bending.
Step 8: Install the New Plug by Hand First
This is one of the most important steps.
Place the new spark plug into the socket or carefully position it in the hole, then begin threading it by hand.
Do not use the ratchet immediately.
The plug should turn several rotations smoothly with little resistance.
If it becomes tight after only a partial turn, stop and back it out.
You may be cross-threading the plug.
The cylinder head is much more expensive than the spark plug, so never force the threads to continue when the plug does not feel properly aligned.
Starting it by hand greatly reduces the risk of cross-threading.
Step 9: Tighten the Spark Plug Correctly
Once the plug is fully hand-threaded and seated, tighten it according to the specification for your engine.
Do not simply tighten it as hard as possible.
A spark plug needs enough clamping force to seal correctly and transfer heat through the cylinder head, but excessive tightening can damage the threads, distort the plug, or make future removal difficult.
Too little tightening can also cause problems.
A loose spark plug may not seal correctly and can potentially allow combustion leakage or improper heat transfer.
If the manual provides a torque value, use a torque wrench.
If the plug manufacturer supplies a turning-angle method for a new gasket-type plug, follow that only when it matches your application.
Step 10: Reconnect the Spark Plug Wire
Push the spark plug boot firmly back onto the plug terminal.
You should feel it seat securely.
A boot that is only partially installed can create intermittent ignition, hard starting, or a no-start condition even though the new spark plug itself is perfectly good.
Inspect the wire and boot while you are there.
Look for obvious cracks, heat damage, torn insulation, corrosion, or loose terminal contact.
Replacing the spark plug will not correct a damaged ignition lead or boot.
Step 11: Start the Snowblower and Check Operation
After everything is reassembled, move the snowblower to a properly ventilated outdoor location and start it according to the normal procedure.
The engine should crank and run normally.
Listen for a steady idle and make sure the spark plug boot remains securely installed.
If the engine still refuses to start, avoid assuming the new spark plug is defective.
Move on to other common snowblower starting causes, particularly fuel condition, carburetor operation, ignition output, choke use, and engine compression.
How Often Should You Change a Craftsman Snowblower Spark Plug?
The exact maintenance interval should come from the manual for your machine.
CRAFTSMAN’s current replacement spark plug pages recommend replacing the plug each season for optimum engine performance on several of its outdoor-equipment replacement plug products.
CRAFTSMAN also stresses that its general outdoor maintenance guidance does not replace the product instruction manual because service requirements can vary by equipment and operating conditions.
For a snowblower, checking the plug before winter is sensible because starting reliability becomes especially important when temperatures fall.
If the plug is fouled, physically damaged, badly worn, or causing a confirmed ignition problem, replacement can be appropriate sooner.
Common Mistakes When Changing a Craftsman Snowblower Plug
One frequent mistake is buying a plug from the snowblower’s brand alone.
CRAFTSMAN is not a spark plug specification. The model and engine determine what plug belongs in the cylinder head.
Another is replacing the plug without cleaning around the opening first. Dirt that falls through the plug hole can enter the cylinder.
Cross-threading is more serious. Always start the plug manually.
Over-tightening is another avoidable problem. More torque is not automatically better.
Finally, do not spend hours troubleshooting a new plug if the engine has been sitting with old gasoline. A snowblower that will not start after months of storage often deserves a broader fuel-and-ignition diagnosis, not repeated spark plug replacement.
What if You Don’t Know the Model Number?
Find it before ordering parts.
CRAFTSMAN’s support system uses the model number to route owners to the correct product information, manuals, parts, and service resources.
Current Craftsman snowblower model numbers can look like CMXGBAM213101, CMXGBAM213102, or CMXGBAM1054540, but older equipment may use entirely different numbering formats.
Do not identify the machine only by clearing width, such as “Craftsman 24-inch snowblower.” Multiple generations may share a similar width while using different engines.
Frequently Asked Questions
What Spark Plug Does a Craftsman Snowblower Use?
It depends on the model and engine. CRAFTSMAN currently sells several outdoor-equipment spark plugs, including F6RTC, F5TRC, and RC12YC-family replacements, so you should verify the exact model before purchasing.
Where Is the Spark Plug on a Craftsman Snowblower?
It is attached to the engine cylinder head and covered by a spark plug boot connected to the ignition wire. Exact placement varies with engine design.
What Size Spark Plug Socket Do I Need?
Use the socket size that fits your specific plug. CRAFTSMAN sells a 5/8-inch spark plug socket, but that does not establish 5/8 inch as the correct size for every snowblower model.
Should I Gap a New Craftsman Snowblower Spark Plug?
Verify the gap against the specification for your exact engine. Do not assume that a plug is correct simply because it came pre-gapped.
Can I Change the Spark Plug With the Engine Hot?
It is better to work with the engine shut down and cool. This reduces burn risk and makes it safer to work around the engine and cylinder head.
How Tight Should a Craftsman Snowblower Spark Plug Be?
Use the torque or tightening method specified for the exact engine and plug. Avoid guessing because both under-tightening and over-tightening can cause problems.
Why Won’t My Snowblower Start After Installing a New Plug?
Possible causes include a loose spark plug boot, incorrect plug, wrong gap, stale fuel, carburetor problems, lack of ignition output, or low compression. A new spark plug does not correct every no-start condition.
Can I Clean the Old Spark Plug Instead of Replacing It?
Light contamination can sometimes be cleaned for diagnostic purposes, but a plug with worn electrodes, damaged ceramic, serious corrosion, or heavy recurring fouling is better replaced. CRAFTSMAN recommends seasonal replacement for optimum performance on several of its current replacement plugs.
Should I Use Anti-Seize on the Spark Plug Threads?
Do not automatically add anti-seize. Follow the spark plug and engine manufacturer’s installation instructions because lubricating the threads can change the effective tightening torque.
When Is the Best Time to Replace the Spark Plug?
Before the snow season is a convenient time to inspect or replace it as part of preseason maintenance. Your model-specific maintenance schedule should determine the actual service interval.
How to Change a Spark Plug on a Craftsman Snowblower Correctly
To change a spark plug on a Craftsman snowblower, identify the exact model first, let the engine cool, disconnect the spark plug wire, clean around the plug, remove it with the correct socket, verify the new plug and gap, then install it carefully by hand before tightening it to specification.
The most important part of the job is avoiding assumptions.
CRAFTSMAN currently sells snowblowers with different engine sizes and offers several different replacement spark plug types for outdoor equipment, so there is no single plug number, gap, or torque specification that should be applied to every Craftsman snowblower.
Use your model number and official manual to confirm the correct parts and specifications before starting. CRAFTSMAN itself recommends using model-specific product manuals for maintenance and safety information.
If the replacement plug is correct, properly gapped, hand-threaded without resistance, tightened correctly, and connected securely to the ignition boot, changing a Craftsman snowblower spark plug is usually a manageable maintenance job—and a useful step toward dependable cold-weather starting.