
Knowing how to test spark plug wire with multimeter can help you find an ignition fault without guessing. A digital multimeter can check the wire’s electrical resistance in a few minutes. This test is simple, but the reading only makes sense when you compare it with the wire type and the vehicle maker’s stated range.
A bad ignition wire can cause a rough idle, hard starting, weak acceleration, or an engine misfire. The same symptoms can come from spark plugs, coils, fuel problems, or other faults. In hands-on diagnosis, the best approach is to use the resistance test as one clue, then inspect the wire and check the rest of the ignition system.
What a Spark Plug Wire Does
A spark plug wire carries high-voltage energy from an ignition coil, distributor, or coil pack to the spark plug on engines that use separate plug wires. The voltage must reach the plug with enough energy to create a strong spark. The wire also needs insulation that can handle heat, oil, vibration, and high voltage.
Many older gasoline engines use plug wires, while many newer engines use coil-on-plug ignition. Some modern engines also use short wires or boots between coils and plugs. If your vehicle has coil-on-plug ignition, you may not have a traditional spark plug wire to test.
- ✦ Electrical path
The wire provides a path for ignition voltage to reach the spark plug.
- ✦ Insulation
The outer jacket helps keep high voltage from leaking to nearby engine parts.
- ✦ Noise control
Resistor-type wires help reduce electrical interference from the ignition system.
When You Should Test a Spark Plug Wire
You can test a spark plug wire when the engine shows signs of an ignition problem. A resistance check is useful when one cylinder seems weak or when you find a wire that looks damaged. It is also a good check when troubleshooting a misfire on an older ignition system.
Do not replace every wire just because the engine runs poorly. First, inspect the plugs, wires, coils, connectors, and other likely causes. A multimeter test can help narrow the problem, but it cannot find every type of ignition fault.

- ✦ Engine misfire
A damaged wire can interrupt spark delivery and cause a cylinder to misfire.
- ✦ Hard starting
Weak or inconsistent spark can make an engine harder to start.
- ✦ Rough idle
An ignition fault may show up most clearly when the engine is idling.
- ✦ Visible damage
Cracks, burns, cuts, swelling, or damaged boots are reasons to inspect the wire closely.
Tools and Safety Steps Before Testing
Before learning how to test spark plug wire with multimeter, gather the right tools. You mainly need a digital multimeter with an ohms setting and a way to access both ends of the wire. Your vehicle service manual is also useful because it may list the correct resistance range.
Work with the engine off and allow it to cool. Ignition systems can produce very high voltage, so do not touch ignition parts while the engine is running. Keep loose clothing and tools away from moving engine parts, and follow the vehicle maker’s safety instructions.

- ✦ Digital multimeter
Use a meter that can measure resistance in ohms.
- ✦ Vehicle specifications
Use the service manual or trusted repair data for the correct wire resistance range.
- ✦ Safety gloves
Use suitable gloves when handling dirty or oily engine parts, while still following the meter and vehicle safety guidance.
- ✦ Good lighting
Bright light makes it easier to spot cracks, burns, corrosion, and loose terminals.
Do Not Test a Live Ignition Wire With a Basic Resistance Setting
An ohms test is made with the circuit off. Never place a multimeter set to resistance across a live ignition circuit. For this basic wire test, remove the wire from the ignition components and test it by itself.
How to Test Spark Plug Wire With Multimeter Step by Step
The main test is a continuity and resistance check. You measure from the metal terminal at one end of the wire to the metal terminal at the other end. The exact resistance you should see depends on the wire’s length and construction, so do not use one universal number for every vehicle.
Follow these steps when learning how to test spark plug wire with multimeter. Take your time and keep the wire straight enough that you can make firm probe contact.

- ✦ Step 1: Turn the vehicle off
Park safely, switch off the ignition, remove the key, and let the engine cool before working around the ignition system.
- ✦ Step 2: Remove the wire
Remove the wire from the spark plug and its other connection. Pull on the boot rather than yanking the cable itself.
- ✦ Step 3: Set the meter to ohms
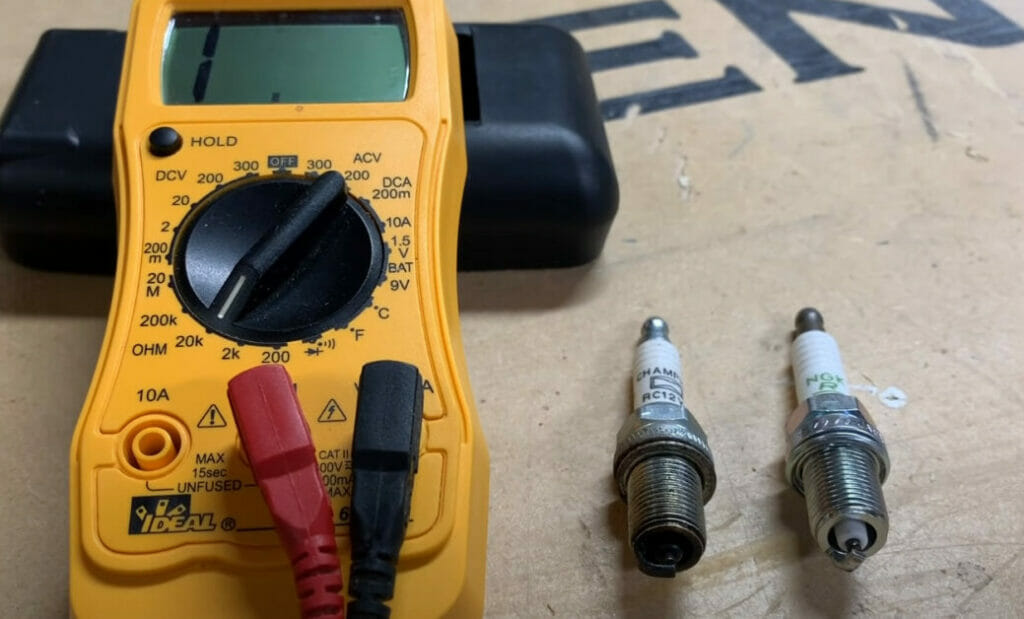
Choose the resistance setting. If the meter has manual ranges, select a range that can measure the expected resistance.
- ✦ Step 4: Check the meter
Touch the two probes together. A digital meter should show a very low resistance value, often close to zero, though the exact display depends on the meter and probe leads.
- ✦ Step 5: Touch both wire terminals
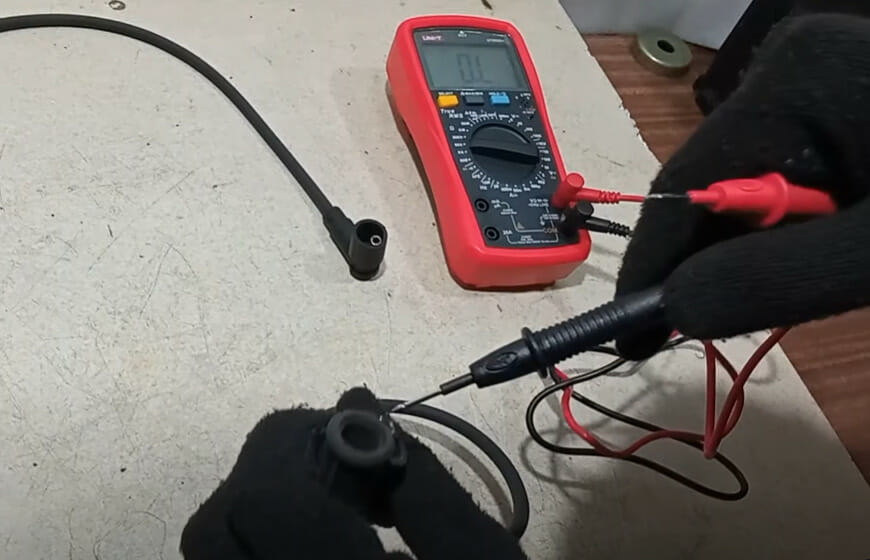
Place one probe on the metal contact at each end of the spark plug wire. Make sure both probes have clean, firm contact.
- ✦ Step 6: Read the resistance
Wait for the display to settle. Record the value so you can compare it with the manufacturer’s specification and with other wires.
- ✦ Step 7: Repeat the test
Test the other plug wires in the same way. A side-by-side check can reveal one wire with a very different reading.
How to Position the Multimeter Probes
The probes must touch the metal terminals inside the ends of the wire. Do not measure through the rubber boot or place both probes on the outside insulation. Poor contact can create a false reading or make the meter show an open circuit.
How to Test a Spark Plug Wire With Multimeter for Continuity
Continuity means the wire has an electrical path from one end to the other. A low resistance reading usually shows that the path is complete. An OL, open, or extremely high reading can mean the conductor is broken or the probe is not making contact, so check the connections and repeat the test before replacing the wire.
How to Read Spark Plug Wire Resistance
The most important rule is simple: use the resistance specification for your exact wire and vehicle. Some wires use a resistor core and have measurable resistance by design. A longer wire can also have more resistance than a shorter wire of the same type.
Because of these differences, a reading that looks high to one person may be normal for another wire. Do not replace a wire based only on a generic ohms number found online. Compare the reading with reliable service information whenever possible.
- ✦ Low resistance
A low reading can be normal for some wire designs, but it does not prove that the wire is perfect.
- ✦ High resistance
A reading above the specified range may indicate a damaged conductor, poor terminal connection, or aging wire.
- ✦ OL or infinite resistance
This usually means the meter sees an open circuit, but first confirm that the probes touch the correct metal terminals.
- ✦ Unstable reading
A changing reading can point to poor probe contact or a problem inside the wire, especially if the value changes when the wire is gently moved.
Why There Is No Single Normal Ohms Value
Spark plug wires are made in different ways. Some have a conductive core, while others use a resistance material to limit electrical noise. Wire length also affects resistance, so the correct value must come from the specific application or wire maker.
Compare Similar Wires Carefully
Testing every wire can help you spot an outlier. Still, wires of different lengths may not have identical readings. A better comparison uses wires of similar length and the same design, along with the published specification.
Inspect the Wire Beyond the Multimeter Test
A resistance test does not tell the whole story. A wire can show an acceptable resistance value and still have damaged insulation, a loose boot, poor terminal contact, or an intermittent fault. That is why visual and physical inspection should be part of the diagnosis.
Look closely at the wire near the spark plug, ignition coil, distributor, and hot engine parts. Heat and vibration can damage the insulation over time. Oil and chemical contamination can also affect the boots and connections.
- ✦ Cracks
Small cracks in the insulation can allow high voltage to leak to nearby parts.
- ✦ Burn marks
Melted or burned insulation can signal excessive heat or contact with a hot engine component.
- ✦ Corroded terminals
Rust or corrosion at a terminal can interfere with the electrical connection.
- ✦ Loose boots
A loose boot may not keep the terminal firmly connected to the spark plug or coil.
- ✦ Oil contamination
Oil around the boots can point to another engine problem and may affect the condition of the ignition parts.
The Wiggle Check
After the basic resistance test, gently flex the wire while watching the meter. Do not bend it sharply or damage an old wire on purpose. A resistance value that jumps sharply during gentle movement can suggest an intermittent internal connection.
Check for Heat Damage
A wire that touches an exhaust part can become damaged even when its resistance still looks reasonable. Check the wire’s routing and keep it away from very hot surfaces when the vehicle design allows it.
What a Bad Spark Plug Wire Can Cause
A failed wire can stop or weaken the spark at the plug. The engine may then run unevenly, especially under load or during acceleration. In some cases, the problem can be worse when the engine is hot or when the insulation is exposed to moisture.
These symptoms are not unique to plug wires. Spark plugs, ignition coils, fuel injectors, vacuum leaks, sensors, and mechanical problems can create similar symptoms. Use the wire test as part of a wider diagnostic process.
- ✦ Misfire
One or more cylinders may fail to burn the air-fuel mixture correctly.
- ✦ Poor acceleration
A weak or missing spark can make the engine feel weak when you press the gas.
- ✦ Rough running
The engine may shake or idle unevenly when ignition is not consistent.
- ✦ Hard starting
A weak ignition path can make starting more difficult.
- ✦ Check engine light
On vehicles with onboard misfire monitoring, an ignition fault may trigger a diagnostic trouble code.
Why a Good Resistance Reading Does Not Always Mean a Good Wire
One common mistake is to treat an ohms test as a complete health check. The meter tests resistance with a small test current. The ignition system sends a much higher voltage through the wire during engine operation, so a wire can pass a simple resistance test yet fail under real operating conditions.
This is why how to test spark plug wire with multimeter should be viewed as one part of diagnosis. If the wire passes the resistance check but the engine still has an ignition problem, continue with the vehicle’s recommended diagnostic procedure.

- ✦ Insulation breakdown
A wire may leak voltage through damaged insulation even when its conductor has normal resistance.
- ✦ Intermittent faults
A fault may appear only when the wire moves, heats up, or experiences vibration.
- ✦ Terminal problems
A poor connection at the boot can cause trouble that a simple conductor test may not reveal.
- ✦ Other ignition faults
A coil, spark plug, connector, or control problem can cause the same engine symptoms.
When to Use More Advanced Testing
If the resistance test and visual inspection do not explain the problem, a professional may use additional ignition tests. Depending on the vehicle, this can include spark testing, scan-tool data, coil testing, or other methods. Follow the service information for the specific engine.
Common Mistakes When Testing Spark Plug Wires
Learning how to test spark plug wire with multimeter is easy, but small errors can lead to bad conclusions. The most common mistake is using a generic resistance value instead of the specification for the actual wire. Another is testing the wire while it remains connected to other ignition parts.
Good testing is repeatable. Use the same meter, the same probe method, and clean contact points for each wire. Record the readings before deciding that a wire has failed.
- ✦ Testing a hot or running engine
Do the basic resistance test with the ignition off and the wire removed from the circuit.
- ✦ Using the wrong meter setting
Make sure the meter is set to resistance rather than voltage or current.
- ✦ Poor probe contact
Touch the metal terminals firmly so the meter measures the wire rather than an air gap or dirty surface.
- ✦ Using one universal resistance limit
Wire construction, length, and manufacturer design affect resistance.
- ✦ Ignoring visual damage
Always inspect the insulation, boots, terminals, and wire routing along with the ohms reading.
- ✦ Pulling on the cable
Remove the wire by its boot when possible. Pulling the cable can damage the conductor or terminal.
How to Decide Whether the Wire Needs Replacement
Replace a spark plug wire when the test results, physical condition, and vehicle specifications point to a fault. An open circuit, resistance outside the stated range, damaged insulation, or a poor terminal connection can all justify further action. If the cause is unclear, avoid replacing parts at random.
When replacing a wire set, use parts made for the exact engine and ignition system. Route the new wires as specified by the vehicle maker. Correct routing helps prevent heat damage and keeps the wires from interfering with other ignition components.
- ✦ Confirmed open circuit
A wire that remains open after you confirm good probe contact should be treated as faulty.
- ✦ Out-of-spec resistance
A resistance value outside the manufacturer’s stated range is a reason to replace or investigate the wire.
- ✦ Damaged insulation
Severe cracks, burns, cuts, or melted sections can make the wire unsafe or unreliable.
- ✦ Bad terminal connection
A damaged or loose terminal can prevent reliable spark delivery.
A Simple Diagnostic Workflow
If you are troubleshooting a rough-running car in your driveway, use a clear order. Start with the symptoms and any diagnostic codes. Then inspect the ignition parts, test the plug wire, and compare the result with the correct service specification.
This workflow helps prevent unnecessary parts replacement. It also makes it easier to explain the problem to a repair shop if you decide to have the vehicle diagnosed professionally.
- ✦ 1. Confirm the symptom
Note when the engine misfires, such as at idle, during acceleration, or when the engine is hot.
- ✦ 2. Check for codes
If the vehicle has onboard diagnostics, scan for relevant trouble codes.
- ✦ 3. Inspect the ignition system
Look at the spark plug, wire, boots, coil connections, and related parts.
- ✦ 4. Test the wire
Measure resistance from terminal to terminal with the engine off and the wire removed.
- ✦ 5. Compare with specifications
Use vehicle-specific service information rather than relying on a generic resistance number.
- ✦ 6. Recheck if needed
If the result seems wrong, clean the probe contact points and repeat the measurement.
- ✦ 7. Repair the confirmed fault
Replace or repair the faulty component according to the vehicle maker’s procedure.