
A loose or damaged terminal on a spark plug wire can cause a weak connection, intermittent misfire, rough running, or a wire that simply pulls out of the boot. Normally, the cleanest way to install a new terminal is with a dedicated spark plug wire crimping tool. But if you are making an emergency repair or assembling a universal wire set and do not have one available, you may be wondering how to crimp spark plug wires without tool.
It is possible to make a basic crimp using common hand tools such as needle-nose pliers and regular pliers, provided the terminal and wire are prepared carefully. The goal is to establish solid electrical contact with the conductive core while also clamping the terminal securely around the wire insulation.
The exact preparation varies among carbon-core, spiral-core, solid-core, HEI-style, and conventional distributor-style spark plug wires, so the instructions supplied with the wire set should always take priority. Some terminals are designed for the conductor to be folded back over the insulation, while others use a slightly different connection method.
A hand-made crimp can work, but it is easier to make an uneven or weak connection without the proper crimper. For a permanent ignition-wire installation, especially on a vehicle where reliability matters, an inexpensive spark plug wire crimping tool is usually worth using.
This guide explains how to make the connection with basic hand tools, how much insulation to remove, how to position the conductor and terminal, and how to tell whether the finished spark plug wire is secure.
How to Crimp Spark Plug Wires Without Tool
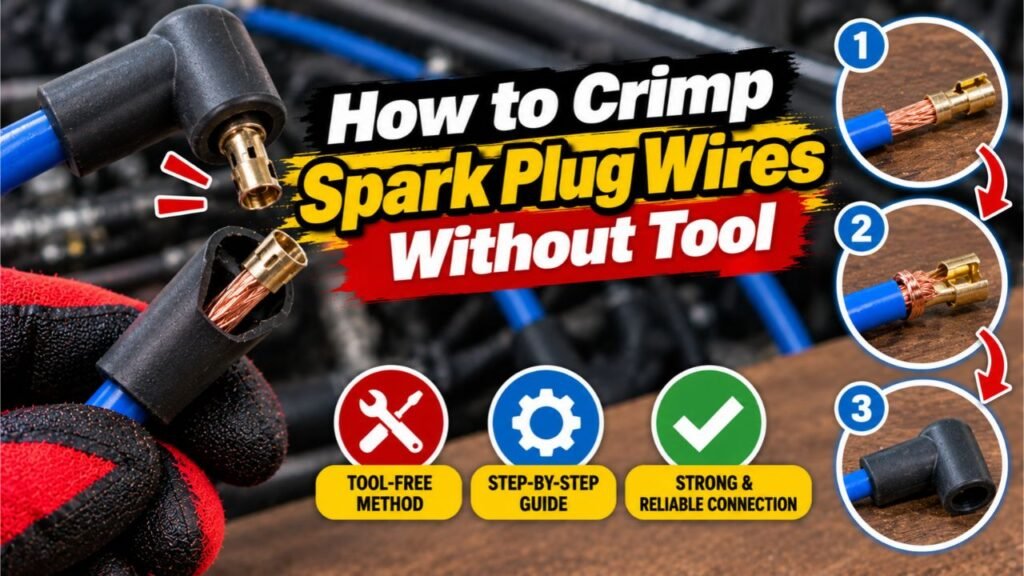
To crimp spark plug wires without tool, carefully strip the specified amount of insulation, position the conductive core according to the terminal manufacturer’s instructions, place the terminal over the wire, and gradually fold and compress the terminal’s crimping tabs with needle-nose and standard pliers.
For many common universal spark plug wire terminals, the basic process is:
- Measure and cut the spark plug wire.
- Slide the boot onto the wire before installing the terminal.
- Strip the required amount of outer insulation.
- Prepare or fold back the conductive core as specified.
- Position the terminal correctly.
- Fold the terminal wings inward with needle-nose pliers.
- Compress the crimp evenly with standard pliers.
- Perform a gentle pull test.
- Install the terminal inside the boot.
- Check continuity or resistance when appropriate.
Do not crush the terminal completely flat. A good crimp should hold the wire firmly without cutting through the insulation or damaging the conductive core.
Why Spark Plug Wires Need a Proper Crimp
A spark plug wire carries the high-voltage electrical pulse produced by the ignition coil to the spark plug.
The terminal at each end has two important jobs.
First, it must create reliable electrical contact between the ignition-wire conductor and the metal terminal.
Second, it must provide enough mechanical grip that normal engine vibration or boot removal does not pull the terminal off the wire.
A weak connection can result in:
- Intermittent misfires
- Rough idle
- Difficult starting
- Loss of power
- Arcing
- Increased ignition resistance
- Terminal separation inside the boot
That is why simply squeezing the terminal randomly with pliers is not enough.
What You Need to Crimp Spark Plug Wires Without a Crimper
You do not need many tools for an improvised crimp.
Useful items include:
- Spark plug wire
- Correct replacement terminal
- Spark plug boot
- Sharp wire cutters
- Razor blade or suitable wire stripper
- Needle-nose pliers
- Standard pliers
- Multimeter if available
- Silicone dielectric grease if recommended for the boot
A small bench vise can sometimes help hold parts, but it should not be used to crush the terminal indiscriminately.
The terminal should be shaped around the wire rather than flattened.
Understand the Parts of a Spark Plug Wire Terminal
Many replacement spark plug terminals have several sections.
Electrical Contact Area
This section contacts the spark plug, distributor cap, or ignition coil terminal.
Do not crush or deform this portion.
Conductor Contact Area
This portion connects electrically with the conductive core of the spark plug wire.
Depending on terminal design, a conductive core may be folded back so the metal terminal clamps directly against it.
Insulation Crimp Wings
These larger tabs wrap around the outer insulation.
Their primary job is mechanical support.
They prevent vibration and pulling force from being transferred directly to the delicate conductor.
Understanding these sections helps prevent one of the most common mistakes: crimping only the insulation while failing to establish reliable electrical contact.
Step 1: Measure the Spark Plug Wire
If you are making a replacement wire from a universal kit, determine the correct length before cutting.
Route the wire approximately where it will sit on the engine.
Leave enough length for:
- Normal engine movement
- Proper routing
- Boot installation
- Terminal installation
Avoid making the wire extremely tight.
At the same time, excessive extra length can create messy routing and place the ignition wire too close to hot exhaust components.
If replacing an existing wire, using the old wire as a length reference is often helpful.
Step 2: Cut the Wire Cleanly
Use sharp cutters to make a clean, square cut.
A crushed or angled end makes stripping and terminal installation more difficult.
Do not use worn cutters that severely flatten the ignition cable.
If you are shortening an existing spark plug wire, verify the routing before cutting because the lost length cannot be restored.
Step 3: Put the Boot on Before Crimping
This step is easy to forget.
Many spark plug boots cannot be installed after the metal terminal has been crimped onto the wire.
Slide the boot over the wire first.
Depending on the boot design, a tiny amount of suitable silicone lubricant or dielectric grease may help the wire slide through.
Do not fill the terminal connection with grease unless the manufacturer specifically calls for it.
Dielectric grease is electrically insulating and is generally used around the boot to help control moisture and make future removal easier.
Step 4: Strip the Spark Plug Wire
Remove only the amount of insulation required for the terminal.
Many universal ignition-wire sets require roughly a short section of insulation to be removed, but there is no universal strip length for every terminal.
Follow the instructions supplied with your wire or terminal whenever possible.
How to Strip Without Damaging the Core
Use a razor blade or appropriate stripper carefully.
Score only the outer insulation.
Do not cut deeply into the conductive core.
Bend the cut section slightly and pull the insulation away.
The exposed conductor may look different depending on wire construction.
It may appear as:
- Carbon-impregnated fiber
- Fine conductive strands
- Spiral-wound metallic conductor
- Solid metallic conductor
Treat it gently.
Step 5: Prepare the Conductive Core
Many common replacement spark plug wire terminals require the exposed conductor to be folded backward over the outer insulation.
This places the conductive material where the terminal can clamp directly against it.
For that style:
- Expose the required length of conductor.
- Bend the conductor gently backward.
- Lay it flat against the outside of the wire insulation.
- Avoid twisting or breaking it.
Do not assume every spark plug wire uses this exact method.
Some terminal systems have manufacturer-specific preparation requirements.
If instructions are available with your wire set, use them.
Step 6: Position the Terminal
Place the terminal over the end of the prepared ignition wire.
The conductor should align with the part of the terminal designed to make electrical contact.
The larger terminal wings should align with the insulated portion of the cable.
Check the orientation before crimping.
Once the terminal has been tightly folded, repositioning it can weaken the metal.
Step 7: Start the Crimp With Needle-Nose Pliers
Without a crimping tool, needle-nose pliers are useful for forming the terminal wings.
Instead of squeezing both wings randomly at once, shape them gradually.
Start one side inward.
Then bend the opposite side inward.
The wings should begin wrapping around the wire rather than folding flat against each other.
Work slowly.
The objective is to imitate the rounded shape that a proper crimping die would create.
Step 8: Tighten the Crimp With Regular Pliers
Once the terminal wings are formed around the wire, use standard pliers to tighten them gently.
Apply pressure in small increments.
Check the terminal after each squeeze.
You want:
- Firm contact
- No loose terminal movement
- Secure insulation grip
- Proper conductor contact
You do not want:
- Severed insulation
- Crushed conductor
- Split terminal
- Completely flattened metal
- Distorted connector end
If the terminal becomes badly deformed, replacing it is preferable to trying to straighten and reuse it repeatedly.
Do Not Over-Crimp the Terminal
More pressure does not necessarily create a better electrical connection.
Over-crimping can:
- Cut through insulation
- Break a carbon conductor
- Damage spiral conductor strands
- Crack the terminal
- Create a weak point in the cable
A proper crimp compresses the components enough to maintain electrical and mechanical contact without destroying them.
This is one reason dedicated crimpers provide more consistent results.
Step 9: Perform a Pull Test
Before installing the terminal into the boot, gently pull on it.
Do not yank it aggressively.
The terminal should remain firmly attached.
If it slides or rotates easily on the wire, the crimp is not secure enough.
Inspect the connection and correct it before installation.
If the conductor has broken or the terminal has become badly damaged, cut the end off and start again with a new terminal if enough wire length remains.
Step 10: Check the Wire With a Multimeter
If you have a digital multimeter, checking the wire can identify a completely open connection.
Set the meter to measure resistance.
Place one probe at each end of the wire where good electrical contact can be made.
The exact resistance depends heavily on the spark plug wire design and length.
For example, resistance-type carbon-core wires behave differently from low-resistance spiral-core performance wires.
Do not use a universal resistance number to decide whether every wire is good.
Instead:
- Compare with the wire manufacturer’s specification.
- Compare similar wires of similar length.
- Look for an open circuit or unusually high resistance.
A wire showing no continuity when continuity should be present may have a broken conductor or poor terminal connection.
Step 11: Pull the Terminal Into the Boot
After confirming the crimp, position the terminal inside the spark plug boot.
Depending on the boot style, you may need to push or pull the wire until the terminal seats correctly.
The terminal must align with the boot opening so it can engage the spark plug securely.
Do not leave the metal terminal buried at an angle.
Step 12: Install the Spark Plug Wire
Push the boot onto the spark plug until you feel or hear the terminal engage.
Depending on the terminal style, you may feel a:
- Click
- Snap
- Firm seat
Grip the boot rather than pulling directly on the wire.
When connecting the other end to a distributor or coil pack, make sure that terminal also seats completely.
How Tight Should a Hand Crimp Be?
A hand-crimped terminal should be tight enough that moderate pulling cannot remove it.
However, the insulation should not be deeply cut or crushed.
Look for a crimp that:
- Wraps evenly around the cable
- Holds the conductor in position
- Does not have sharp metal edges cutting into the wire
- Keeps the terminal centered
- Resists gentle pulling
If the terminal slides around the cable easily, it is too loose.
If the cable is visibly crushed or conductor material is broken, it is too tight.
Needle-Nose Pliers vs. Regular Pliers
Both can be useful, but they serve slightly different purposes.
Needle-Nose Pliers
Best for:
- Folding individual terminal tabs
- Shaping small crimp wings
- Controlling the crimp gradually
Standard Pliers
Best for:
- Final compression
- Applying even pressure to larger wings
Trying to complete the entire connection with large pliers can crush the terminal before the wings are properly shaped.
Start with precise shaping and finish with controlled compression.
Can You Use a Bench Vise?
A bench vise can apply tremendous pressure, so it should be used cautiously.
If you simply place the terminal between flat vise jaws and tighten aggressively, you can flatten and ruin it.
If used at all, a vise should apply only gentle, controlled final pressure after the crimp wings have already been shaped with pliers.
For most DIY repairs, hand pliers give better feedback.
Why a Real Spark Plug Wire Crimper Is Better
Although a plier crimp can work, a purpose-built crimping tool has shaped dies that form the terminal evenly around the cable.
Advantages include:
- Consistent pressure
- Proper terminal shape
- Better strain relief
- Lower chance of conductor damage
- Faster assembly
- More reliable electrical connection
Some universal spark plug wire kits even include a small plastic or metal crimping fixture that can be used with a bench vise.
If you are assembling an entire set of ignition wires rather than repairing one wire, using the correct crimper is strongly recommended.
Carbon-Core vs. Spiral-Core Spark Plug Wires
The type of ignition cable matters when preparing the connection.
Carbon-Core Wires
Carbon-core or suppression wires contain a resistive conductive material.
The core can be relatively fragile.
Avoid pulling, crushing, or cutting it excessively.
Spiral-Core Wires
Spiral-core wires typically use a fine conductive winding around an internal core.
They often offer lower resistance while still suppressing radio-frequency interference.
Careless stripping can cut the fine winding.
Solid-Core Wires
Solid-core ignition wires use a metallic conductor.
They are found in some specialized and older applications but may create substantial electromagnetic interference and are not appropriate for every modern ignition system.
Always use the type of wire specified or suitable for the vehicle’s ignition system.
Common Mistakes When Crimping Spark Plug Wires
Forgetting to Install the Boot First
Once the terminal is attached, some boots cannot slide over it.
Put the boot on before crimping.
Stripping Too Much Insulation
Exposing excessive conductor can reduce mechanical support and create an unwanted high-voltage path.
Follow the terminal instructions.
Cutting the Conductive Core
A conductor damaged while stripping can create high resistance or an intermittent open circuit.
Cut only the insulation.
Poor Electrical Contact
The terminal may be mechanically tight around the insulation while failing to make proper contact with the conductor.
Make sure the conductor is positioned exactly where the terminal design requires it.
Flattening the Terminal
The electrical-contact portion must retain its intended shape.
If you flatten it, it may no longer grip the spark plug or distributor terminal correctly.
Pulling the Wire Instead of the Boot
When removing spark plug wires later, pull from the boot.
Pulling the cable itself can separate your newly crimped connection.
Signs of a Bad Spark Plug Wire Crimp
After installation, watch for symptoms such as:
- Engine misfire
- Rough idle
- Hesitation
- Difficult starting
- Intermittent power loss
- Check engine light
- Visible arcing in darkness
- Clicking or snapping electrical sounds
A loose terminal can create an intermittent problem that changes with engine vibration.
If symptoms appear immediately after making a spark plug wire, inspect that connection first.
Can a Poor Crimp Cause a Misfire?
Yes.
A bad connection can increase electrical resistance or interrupt the ignition voltage entirely.
The spark plug may then receive weak or inconsistent energy.
Modern vehicles may set a cylinder-specific misfire diagnostic code, such as a code in the P0301–P0308 range depending on the affected cylinder and engine configuration.
However, misfires can have many other causes, including:
- Bad spark plug
- Failed ignition coil
- Fuel injector problem
- Vacuum leak
- Low compression
Do not assume every misfire after spark plug service is automatically caused by the wire.
Can You Re-Crimp an Existing Terminal?
Sometimes a slightly loose new terminal can be tightened carefully.
However, repeatedly opening and closing the metal crimp wings can fatigue or crack them.
If the terminal has already been severely bent, crushed, or loosened several times, installing a new terminal is preferable.
Replacement terminals are inexpensive compared with troubleshooting an unreliable ignition connection later.
Should You Solder Spark Plug Wire Terminals?
Usually, no.
Most spark plug wire terminals are designed for a mechanical crimp connection, not a soldered connection.
Solder can create a rigid section where the flexible wire meets the terminal. Vibration may then concentrate stress at that point.
It can also make installing the terminal and boot more difficult.
Follow the ignition-wire manufacturer’s specified termination method.
Should You Use Dielectric Grease?
A small amount of dielectric grease is commonly used inside spark plug boots to:
- Reduce moisture intrusion
- Prevent boot sticking
- Make future removal easier
It should generally be applied lightly to the inside of the rubber boot or sealing area.
Do not pack the electrical terminal full of grease unless the product or vehicle instructions specifically call for it.
The terminal itself needs proper metal-to-conductor electrical contact.
When Should You Replace the Entire Spark Plug Wire?
A new terminal may not solve the problem if the cable itself is deteriorated.
Replace the wire if you find:
- Cracked insulation
- Burned insulation
- Visible arcing marks
- Broken conductor
- Oil-soaked rubber
- Severe heat damage
- Multiple damaged terminals
- Resistance outside the wire manufacturer’s specification
If several wires are old and deteriorating, replacing the complete set may provide more consistent ignition performance.
Safety Tips When Working With Spark Plug Wires
Work with the engine off.
Allow hot exhaust components to cool before reaching around the engine.
Avoid testing ignition output by holding a spark plug wire in your bare hand while someone cranks the engine.
Ignition systems can generate tens of thousands of volts. Although current is limited, the shock can be painful and particularly unsafe for people with certain medical devices or conditions.
Use an appropriate spark tester when checking ignition operation.
Also route spark plug wires away from:
- Exhaust manifolds
- Headers
- Sharp metal edges
- Moving belts
- Pulleys
- Cooling fans
Proper routing protects the new connection and wire insulation.
FAQs About How to Crimp Spark Plug Wires Without Tool
Can I crimp spark plug wires with regular pliers?
Yes, regular pliers can be used for a basic crimp, particularly when combined with needle-nose pliers to shape the terminal tabs first.
However, a dedicated spark plug wire crimper produces a more consistent and reliable connection.
Can I use needle-nose pliers to crimp spark plug wires?
Yes.
Needle-nose pliers are useful for gradually folding each terminal wing around the wire.
You may then use standard pliers for gentle final compression.
Do you fold the spark plug wire core back before crimping?
Many universal spark plug wire terminal designs require the exposed conductive core to be folded back over the outside of the insulation before the terminal is installed.
However, terminal designs vary, so follow the instructions for your specific wire kit.
How much insulation should I strip from a spark plug wire?
There is no single strip length for every spark plug wire and terminal.
Remove only the amount specified by the wire or terminal manufacturer.
Too much stripping can weaken the connection, while too little may prevent proper conductor contact.
How do I know if the crimp is good?
The terminal should be centered, securely wrapped around the cable, electrically connected to the conductor, and resistant to a gentle pull.
The wire should not show severe crushing or cuts.
Can you crimp an HEI spark plug wire terminal without a tool?
It can be done carefully with pliers, but HEI and similar terminals are much easier to form correctly with a proper ignition-wire crimping die.
For an entire wire set, a crimping tool is strongly recommended.
Can a loose spark plug wire terminal cause rough idle?
Yes.
A loose terminal can interrupt ignition voltage and create an intermittent or continuous misfire, which may cause rough idle and poor acceleration.
Is it better to solder or crimp spark plug wires?
For most automotive spark plug wire terminals, crimping is the intended method.
Use the termination procedure recommended by the wire manufacturer rather than automatically adding solder.
Conclusion
Learning how to crimp spark plug wires without tool is useful when you need to make a temporary repair or assemble a wire and do not have a specialized crimper available. With careful preparation, needle-nose pliers can shape the terminal wings and regular pliers can provide the final compression.
The critical part is not simply squeezing the metal tightly. The conductive core must make reliable electrical contact, while the insulation crimp must hold the cable securely without crushing or cutting it.
Install the boot before the terminal, strip the wire carefully, follow the terminal manufacturer’s conductor-preparation method, and perform a pull and electrical check before installation. A hand-crimped terminal can work, but for an entire spark plug wire set or a permanent repair, a proper spark plug wire crimping tool provides a more consistent and dependable connection.