
To learn how to use spark plug gap tool correctly, first find the required gap for your exact engine, then gently insert the correct gauge between the center and ground electrodes. The gauge should pass through with slight drag. If the gap is wrong, adjust only the ground electrode in very small increments, remeasure, and repeat until the specified clearance is reached.
The basic process is simple, but the type of gap tool matters. Coin-style ramp gauges, wire gauges, feeler gauges, and dedicated electrode-adjusting tools do not all work exactly the same way. Modern iridium and platinum spark plugs also require more care than traditional copper or nickel plugs because their center electrodes can be extremely small and relatively easy to damage.
A spark plug gap that is too wide may require more voltage than the ignition system can reliably produce, potentially causing hard starting or misfires under load. A gap that is too narrow can alter how the spark interacts with the air-fuel mixture. That is why checking the gap against the actual vehicle specification is more important than simply making every new plug look identical.
You should also avoid assuming every new plug needs adjustment. Many modern spark plugs are supplied close to their intended application gap, and some fine-wire designs should not be aggressively regapped. You should still verify the specification and inspect the gap when appropriate, but the manufacturer’s instructions for the particular plug always take priority.
In this guide, I’ll explain how to use a spark plug gap tool, how different gap gauges work, how to read the measurement in inches or millimeters, how to widen or close a gap safely, and how to avoid damaging iridium, platinum, or conventional spark plugs.
What Is a Spark Plug Gap Tool?
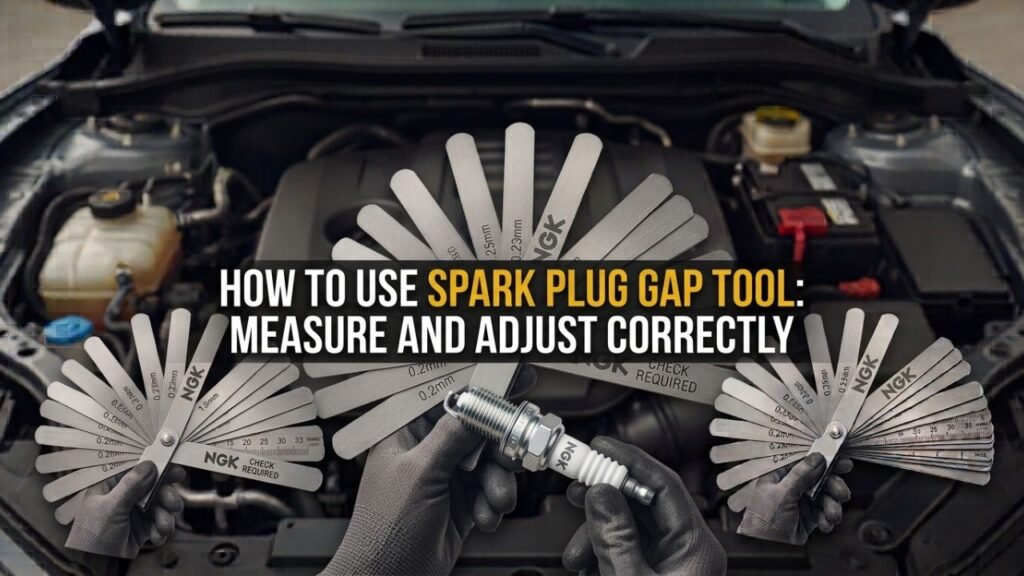
A spark plug gap tool is used to measure the distance between the center electrode and ground electrode at the firing end of a spark plug.
That distance is known as the spark plug gap.
When the ignition system fires, electrical voltage builds until it becomes high enough to jump across this gap.
That spark ignites the compressed air-fuel mixture inside the cylinder.
The engine manufacturer selects a gap that matches the ignition system, combustion chamber, plug design, and operating conditions.
A gap tool helps you verify that the plug is actually set to that specification.
Parts of the Spark Plug You Are Measuring
At the firing end of a typical spark plug, you will see a center electrode coming through the ceramic insulator.
A curved metal strap extends over it. This is the ground electrode, sometimes called the ground strap or side electrode.
The space between these two electrodes is what you measure.
You are not measuring from the ceramic to the ground strap or from the side of the center electrode.
The measurement should represent the shortest intended firing distance between the electrode surfaces.
Types of Spark Plug Gap Tools
Several tool styles can measure spark plug gap successfully, but each has advantages and limitations.
Wire-Style Gap Gauge
A wire gauge uses pieces or loops of wire with known diameters.
Each wire represents a specific gap measurement.
For example, one may correspond to 0.035 inch and another to 0.040 inch.
You slide the appropriate wire between the electrodes.
If it passes through with light resistance, the gap is close to that measurement.
A wire gauge is one of my preferred choices because the measuring surface has a fixed diameter rather than gradually changing thickness.
It is especially useful when working with fine-wire spark plugs.
Coin-Style or Ramp Gap Tool
This familiar round tool has a gradually increasing outer edge.
Numbers around the perimeter indicate the gap at different points along the ramp.
You insert the thin end between the electrodes and gently move the plug until the electrodes contact the gauge.
Then read the number corresponding to that location.
These tools are inexpensive and convenient, but they should be used gently.
Forcing the tapered edge through a delicate fine-wire spark plug can place pressure on the center electrode.
For conventional plugs, a coin-style gauge is often perfectly adequate when used correctly.
Feeler Gauge
Flat feeler blades can also measure spark plug gap.
A blade of known thickness is inserted between the electrodes.
You look for slight resistance when the correct thickness passes through.
Stackable feeler gauges allow you to combine blades to create a specific measurement.
For example, a 0.020-inch blade plus a 0.015-inch blade creates a total of 0.035 inch.
However, flat feelers may not contact rounded or shaped electrodes as naturally as a round-wire gauge, so use the measuring method recommended for the plug.
Dedicated Spark Plug Gapping Tool
Professional gapping tools may include a gauge plus a controlled mechanism for bending the ground electrode.
These can provide greater precision and reduce the temptation to pry against the center electrode.
They are especially useful when preparing several plugs that all need exactly the same setting.
Key Takeaways:
- Wire gauges are excellent for accurate measurement and delicate fine-wire plugs.
- Coin-style ramp tools are inexpensive and convenient but should never be forced through the electrodes.
- Adjustment should be made by bending the ground electrode, not by pushing on the center electrode.
How to Find the Correct Spark Plug Gap Before Using the Tool
Do not begin with the number printed closest to the current gap.
First determine what the plug is supposed to measure.
The correct gap may be listed in:
The vehicle owner’s manual, factory service information, an under-hood emissions label, or the spark plug manufacturer’s application information.
Use the specification for the exact engine.
Spark plug gaps can differ between engines that are otherwise very similar.
They may also change between model years or ignition systems.
Do Not Guess Based on Plug Appearance
Two spark plugs can look almost identical but have different intended applications.
Likewise, the same basic engine displacement may have used several ignition systems over the years.
Use the engine specification rather than estimating what looks reasonable.
Inches vs. Millimeters
Spark plug gaps are commonly expressed in either thousandths of an inch or millimeters.
For example:
| Inches | Approx. Millimeters |
| 0.028 in. | 0.7 mm |
| 0.032 in. | 0.8 mm |
| 0.035 in. | 0.9 mm |
| 0.040 in. | 1.0 mm |
| 0.044 in. | 1.1 mm |
| 0.050 in. | 1.3 mm |
These metric values are rounded for practical comparison.
When possible, use the scale that directly matches the vehicle specification instead of repeatedly converting between units.
How to Use a Wire Spark Plug Gap Tool
A wire gauge is one of the simplest tools to use accurately.
Suppose your engine requires a 0.040-inch spark plug gap.
Find the wire on the gauge marked 0.040.
Hold the spark plug securely by the metal shell or hex area.
Do not squeeze the ceramic unnecessarily.
Step 1: Insert the Correct Wire
Move the 0.040-inch wire between the center and ground electrodes.
Do not force it.
If the wire will not enter with gentle pressure, the gap is smaller than 0.040 inch.
If it passes through very loosely, the gap is probably wider.
Step 2: Feel for Light Drag
At the correct gap, the wire should typically slide between the electrodes with slight resistance.
You should be able to move it through without bending the electrodes.
The goal is not an extremely tight fit.
Step 3: Verify With Neighboring Sizes
For greater confidence, check a slightly smaller and slightly larger gauge.
If 0.040 passes with light drag, 0.038 or a nearby smaller size should pass more freely, while a meaningfully larger gauge should not pass easily.
This approach is particularly useful when you are learning how “slight drag” should feel.
Step 4: Adjust if Necessary
If the measurement is incorrect, remove the gauge before adjusting the electrode.
Never use the measuring wire as a pry bar.
Adjust the ground strap with the designated part of the gapping tool or an appropriate electrode-bending tool.
Then measure again.
How to Use a Coin-Style Spark Plug Gap Tool
The coin-style gauge works differently because its edge becomes progressively thicker.
Start at the thinnest part of the tool.
Gently slide that portion between the electrodes.
Then move the spark plug along the tapered edge until the gauge just fills the space.
Read the value marked at that position.
Do Not Force the Tool
A common mistake is pushing the plug aggressively along the ramp until you reach the number you want.
That can unintentionally bend the electrode while you are trying to measure it.
Measurement and adjustment should be treated as two separate operations.
First determine the current gap.
Then remove the gauge and make a deliberate adjustment.
Then measure again.
Coin Gauges and Fine-Wire Plugs
Be especially careful with iridium or platinum fine-wire plugs.
The tiny center electrode can be damaged if the tapered gauge is forced against it.
A round-wire gauge is generally a better choice for delicate electrode designs.
If the spark plug manufacturer says the plug should not be regapped, follow that instruction.
How to Use a Feeler Gauge on a Spark Plug
Select the feeler blade matching the specified gap.
For a 0.035-inch specification, use a 0.035-inch blade if available.
Slide it between the electrodes.
You are looking for light resistance, similar to measuring many other mechanical clearances.
If the blade will not enter, the gap is too small.
If it moves through with virtually no contact, the gap may be too wide.
Combining Feeler Blades
If your set does not have the exact measurement, you can combine clean blades.
For example:
0.020 + 0.015 = 0.035 inch.
Make sure both blades sit flat together.
However, with very small or specialized spark plug electrodes, a wire gauge may provide a more natural contact surface.
How to Make a Spark Plug Gap Wider
If the gap is smaller than specification, the ground electrode needs to move slightly away from the center electrode.
Use the adjustment feature on the gap tool or a dedicated spark plug electrode tool.
Place the tool on the ground strap only.
Apply a very small amount of force.
Then stop and remeasure.
Spark plug electrodes do not require large movements.
A tiny bend can change the gap by several thousandths of an inch.
Never Pry Against the Center Electrode
This is one of the most important rules of spark plug gapping.
Do not place a screwdriver, gauge, or other object between the electrodes and use the center electrode as a leverage point.
That can damage the center electrode, ceramic insulator, or precious-metal tip.
Always bend the ground strap independently.
How to Make a Spark Plug Gap Smaller
If the gap is too wide, the ground electrode must move closer to the center electrode.
Some gap tools have a specific section designed for gently closing the ground strap.
Another traditional method is lightly pressing or tapping the outer ground electrode against a suitable hard surface.
If you use this approach, apply very little force and strike only the ground electrode area.
Do not hit the ceramic body.
Adjust a Little at a Time
It is easy to close the gap too far.
A better approach is:
Make a tiny adjustment, measure, make another tiny adjustment, and measure again.
This may take a few extra seconds, but it gives you much more control.
Once the correct gauge moves through with the desired light drag, stop adjusting.
Key Takeaways:
- Widen the gap by bending the ground electrode outward.
- Narrow the gap by moving the ground electrode inward.
- Make tiny adjustments and remeasure after every change.
- Never use the center electrode or ceramic insulator as a leverage point.
How Much Drag Should a Spark Plug Gap Gauge Have?
The phrase “slight drag” can be confusing if you have never gapped a spark plug before.
The gauge should contact both electrode surfaces without requiring significant force.
You should be able to slide it through smoothly.
If you have to force the gauge, the gap is too narrow for that measurement.
If the gauge rattles loosely between the electrodes, the gap is wider.
The feel is similar to checking a mechanical clearance with a feeler gauge: definite contact, but no binding.
Do Not Obsess Over Microscopic Differences
For normal automotive service, you do not need laboratory-level measurement.
Your goal is to set all plugs consistently within the manufacturer’s acceptable specification.
If the service information specifies a range rather than one exact value, keep the plugs within that range.
Should You Check the Gap on New Spark Plugs?
Generally, you should at least verify that the plug gap is appropriate for the application unless the plug manufacturer specifically advises against checking or adjusting that plug design.
“Pre-gapped” does not mean the ground strap can never move during manufacturing, packaging, shipping, or handling.
A box can be dropped.
The firing end can contact another object.
Even a small impact can change the gap.
Pre-Gapped Does Not Mean Universal-Gapped
A spark plug model may fit more than one engine application.
Different engines can sometimes use different gap specifications.
Do not automatically assume the gap from the box is correct simply because the plug physically fits the engine.
Check the application information.
Can You Gap Iridium Spark Plugs?
Some iridium plugs can be adjusted carefully, while others are supplied for specific applications and their manufacturers discourage regapping.
The important difference is the fine center electrode.
Iridium plugs often have an extremely small center tip.
That design concentrates the electrical field and provides excellent durability, but the fine tip can be damaged by careless mechanical contact.
How to Gap Iridium Plugs Safely
If the manufacturer permits adjustment, use a wire-style gauge.
Measure without dragging a heavy tapered tool against the center electrode.
When adjustment is necessary, bend only the ground strap.
Never push on the fine center tip.
If the plug is dramatically outside the required gap straight from the box, I would investigate whether you have the correct plug before bending it a large amount.
Can You Gap Platinum Spark Plugs?
Yes in many cases, but the same general caution applies.
Platinum may be used on the center electrode, ground electrode, or both.
Do not scrape, pry, or press directly against the precious-metal pads.
Use a gentle measuring method and adjust only the ground strap when permitted.
If the plug manufacturer provides a specific no-adjustment warning, follow it.
How Far Can You Safely Regap a Spark Plug?
There is no universal maximum adjustment.
If a plug needs only a few thousandths of an inch of correction, careful adjustment is generally straightforward on a conventional design.
If the plug is dramatically different from the engine specification, stop and confirm the part number.
For example, if your engine calls for 0.040 inch and a new plug measures something dramatically different, do not automatically bend it a large distance.
You may have:
The wrong spark plug, a damaged plug, or a plug intended to be used without substantial adjustment.
Large changes can alter the ground strap’s position relative to the center electrode and may affect spark exposure.
Why Spark Plug Gap Matters
The ignition system must create enough voltage to jump the gap.
As the gap gets wider, more voltage is generally required.
Cylinder pressure also affects the required voltage.
That is why a spark plug may fire perfectly outside the engine but misfire under heavy acceleration.
Inside the cylinder, pressure is much higher.
If the Gap Is Too Wide
An excessively wide gap can contribute to:
Hard starting, hesitation, misfire under load, rough running, and increased stress on ignition components.
The coil may need to produce unusually high voltage before the spark occurs.
If the ignition system cannot provide it consistently, combustion is interrupted.
If the Gap Is Too Narrow
A very narrow gap is easier for the ignition system to fire, but the spark is concentrated across a smaller distance.
A severely incorrect narrow gap can affect ignition performance.
Do not intentionally close the plugs below specification simply to hide a weak coil or worn ignition system.
Fix the underlying problem.
How to Gap All Spark Plugs Consistently
When replacing a full set, measure every plug before installation.
Do not gap the first one and assume the others match.
Set the correctly adjusted plugs together in a clean tray or their individual boxes.
This helps you avoid mixing inspected plugs with plugs you have not checked yet.
Consistency is particularly important on multi-cylinder engines.
You do not want seven plugs at one setting and one significantly different.
Record the Specification
Before starting, write the required gap on a piece of paper or place it somewhere visible.
This prevents mistakes if your gauge contains many closely spaced measurements.
It is surprisingly easy to confuse 0.040 with 0.044 or a metric number when you are working quickly.
How to Read Inches and Millimeters on a Gap Tool
Many gap tools show both scales.
A specification written as “0.040” usually means 0.040 inch, or forty thousandths of an inch.
The metric equivalent is approximately 1.0 mm.
A specification such as 0.9 mm is approximately 0.035 inch.
Do not read 0.040 as 0.40 inch.
Spark plug gaps are small clearances.
Common Approximate Conversions
A few common values are useful to recognize:
0.7 mm ≈ 0.028 inch
0.8 mm ≈ 0.031–0.032 inch
0.9 mm ≈ 0.035 inch
1.0 mm ≈ 0.039–0.040 inch
1.1 mm ≈ 0.043–0.044 inch
1.3 mm ≈ 0.051 inch
For actual service, use the precise specification provided for the engine rather than relying solely on rounded conversions.
Common Spark Plug Gap Tool Mistakes
The most common mistake is using the gauge itself as a lever against the center electrode.
The measuring tool should measure.
The adjusting portion of the tool should bend the ground strap.
Keep those functions separate.
Another mistake is forcing a ramp-style tool through the gap. This can turn the measurement process into an accidental adjustment.
People also sometimes measure dirty old spark plugs without cleaning enough deposits from the electrode area. Heavy deposits can interfere with the reading.
Worn plugs create another challenge because the electrodes may no longer have their original shape.
If a plug is heavily worn, fouled, cracked, or eroded, replace it instead of trying to restore it by adjusting the gap.
Key Takeaways:
- Never force the measuring gauge between the electrodes.
- Do not attempt to “repair” badly worn plugs simply by closing their enlarged gap.
- Measure every new plug individually and keep the final settings consistent.
Should You Gap Spark Plugs Before or After Installing Them?
Before installation.
Measuring or adjusting the electrode accurately is much easier while the plug is in your hand.
Once the plug is threaded deep into a cylinder head, the firing end is inaccessible.
Gap all plugs before beginning installation.
This also gives you an opportunity to inspect them for shipping damage.
Look for cracked ceramic, bent ground electrodes, damaged threads, or other visible problems before putting them in the engine.
Can Installing a Spark Plug Change the Gap?
Normally, proper installation should not change the electrode gap.
However, careless handling can.
Dropping the spark plug onto its firing end can bend the ground electrode.
Allowing the electrode to strike the cylinder head while guiding the plug into a deep well can also affect the setting.
Use a proper spark plug socket or another controlled installation method.
Start the plug by hand whenever possible.
Should You Regap Old Spark Plugs?
It depends on their condition.
Traditional service procedures sometimes included cleaning and regapping reusable plugs.
Modern spark plugs are generally inexpensive relative to the labor involved, and long-life plugs can accumulate significant electrode wear before replacement.
If an old plug’s gap has grown because the electrodes are eroded, simply bending the ground strap inward does not restore the missing electrode material.
The plug may still have rounded edges, deposits, or internal wear.
For a plug that has reached its replacement interval, install a new one rather than treating regapping as a substitute for replacement.
What if the Gap Is Already Correct?
Leave it alone.
There is no advantage to bending a correctly positioned ground electrode merely because you own a gapping tool.
Verify the measurement, inspect the plug, and proceed with installation.
Every unnecessary adjustment creates another opportunity to damage a delicate electrode.
What if the Gap Is Slightly Different Between New Plugs?
A small variation can be corrected when the plug design permits adjustment.
Set each plug to the engine specification.
If one plug is dramatically different, inspect it more carefully.
Its ground strap may have been bent during shipping.
If the ceramic, center electrode, or overall alignment looks damaged, replace the plug rather than trying to reshape it extensively.
Spark Plug Gap Tool vs. Feeler Gauge: Which Is Better?
Both can work.
For conventional plugs, a simple coin-style spark plug gauge is cheap and convenient.
For precise measurement, especially on fine-wire plugs, I prefer a wire-style gauge.
Feeler gauges are useful when you already own a high-quality set and need a specific thickness.
The most important issue is not which tool looks more professional.
It is whether the gauge measures the gap accurately without damaging the electrodes.
Safety When Checking Spark Plug Gap
Gap adjustment is a low-risk maintenance task, but a few precautions are worthwhile.
Work with the spark plugs removed from the engine and preferably with the engine cool.
Wear eye protection if you are cleaning deposits or working around other maintenance operations.
Do not use excessive force on the electrode.
A broken ceramic insulator or damaged plug should be discarded.
Keep new plugs clean.
Do not allow oil, grit, metal particles, or anti-seize compound to contaminate the firing end.
When installation begins, thread each plug carefully by hand to avoid damaging the cylinder-head threads.
How to Know Your Gap Is Correct
After adjustment, measure the plug one final time.
The correct gauge should pass through with slight drag.
Check that the ground strap remains centered over the center electrode rather than being bent sideways.
Inspect the ceramic for damage.
Then set the plug aside as completed.
Repeat the same process for the rest of the plugs.
When every plug is consistent, you are ready for installation.
FAQs about How to Use Spark Plug Gap Tool
How do you use a spark plug gap tool?
Find the required gap, insert the matching gauge between the center and ground electrodes, and check for slight drag.
If adjustment is necessary, bend only the ground electrode and remeasure.
How tight should a spark plug gap gauge feel?
It should move through with light resistance.
You should not have to force it, but it should not move freely without contacting both electrodes.
How do you use a round coin spark plug gap tool?
Insert the thin section between the electrodes and gently slide along the increasing thickness until the gauge fills the gap.
Read the corresponding measurement without forcing the tool.
How do you use a wire spark plug gap gauge?
Select the wire matching the required gap and slide it between the electrodes.
Light drag indicates the clearance is approximately correct.
How do you widen a spark plug gap?
Use the adjustment feature of the gap tool to bend the ground electrode slightly away from the center electrode.
Do not pry against the center electrode.
How do you close a spark plug gap?
Gently bend the ground strap toward the center electrode using an appropriate gapping tool.
Make small adjustments and measure after each one.
Which electrode should you bend?
Only the ground electrode should normally be bent during standard gap adjustment.
Avoid placing adjustment force on the center electrode or ceramic insulator.
Can you use a screwdriver to gap spark plugs?
I do not recommend it.
A screwdriver can easily place force against the center electrode or ceramic and may damage the plug.
Use a proper gapping tool.
Can you use a feeler gauge for spark plugs?
Yes.
Select the correct blade thickness and check for light drag between the electrodes.
A wire gauge may be preferable for some fine-wire electrode designs.
Should you check pre-gapped spark plugs?
It is sensible to verify the specification and inspect the plug when the manufacturer allows it.
Do not aggressively adjust fine-wire plugs that are intended to remain at their factory setting.
Can you gap iridium spark plugs?
Some can be adjusted carefully, but manufacturer instructions vary.
Never push against the fine iridium center electrode. Use a wire gauge and adjust only the ground strap when adjustment is permitted.
Can you gap platinum plugs?
Many platinum plugs can be checked and carefully adjusted, but avoid contacting precious-metal electrode surfaces unnecessarily.
Follow the plug manufacturer’s instructions.
Can a spark plug gap tool damage the plug?
Yes, if it is forced between the electrodes or used as a lever against the center electrode.
Gentle measurement and proper ground-strap adjustment prevent most damage.
What happens if the spark plug gap is too wide?
The ignition system may have difficulty jumping the gap, particularly under high cylinder pressure.
That can cause hesitation, hard starting, or misfire under load.
What happens if the spark plug gap is too small?
A very narrow gap changes the intended spark characteristics and may negatively affect combustion.
Use the manufacturer’s specified setting rather than intentionally narrowing the gap.
Is a wire gap tool better than a coin tool?
For delicate iridium and platinum fine-wire plugs, I prefer a wire gauge because its fixed round diameter reduces the need to drag a tapered surface across the electrodes.
For conventional plugs, either can work when used gently.
What does .040 spark plug gap mean?
It means the space between the electrodes is 0.040 inch, or approximately 1.0 mm.
What is .035 spark plug gap in millimeters?
Approximately 0.9 mm.
Should all spark plugs have the same gap?
Normally, yes, when they are the same correct plug for the same engine.
Set all cylinders consistently to the specified value.
Can you gap spark plugs while they are installed?
No practical adjustment should be attempted with the plugs installed in the cylinder head.
Check and adjust them before installation.
Do worn spark plugs need to be regapped?
If the plugs are still serviceable and the manufacturer allows it, they may sometimes be checked.
However, severely worn or eroded plugs should be replaced rather than simply regapped.
Conclusion
Learning how to use spark plug gap tool correctly is mainly about measuring gently and adjusting only the ground electrode.
Start by finding the correct specification for your exact engine. Do not assume a universal gap applies to every vehicle or spark plug.
With a wire gauge, choose the wire matching the required measurement and slide it between the electrodes. With a coin-style gauge, use the tapered edge gently and read the measurement where it fills the gap. A properly set plug should allow the correct gauge to pass with light drag.
If the gap is too small, carefully bend the ground electrode outward. If it is too wide, move the ground electrode inward. Make only tiny adjustments and remeasure after every change.
Never pry against the center electrode, and take extra care with fine-wire iridium or platinum plugs. Some modern plugs are supplied pre-gapped for specific applications and should not be significantly adjusted unless the manufacturer specifically permits it.
For most DIY work, I recommend a wire-style spark plug gap gauge combined with a proper ground-electrode adjustment tool. It makes the measurement easy to interpret and reduces the chance of damaging delicate electrode designs.
The basic rule is simple: measure, adjust the ground strap slightly, measure again, and stop as soon as the specified gauge passes with light resistance. That approach gives you consistent spark plug gaps without damaging the components responsible for producing the spark.