
Learning how to read a spark plug gap tool is easier than it first looks. The tool measures the small space between the center electrode and the ground electrode. That space is called the spark plug gap.
A common mistake is to treat the tool like a ruler and pick any number that looks close. The right method is different. First find the gap listed for your engine or spark plug, then use the tool to check whether the plug matches that value.
For many U.S. vehicle owners, the gap may be listed in thousandths of an inch, such as 0.040 inch. It may also appear in millimeters, such as 1.0 mm. Once you know how the markings work, checking a plug takes only a short time.

What Is a Spark Plug Gap Tool?
A spark plug gap tool is a small gauge used to check the distance between a spark plug’s two electrodes. It can also help you adjust the gap when the plug design allows adjustment.
Several types are common. A round wire-style gauge uses a rising edge to measure the gap. A feeler gauge uses thin metal blades with known thickness. Some tools combine both styles.
The tool does not tell you the correct gap for every engine. It only tells you the size of the gap you are measuring. The correct target must come from the vehicle maker, engine maker, or spark plug maker.

- ✦ Round wire gauge
A round gauge has a sloped edge or a set of wire sizes. You move the spark plug gap along the gauge until the fit matches the desired measurement.
- ✦ Feeler gauge
A feeler gauge has thin blades marked with their thickness. You select the blade or blade stack that matches the required gap.
- ✦ Combination gauge
Some tools include a round gap scale and feeler blades. They work in much the same way, but the markings may look different.
Why the Gap Matters
The ignition system must send enough voltage across the gap to create a spark. A gap that is too wide can make the spark harder to produce. A gap that is too small can reduce the spark distance and may affect combustion.
The correct gap is a design choice. It depends on the engine, ignition system, spark plug, and operating conditions. That is why a gap that works on one vehicle may not be right for another.
How to Read a Spark Plug Gap Tool in Inches
Many spark plug gap specifications in the United States use inches. You may see a value such as 0.028, 0.032, 0.040, or 0.060 inch. These numbers describe the distance across the spark plug gap.
The decimal is important. A reading of 0.040 inch means forty thousandths of an inch. It does not mean four hundredths of an inch in a casual sense. Read every digit carefully.
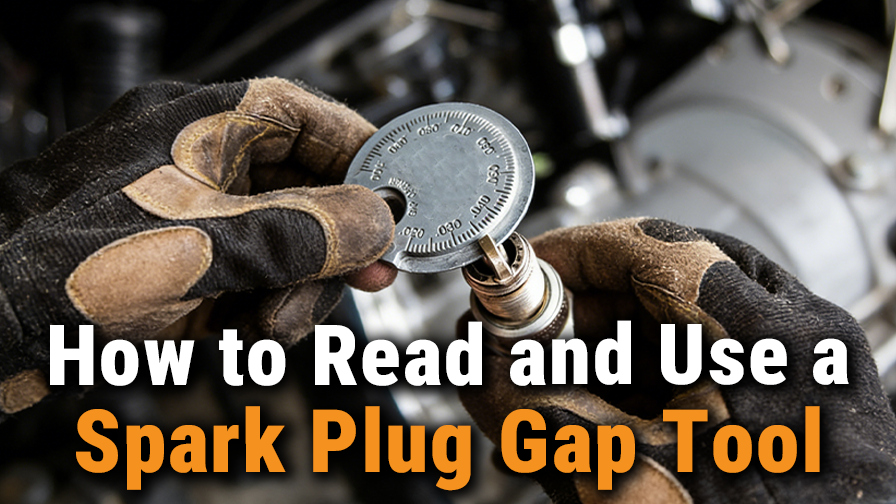
When learning how to read a spark plug gap tool, start by finding the printed inch scale. On a round gauge, the numbers often increase as you move around the curved edge. On a feeler gauge, each blade may carry its own thickness marking.

- ✦ 0.030 inch
This means thirty thousandths of an inch. It is a gap measurement, not a plug size.
- ✦ 0.040 inch
This means forty thousandths of an inch. If the plug specification says 0.040 inch, this is the target measurement.
- ✦ 0.045 inch
This means forty-five thousandths of an inch. A small difference can matter when the engine calls for a precise gap.
Do Not Drop the Leading Zero
A value such as 0.035 inch is often spoken as thirty-five thousandths. The leading zero simply shows that the measurement is less than one inch.
Keep the full value when you compare the tool with a service specification. This reduces the chance of confusing 0.035 with 0.350 inch, which is a much larger gap.
How to Read a Spark Plug Gap Tool in Millimeters
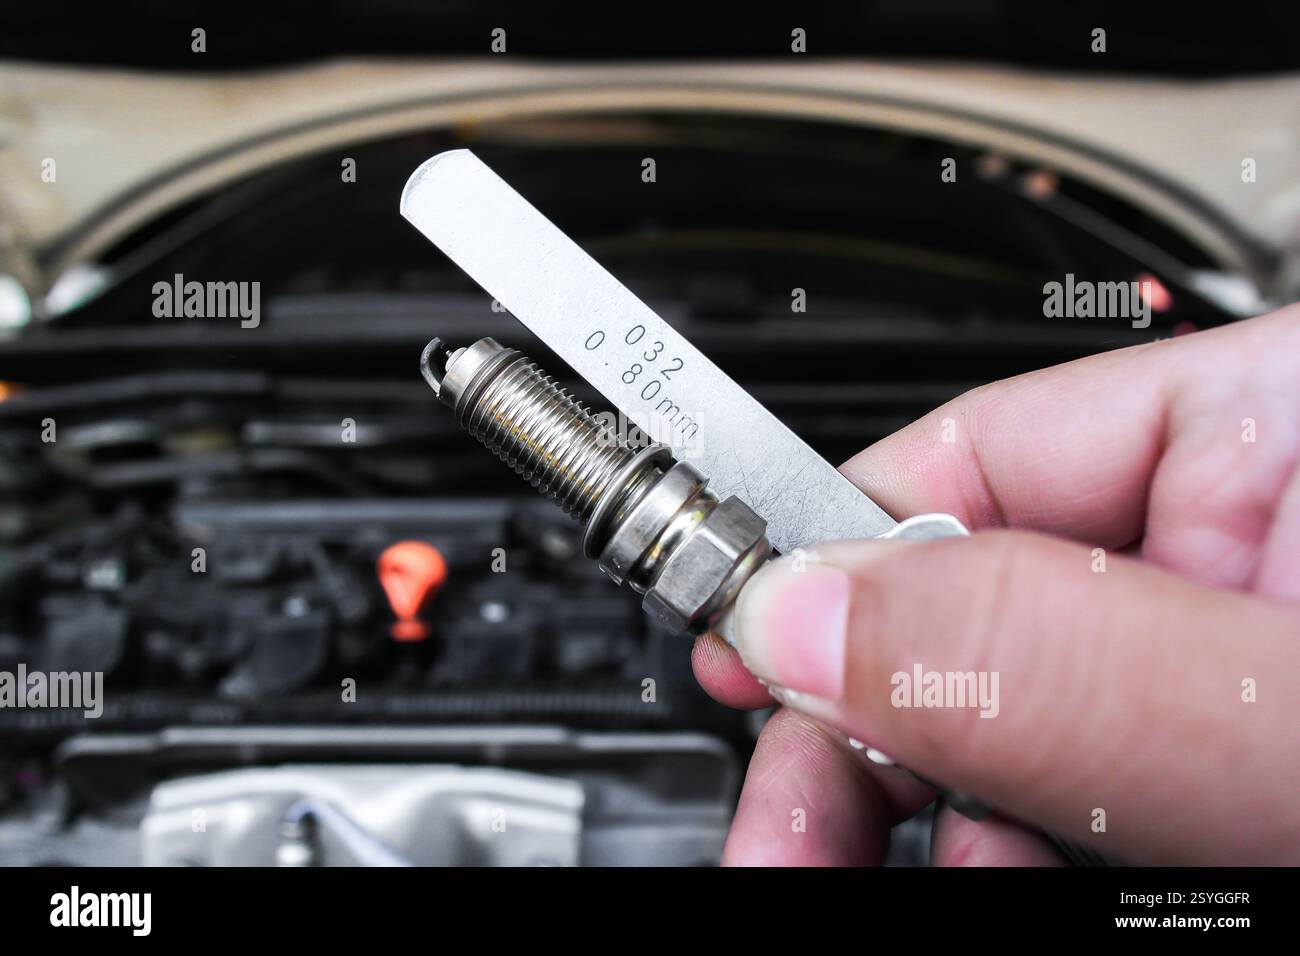
Some spark plug tools use millimeters, often written as mm. You may see values such as 0.7 mm, 0.8 mm, 1.0 mm, or 1.1 mm. The number shows the same type of measurement as an inch reading, but it uses the metric system.
Some tools show both units. If your vehicle specification says 1.0 mm, look for the 1.0 mm marking. If your specification gives 0.040 inch, use the inch scale or convert the value carefully.
A useful conversion is 1 inch = 25.4 mm. For example, 0.040 inch is about 1.02 mm. Because spark plug gaps can be precise, use the unit and tolerance specified for your engine rather than rounding a conversion to an unrelated target.
- ✦ mm means millimeters
The mm marking tells you that the scale uses millimeters. It measures the same physical gap as the inch scale.
- ✦ Compare like units
If your specification uses millimeters, read the metric scale when possible. This avoids needless conversion errors.
- ✦ Check the decimal
A reading of 0.8 mm is not the same as 8 mm. Small decimal differences can change the actual plug gap.
Inch-to-Metric Examples
For reference, 0.028 inch is about 0.71 mm, 0.032 inch is about 0.81 mm, and 0.040 inch is about 1.02 mm. These are conversions, not universal spark plug settings.
When you learn how to read a spark plug gap tool, focus on matching the tool to the specification. Do not choose a gap simply because an inch and metric value look close.
How to Read a Round Spark Plug Gap Gauge
A round spark plug gap gauge usually has a tapered edge. The numbers along the edge represent different gap sizes. You place the gap over the gauge and find the point where the electrodes fit the measurement.
Start with the target gap from the service information. Then place the gauge between the center electrode and ground electrode. Move the gauge until the electrodes line up with the target marking.
The key is to read the number at the point where the electrodes meet the gauge. Do not read the number from the widest part of the tool unless that is where the electrodes actually fit.

- ✦ Step 1: Find the target
Look up the required spark plug gap before touching the gauge. Write down the exact value if needed.
- ✦ Step 2: Place the gauge
Put the gauge between the center electrode and ground electrode. Keep the tool aligned with the gap.
- ✦ Step 3: Find the fit
Move along the gauge until the electrodes meet the desired measurement point.
- ✦ Step 4: Read the marking
Read the inch or millimeter value at the contact point. Compare it with the required specification.
What a Correct Fit Feels Like
The gauge should pass through the gap with light, controlled contact. It should not require force. A very loose fit suggests that the gap is larger than the gauge thickness or marking being checked.
With a feeler blade, a slight drag is normal when the thickness matches the gap. Heavy resistance can mean the blade is too thick or the electrodes are not aligned.
How to Read a Spark Plug Gap Tool With Feeler Blades
A feeler gauge works by matching a blade thickness to the spark plug gap. Each blade has a marked thickness. The marking may be in inches, millimeters, or both.
To check the plug, select the blade that matches the specified gap. Slide it between the electrodes. The correct blade should fit with a small amount of drag without needing force.
Some feeler gauges let you combine blades. For example, a 0.020-inch blade and a 0.020-inch blade together make 0.040 inch. This method can help when the exact single blade is not included.
- ✦ Select the correct blade
Choose the blade that matches the specified gap. Check the unit before using it.
- ✦ Keep the blade flat
Insert the blade straight into the gap. Tilting it can make the fit harder to judge.
- ✦ Use light pressure
Do not force the blade between the electrodes. Excess pressure can change the gap or damage the blade.
- ✦ Use blade stacks when needed
Add marked blades together when the gauge design permits it. The combined thickness equals the total gap measurement.
How to Tell if the Gap Is Too Wide or Too Narrow
If a blade marked 0.040 inch slides in with little resistance but a thicker blade also fits, the gap is larger than 0.040 inch. If the 0.040-inch blade will not enter without force, the gap is smaller than 0.040 inch.
This simple comparison makes a feeler gauge useful for diagnosis. Test nearby sizes when you are unsure, but always compare the final reading with the required specification.
How to Check and Adjust a Spark Plug Gap
Once you know how to read a spark plug gap tool, checking a plug is simple. Remove the plug only when the engine is cool enough to work on safely, and keep dirt from falling into the spark plug hole.
First inspect the plug. Look for damage to the insulator, center electrode, ground electrode, and threads. Do not install a plug that is cracked, badly worn, or otherwise damaged.
Next, measure the gap. If it differs from the specified value, follow the spark plug maker’s instructions for adjustment. Some modern plugs come pre-gapped and may have a design that does not tolerate aggressive bending.

- ✦ Check the specification
Use the owner’s manual, service information, or the spark plug manufacturer’s application data to find the required gap.
- ✦ Inspect the plug
Check for cracks, worn electrodes, damaged threads, and other visible defects before adjusting or installing it.
- ✦ Measure before adjusting
Read the existing gap first. This tells you how far the plug differs from the target.
- ✦ Adjust with care
Use a proper gap tool and apply force only where the plug maker permits it. Avoid striking the center electrode or porcelain insulator.
- ✦ Measure again
After any adjustment, check the gap again. Small changes are easier to control when you measure after each adjustment.
Common Mistakes to Avoid
One common mistake is using a generic gap value from memory. Another is assuming every new spark plug arrives at the exact gap your engine needs. Always check the application data.
Do not use excessive force with a gauge. Do not pry against the center electrode unless the tool and plug maker specifically allow that method. A damaged electrode or insulator can turn a simple tune-up into a larger repair.
It is also easy to read the wrong scale. Before taking a measurement, confirm whether the tool shows inches, millimeters, or both.
- ✦ Guessing the gap
The correct value is engine-specific. Never choose a gap only because it is common on another vehicle.
- ✦ Forcing the gauge
Force can change the gap and may damage the plug. Use gentle pressure.
- ✦ Reading the wrong scale
A tool may show inch and metric markings close together. Confirm the unit before reading the number.
- ✦ Skipping a second check
After adjusting a plug, measure again. This confirms that the final gap matches the target.
How to Choose the Right Spark Plug Gap Tool
A basic gap tool can work well for routine maintenance, but the best choice depends on the type of plugs you service. A round wire gauge is compact and quick. A feeler gauge gives a direct thickness measurement.
For regular home maintenance, choose a tool with clear markings and the units you use most often. A tool that shows both inches and millimeters can reduce conversion work.
If you work on several vehicles, check that the tool covers the gap range you need. Good visibility also matters. Tiny numbers are easy to misread in a dim garage.

- ✦ Clear markings
Choose a gauge with easy-to-read numbers. Clear markings reduce measurement errors.
- ✦ Useful measurement range
Make sure the tool covers the spark plug gaps you expect to check.
- ✦ Correct measurement units
Inch markings are useful for many U.S. applications, while metric markings are common on many parts and service documents.
- ✦ Durable construction
A sturdy gauge should hold its shape and markings during normal shop or garage use.
When a Simple Gauge Is Enough
For an occasional tune-up, a basic spark plug gap gauge is often all you need. The important part is not how complex the tool looks. It is whether you can make a clear, accurate measurement.
If you service engines often, a quality feeler gauge or a well-made combination tool can make repeated checks easier. Keep the tool clean and store it where the blades or measuring edge will not bend.
Why the Correct Spark Plug Gap Matters for Engine Performance
The spark plug gap affects how the ignition system starts the spark across the electrodes. The required gap is chosen as part of the engine’s ignition and combustion design.
A gap that is outside the specified range can contribute to ignition problems. Symptoms may include a misfire, rough running, hard starting, or poor response, although many other faults can cause the same symptoms.
That is why gap measurement should be part of a wider inspection. If a plug repeatedly changes gap or shows unusual wear, replacing the plug or finding the cause may matter more than repeatedly resetting the gap.
- ✦ Starting
The ignition system must create a spark across the gap during starting. The specified gap helps keep that process within the system’s intended range.
- ✦ Combustion
A correctly set plug helps the ignition system deliver the spark the engine was designed to use.
- ✦ Consistent maintenance
Checking the gap during plug service can help confirm that the plug matches the required specification.
- ✦ Fault finding
An incorrect gap can be one possible cause of an ignition issue, but it should not be treated as the only possible cause.
The Gap Is Not a Universal Setting
There is no single spark plug gap that fits every car, truck, motorcycle, lawn mower, or small engine. Even two engines made by the same company may use different specifications.
Use the exact application data for your engine and plug. This is the most important rule to remember when learning how to read a spark plug gap tool.