
To remove a seized glow plug safely, first follow the removal procedure for your exact diesel engine, use the recommended engine temperature, clean the area around the plug, apply a suitable penetrant if appropriate, and work the glow plug back and forth with small controlled movements rather than forcing it out. If the plug requires unusually high torque, begins twisting, or loosens but will not pull out, stop before it breaks. Carbon around the tip or corrosion around the threads may require specialized cleaning or extraction.
A seized glow plug is very different from an ordinary stubborn bolt. Glow plugs are long, relatively thin components that spend years exposed to extreme combustion temperatures. Their threaded bodies can seize in the cylinder head, while carbon can accumulate around the heating tip inside the combustion chamber.
Applying a long breaker bar and simply increasing force can snap the glow plug. Once that happens, part of the plug may remain inside the cylinder head, turning a routine maintenance job into a specialized extraction repair.
Another important point is engine temperature. Some diesel manufacturers specify removing glow plugs with the engine warm, while other procedures differ. There is no universal rule that every glow plug should be removed hot or cold. The service procedure for your particular engine takes priority.
In this guide, I’ll explain how to remove a seized glow plug, why glow plugs get stuck, how to loosen one gradually, when penetrating oil may help, what to do if the threads loosen but the plug will not come out, and when you should stop before causing expensive cylinder-head damage.
Why Do Glow Plugs Seize?
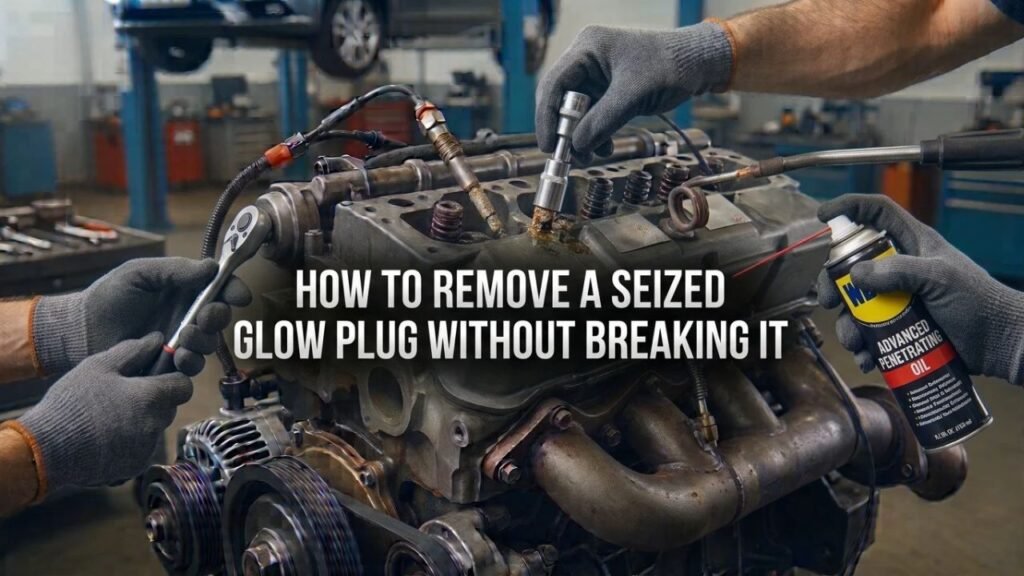
Glow plugs operate in one of the harshest environments in the engine.
Their heating tips extend into or near the combustion chamber, where they are exposed to extremely high temperatures, combustion pressure, soot, and repeated heating and cooling cycles.
Over thousands of miles, several things can make removal difficult.
Carbon Buildup Around the Glow Plug Tip
Carbon is one of the most common causes of a glow plug that unscrews but refuses to come out.
The threaded portion may already be free, but deposits around the heating tip can make the lower part of the glow plug larger than the opening through which it must pass.
Trying to pull harder may break the tip.
This situation requires a different approach from a plug whose threads themselves are seized.
Corrosion in the Threads
The glow plug and cylinder head may be made from different metals.
Heat, moisture, and long service intervals can contribute to corrosion around the threaded section.
This can make the initial breakaway torque unusually high.
Excessive Previous Tightening
If someone installed the glow plug too tightly, the threads may have been overstressed.
Overtightening can distort the plug body, damage cylinder-head threads, and make future removal much more difficult.
Very Long Service Interval
A glow plug that has remained installed for many years has experienced countless thermal cycles.
Even if it still works, the combination of carbon and corrosion may make removal difficult.
Injector or Combustion Problems
A poorly spraying injector can create abnormal heat or carbon formation around a specific glow plug.
If one cylinder repeatedly develops seized or damaged glow plugs, the underlying combustion condition deserves investigation.
Key Takeaways:
- Glow plugs can seize from carbon, corrosion, overtightening, or long-term heat cycling.
- A plug that will not turn and a plug that turns but will not pull out are different problems.
- Excessive force can snap the glow plug inside the cylinder head.
Before You Try to Remove a Seized Glow Plug
Preparation is one of the most important parts of the job.
Do not start by applying maximum torque.
First confirm that you have access to the correct service information.
Check the Engine-Specific Removal Procedure
Find the procedure for the exact:
Year, make, model, engine code, and glow plug type.
Some manufacturers specify a particular engine temperature.
Some specify maximum removal torque.
Some engines are known for carbon accumulation and have special procedures designed to reduce the risk of breakage.
Do not substitute a generic internet torque number for the specification for your engine.
Make Sure You Have the Correct Socket
Glow plugs often use relatively small hex sizes.
Use a high-quality deep socket that fits the hex precisely.
A loose or oversized socket can round the glow plug.
Whenever possible, use a straight extension and keep the socket aligned with the plug.
Side-loading a long glow plug increases the chance of bending or breaking it.
Clean the Area First
Before loosening the glow plug, remove dirt, sand, and debris from around it.
A vacuum and suitable compressed-air technique can help.
Wear eye protection if using compressed air.
Once the glow plug comes out, the opening leads toward the combustion chamber, so preventing debris from entering is important.
Disconnect Electrical Connections Carefully
Remove the glow plug connector, bus bar, or electrical terminal according to the engine’s design.
Old connectors can become brittle from years of heat exposure.
Pull on the connector itself rather than yanking on the wiring.
Should You Remove a Seized Glow Plug Hot or Cold?
There is no single answer for every diesel engine.
Cylinder heads are commonly aluminum, while glow plugs are generally steel or another metal alloy. These materials expand differently as temperature changes.
For some engines, the manufacturer may recommend removal with the engine warm because thermal expansion can reduce thread resistance.
Other manufacturers may specify a different condition.
Why a Warm Engine Can Sometimes Help
Heat expands the cylinder head.
This can sometimes reduce the grip around the glow plug threads.
Warm temperatures may also soften certain carbon deposits.
But this does not mean you should work on an extremely hot engine.
A hot engine creates burn hazards and may make surrounding components difficult to handle.
Follow the Manufacturer
The safest rule is:
Use the engine temperature specified by the manufacturer for glow plug removal.
If no specific information is available, avoid guessing aggressively. A diesel specialist familiar with that particular engine may be a better option when the plug already appears heavily seized.
Can Penetrating Oil Help a Seized Glow Plug?
It can sometimes help when corrosion around the threaded portion contributes to the seizure.
However, penetrating oil is not a guaranteed solution.
The threads may be relatively deep in the cylinder head, and the penetrant may not easily reach the area causing resistance.
Carbon around the tip is also inside the combustion side of the head, where external penetrant may have limited effect.
Use Only a Small Amount
If the service procedure allows penetrant, apply a controlled amount around the base of the glow plug.
Allow time for it to work.
Avoid flooding the glow plug well with liquid.
Excess fluid creates unnecessary mess and can potentially enter places where you do not want it.
Penetrant Does Not Fix Carbon Lock
If the plug threads out normally but then sticks while being pulled upward, penetrating oil around the upper threads may do very little.
That usually indicates carbon around the tip.
Carbon removal may require specialized tools or procedures.
How to Remove a Seized Glow Plug Step by Step
The goal is controlled movement, not maximum force.
Step 1: Warm or Cool the Engine as Specified
Follow the engine manufacturer’s recommendation.
If a warm-engine procedure is required, run the engine only long enough to reach the specified condition.
Use gloves and take care around hot exhaust, turbo, intake, and cooling-system components.
Step 2: Clean Around the Glow Plug
Remove loose debris before disconnecting and loosening anything.
This helps prevent contamination from entering the glow plug bore.
Step 3: Disconnect the Glow Plug Electrical Connection
Remove the connector or bus bar carefully.
Inspect the terminal for corrosion or damage while you are there.
Step 4: Apply Penetrant if Appropriate
If the procedure allows it, apply a small amount around the glow plug base.
Give it time to work.
A repeated light application may be more useful than flooding the area.
Step 5: Attach the Correct Socket
Keep the extension as straight as possible.
Do not use a universal joint unless access absolutely requires it because the angled load can make it harder to feel what the glow plug is doing.
A small ratchet generally provides better feedback than a long breaker bar.
Step 6: Apply Gentle Counterclockwise Pressure
Begin loosening the glow plug slowly.
If it moves normally, continue carefully.
If resistance is much greater than expected, stop.
Do not assume more leverage is automatically safer.
Step 7: Work the Plug Back and Forth
If the plug begins moving but remains tight, a controlled back-and-forth technique can help.
Loosen it a small amount.
Then turn it slightly back toward the tightening direction.
Loosen it again a little farther.
This can gradually break deposits free rather than forcing all of the contamination through the threads at once.
Do not repeatedly tighten the plug hard.
The movement should be small and controlled.
Step 8: Reapply Penetrant if the Procedure Allows
If some thread movement has opened a path, a small additional amount of penetrant may reach farther into the threads.
Let it work before continuing.
Step 9: Continue Slowly
As long as resistance gradually decreases and the plug continues to move normally, continue loosening.
If resistance increases sharply, stop.
A sudden change may indicate carbon binding, damaged threads, or the glow plug beginning to distort.
Step 10: Remove the Plug Gently
Once completely unthreaded, pull the glow plug straight out.
Do not pry sideways.
If it does not come out despite being fully unscrewed, carbon around the tip is likely holding it.
That requires a different strategy.
Key Takeaways:
- Use a small, controlled tool rather than maximum leverage.
- Back-and-forth movement can gradually free deposits.
- Stop if resistance suddenly increases or the plug appears to twist.
What if the Glow Plug Loosens but Won’t Come Out?
This is an important warning sign.
If the glow plug has completely unthreaded but remains trapped in the bore, the problem is probably no longer the threads.
Carbon may have accumulated around the heating tip.
Trying to yank the plug out can break that tip inside the cylinder.
Do Not Use Pliers and Pull Hard
Grabbing the electrical terminal or upper body with locking pliers and pulling aggressively can damage the glow plug.
The narrow lower portion is much weaker than it looks.
Carbon Reaming May Be Required
Professional glow plug service kits sometimes include appropriately sized carbon reamers.
These tools clean deposits from the glow plug bore.
However, they must be matched to the engine.
Incorrect reaming can damage the cylinder head or introduce debris into the combustion chamber.
If you do not have the engine-specific procedure and tools, this is a good point to involve a diesel specialist.
How Much Torque Can You Use on a Seized Glow Plug?
There is no universal safe maximum.
This is one of the most important things to understand.
Glow plugs vary dramatically in:
Thread diameter, construction, material, length, and breaking strength.
Manufacturers may publish maximum removal torque for certain engines or glow plug designs.
Use that value if available.
Why a Breaker Bar Is Risky
A long breaker bar removes much of your ability to feel the glow plug.
You can apply enough torque to twist the body before realizing what is happening.
The goal is not simply to exceed the seizure force.
The goal is to free the plug without exceeding the plug’s mechanical strength.
If the plug does not respond within the known safe removal procedure, stop.
Signs a Glow Plug Is About to Break
Glow plugs do not always give clear warning, but several conditions should make you stop.
If the upper part of the plug appears to twist while the threaded body does not move, that is dangerous.
Likewise, if the plug suddenly feels springy rather than solid, the body may be deforming.
Increasing resistance after initially loosening is another warning sign.
A plug that turns but does not rise from the head may have carbon packed around its tip.
Stop Before Failure
A seized intact plug is far easier to deal with than a broken plug.
Stopping is not failure.
It may save hours of extraction work and potentially avoid cylinder-head removal.
What Happens if a Glow Plug Breaks?
A glow plug can break in several places.
The electrical terminal may snap.
The hex or upper body may separate.
The threaded shell may remain in the cylinder head.
The heating tip may also break off in the combustion chamber.
Each situation requires a different extraction method.
Broken Above the Threads
If enough of the body remains accessible, extraction may be relatively straightforward with the proper tool.
Broken Flush With the Head
This is more difficult.
Special drilling, threading, and extraction equipment may be required.
Accuracy is critical because the cylinder head must not be damaged.
Broken Tip Inside the Cylinder
This is particularly concerning.
Do not assume the piece will harmlessly pass through the engine.
A loose metal or ceramic fragment can potentially damage the piston, valves, cylinder wall, or combustion chamber.
If the tip is missing, locate it before running the engine.
Can You Drill Out a Broken Glow Plug?
Specialized glow plug extraction kits often use drilling as part of the process.
But drilling into a cylinder head requires careful alignment and depth control.
A drill that wanders can damage the glow plug bore or cylinder-head threads.
Drilling too deeply can damage internal engine components.
Metal chips can also enter the cylinder.
This is not a repair I would recommend improvising with a normal handheld drill unless you have the proper guide system and engine-specific procedure.
Professional extraction kits are designed to keep the drill centered and limit depth.
Can a Broken Glow Plug Be Removed Without Taking Off the Cylinder Head?
Often, yes.
Professional technicians can sometimes remove broken glow plugs with the cylinder head still installed.
Specialized extraction systems may allow them to:
Drill the remaining plug body, thread the shell, pull the remaining section out, and clean the bore.
Whether this is possible depends on where the glow plug broke and whether the tip has fallen into the cylinder.
When Cylinder-Head Removal May Be Necessary
Head removal may become necessary when:
The heating tip cannot be retrieved, the bore is severely damaged, an extraction attempt fails, or access prevents safe repair.
Because cylinder-head removal is expensive, avoiding glow plug breakage in the first place is extremely valuable.
Can Carbon Be Removed Before Taking the Glow Plug Out?
In some engines, specialized procedures allow carbon around the glow plug to be softened or removed.
The exact procedure depends heavily on engine design.
Do not pour random solvents into the glow plug hole or combustion chamber.
Some chemicals can damage seals, contaminate engine oil, create hydrolock risk, or interfere with emissions systems.
Use only a method approved for the engine.
Should You Use an Impact Wrench on a Seized Glow Plug?
Generally, I would avoid using a conventional impact wrench.
Glow plugs are too slender and delicate for indiscriminate high-impact torque.
Impact tools can make it difficult to feel when the plug is beginning to twist or fail.
Some professional technicians use specialized controlled vibration tools designed specifically for seized glow plugs, but that is different from attaching a standard high-torque impact wrench.
For DIY removal, smooth controlled torque is safer.
Can You Use Heat Around a Seized Glow Plug?
Applying external flame or a torch around a glow plug installed in an engine is generally a poor idea.
There may be:
Fuel lines, plastic wiring, oil residue, intake components, and other heat-sensitive or flammable materials nearby.
Engine temperature itself may be useful when the manufacturer specifies a warm-removal procedure.
That is much safer than applying uncontrolled local flame.
How to Prevent Glow Plugs From Seizing Again
Correct installation is important.
Use the exact plug specified for the engine.
Clean the glow plug bore according to the manufacturer procedure.
Make sure the threads start smoothly by hand.
Then tighten the plug to the specified torque.
Do Not Overtighten
Glow plugs usually require relatively modest torque.
Overtightening can stretch the body or damage the cylinder-head threads.
Use a small torque wrench capable of accurately measuring the specified range.
Should You Use Anti-Seize?
Do not automatically put anti-seize on glow plug threads.
Some glow plug manufacturers and engine manufacturers specify dry installation, while others may provide their own recommendations.
Lubricating the threads changes friction and therefore changes the relationship between torque-wrench reading and actual clamping force.
Follow the instructions for your exact plug.
Address Injector Problems
If one cylinder produces unusually heavy carbon or repeatedly damages glow plugs, inspect the injector.
A poor spray pattern can contribute to abnormal deposits and heat.
Replacing glow plugs repeatedly without fixing the root cause will not solve the problem.
Key Takeaways:
- Correct installation torque helps prevent future seizure and breakage.
- Do not add anti-seize unless the engine or glow plug manufacturer recommends it.
- Repeated trouble in one cylinder can indicate an injector or combustion problem.
Should You Replace All Glow Plugs While One Is Out?
Not automatically.
If one glow plug has failed but the others are relatively new and test correctly, replacing only the failed one may be reasonable.
However, if the plugs are all the same age and accessing them requires significant labor, replacing the set can make sense.
A seized plug changes the equation.
Do not remove perfectly functional glow plugs unnecessarily if each one carries substantial breakage risk.
Test the remaining plugs first and weigh the benefits against the removal risk.
What if Only One Glow Plug Is Seized?
Leave the others alone until you know why that particular plug is stuck.
If the engine has one cylinder with unusual carbon accumulation, the injector may be involved.
Inspect the removed plugs for differences.
One heavily carboned plug while the others are clean is useful diagnostic information.
If several are seized similarly, age and service history may be the primary factors.
Is It Safe to Drive With a Seized Glow Plug?
If the seized glow plug is still intact and functioning, the seizure itself does not necessarily prevent the engine from running.
If the plug has electrically failed, the engine may still operate but cold starting can become more difficult.
However, if the glow plug has been partially loosened, damaged, cracked, or broken during attempted removal, do not simply reassemble and drive.
A partially installed plug may not seal combustion pressure correctly.
A broken tip may also create internal engine risk.
Resolve the condition before running the engine.
When Should You Stop and Call a Professional?
Several situations justify professional help.
If the manufacturer publishes a maximum removal torque and you are approaching it without movement, stop.
If the glow plug begins twisting, stop.
If it loosens but will not pull free, stop before forcing it.
If the hex rounds, the upper body breaks, or the heating tip is missing, specialized extraction tools may be required.
You should also consider professional removal when plug access is extremely poor or cylinder-head removal would be very expensive if something goes wrong.
Paying for controlled extraction can be much cheaper than repairing a damaged head.
What Tools Are Useful for Seized Glow Plug Removal?
For a straightforward removal, useful equipment may include:
- Correct deep glow plug socket
- Small ratchet
- Accurate low-range torque wrench
- Straight extensions
- Penetrating fluid approved for the job
- Vacuum or suitable cleaning equipment
- Multimeter for diagnosis
For severe cases, technicians may use specialized glow plug extraction and carbon-removal tools.
The specific extractor must match the plug dimensions and engine.
Generic bolt extractors are not automatically appropriate.
Common Mistakes When Removing Seized Glow Plugs
The most common mistake is using too much force too early.
A long breaker bar can turn a repairable seized plug into a broken one.
Another mistake is failing to distinguish between seized threads and carbon binding at the tip.
If the plug already turns freely, additional rotational force will not necessarily solve a carbon-packed lower bore.
Working at the wrong engine temperature can also make removal harder.
Another mistake is installing the replacement without cleaning the bore appropriately.
Carbon left behind can interfere with installation and contribute to future problems.
Finally, do not automatically coat the replacement with anti-seize unless the manufacturer calls for it.
FAQs about How to Remove a Seized Glow Plug
How do you remove a seized glow plug?
Follow the engine-specific procedure, use the correct engine temperature, clean around the plug, apply approved penetrant if appropriate, and work the plug loose gradually using small back-and-forth movements.
Stop if the required torque becomes excessive.
Should the engine be hot or cold when removing glow plugs?
It depends on the engine.
Some manufacturers specify warm removal, while others have different procedures.
Follow service information for the exact engine.
Can penetrating oil free a seized glow plug?
It may help with corrosion around the threads.
It is less effective against heavy carbon around the glow plug tip.
How long should penetrating oil sit?
There is no universal time.
Follow the product and engine-service instructions. Multiple light applications over time may help in some cases.
Should I use a breaker bar?
Use caution.
A breaker bar can easily apply enough torque to snap a glow plug.
If the plug requires extreme leverage, stop and find the manufacturer-specific removal limit.
Can I use an impact wrench?
A standard high-torque impact wrench is not recommended for routine seized glow plug removal.
Controlled hand torque provides better feedback.
Can I work the glow plug back and forth?
Yes, small controlled back-and-forth movements can help free deposits when the plug has begun moving.
Do not repeatedly retighten it with significant force.
What if the glow plug turns but won’t come out?
Carbon may be built up around the heating tip.
Do not pull aggressively. Engine-specific carbon cleaning or a professional glow plug removal tool may be required.
Why does a glow plug get stuck?
Common causes include carbon buildup, corrosion, years of heat cycling, overtightening, and abnormal combustion.
Can a seized glow plug break?
Yes.
Glow plugs are thin and can snap in the cylinder head if excessive torque is applied.
What happens if a glow plug breaks?
Part of the plug may remain in the cylinder head and require specialized extraction.
If the tip falls into the cylinder, internal engine damage is possible.
Can a broken glow plug be removed without removing the head?
Often, yes.
Professional extraction kits can remove many broken plugs with the cylinder head installed.
Can I drill out a broken glow plug myself?
It is technically possible with an appropriate guided extraction system, but freehand drilling risks damaging the head or allowing metal chips into the cylinder.
Professional extraction is often safer.
Can you drive with a broken glow plug?
Do not run the engine if part of the glow plug may have fallen into the cylinder or if the plug no longer seals correctly.
The condition should be evaluated first.
Can I heat the cylinder head with a torch?
I would not recommend using an open flame around a diesel engine.
Fuel lines, wiring, oil, and plastic components can create significant risk.
Use the manufacturer-specified engine-temperature procedure instead.
Should I put anti-seize on the new glow plugs?
Only if the glow plug or engine manufacturer specifically recommends it.
Added lubricant changes tightening characteristics.
How tight should glow plugs be?
Use the torque specification for your exact engine and glow plug.
There is no universal tightening torque.
Why does one glow plug keep seizing?
Repeated problems in one cylinder may indicate carbon buildup, injector spray issues, incorrect installation, or an engine-specific problem.
Should I replace all glow plugs at once?
Not always.
Test the remaining plugs and consider their age, access difficulty, and the risk of disturbing plugs that are currently working.
How can I prevent glow plugs from seizing?
Use the correct plug, follow proper installation torque, maintain the fuel system, address injector problems, and follow the manufacturer’s service procedure.
Can carbon make a glow plug impossible to remove?
Yes.
Heavy carbon around the heating tip can trap the plug even after the threaded section has been completely loosened.
Is professional glow plug removal expensive?
Cost varies by engine and severity.
Controlled professional extraction is usually far cheaper than repairing a damaged cylinder head after a plug breaks.
Conclusion
Learning how to remove a seized glow plug is mainly about patience and controlling the amount of force you apply.
Start by finding the service procedure for your exact diesel engine. Use the manufacturer-specified engine temperature, clean around the glow plug, disconnect the electrical connector carefully, and use the correct deep socket.
If the plug begins moving, loosen it gradually. Small back-and-forth movements can help release deposits and corrosion. A suitable penetrating product may help with seized threads when the manufacturer permits its use.
Most importantly, do not assume that more torque is always the answer.
If the plug requires excessive force, begins twisting, or reaches the engine manufacturer’s maximum recommended removal torque, stop. Breaking the glow plug can turn a relatively simple repair into a difficult extraction job.
Also pay attention to how the plug behaves. If it unscrews but refuses to come out, carbon around the heating tip may be trapping it. Pulling harder can break the tip inside the combustion chamber. Specialized carbon-removal or glow plug extraction tools may be required.
Avoid standard impact wrenches, uncontrolled open-flame heating, and oversized breaker bars. These techniques can create much more expensive problems.
Once the plug is removed, inspect the bore and the old plug, correct any underlying injector or combustion problem, and install the replacement according to the correct torque and lubrication instructions.
The safest rule is simple: if a seized glow plug does not become progressively easier to remove with controlled movement, stop before it breaks and use an engine-specific extraction procedure or a qualified diesel technician.