
Learning how to test spark plug wires can save time when an engine runs rough, misfires, or feels weak under load. The test is simple on many older gasoline engines, and a basic digital multimeter is often enough.
In practice, I start with the simple checks before replacing parts. A wire can look fine but have high resistance, while a damaged boot or loose terminal can cause trouble that a resistance test alone may miss. A good diagnosis uses both the eyes and the meter.

What Spark Plug Wires Do
Spark plug wires carry high-voltage power from the ignition coil or distributor to the spark plugs. The voltage creates the spark that starts combustion inside the engine.
Many modern vehicles use coil-on-plug or coil-pack systems and have no long spark plug wires. This guide applies mainly to engines that use separate high-tension ignition wires.
- ✦ Why wire condition matters
A damaged wire can let voltage leak to metal parts of the engine. A wire with too much resistance can also reduce the spark reaching the plug.
- ✦ Common symptoms
Bad wires may cause a rough idle, engine misfire, hard starting, poor acceleration, or hesitation, especially when the engine is under load.
When to Test Spark Plug Wires
Test the wires when you have a misfire or rough running and the engine uses serviceable plug wires. Testing also makes sense after water gets into the ignition area or when a wire shows visible wear.
If the vehicle has coil-on-plug ignition, do not assume it has spark plug wires. Check the engine design and service information first.
- ✦ Before buying parts
Testing can help confirm whether a wire is actually faulty instead of replacing a full set without a clear reason.
Tools You Need to Test Spark Plug Wires
You do not need a large tool kit for a basic spark plug wire test. A digital multimeter is the main tool for checking resistance. A flashlight can also help you spot cracks, burns, and damaged boots.
Work on a cool engine when possible. Keep loose clothing, hair, and tools away from moving belts and fans. Do not touch an ignition wire while the engine is running because the ignition system can produce very high voltage.

- ✦ Digital multimeter
Use a meter with an ohms or resistance setting. Most basic digital meters can perform this test.
- ✦ Vehicle service information
Use the factory service manual or trusted vehicle data to find the correct resistance range for the exact wire type and engine.
- ✦ Flashlight
A bright light makes it easier to inspect the wire jacket, boots, terminals, and areas close to hot engine parts.
Safety Before Testing
Turn the engine off before removing or testing a spark plug wire. Let hot parts cool. Disconnecting wires from a running engine can expose you to a high-voltage shock and can also damage some ignition systems.
Pull a wire by its boot, not by the cable itself. If the boot sticks, twist it gently before pulling. Do not yank the wire because the terminal inside the boot can separate from the cable.
- ✦ Avoid high-voltage contact
Never hold a spark plug wire while someone starts or runs the engine. Use approved diagnostic equipment and follow the vehicle maker’s procedure for live ignition tests.
How to Test Spark Plug Wires With a Multimeter
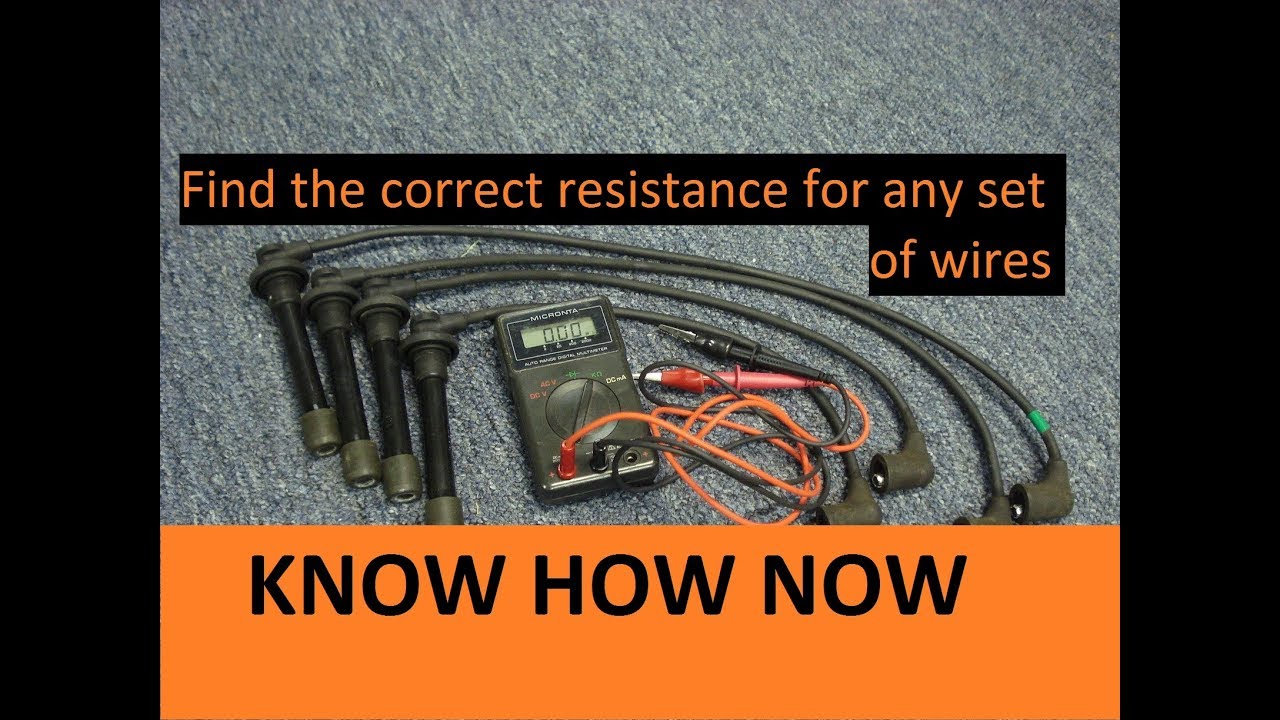
The most common bench test checks the resistance of each wire. This can reveal a broken conductor or resistance that is far above the expected range.
Before testing, label each wire if there is any chance you could mix them up. Spark plug wire routing matters, and connecting a wire to the wrong cylinder can cause a no-start or severe misfire.
- ✦ Step 1: Turn the engine off
Park safely, switch off the ignition, and allow the engine to cool enough for safe handling.
- ✦ Step 2: Remove one wire
Disconnect one wire at a time. Hold the rubber boot and gently remove it from the spark plug and the coil or distributor end as needed.
- ✦ Step 3: Set the meter
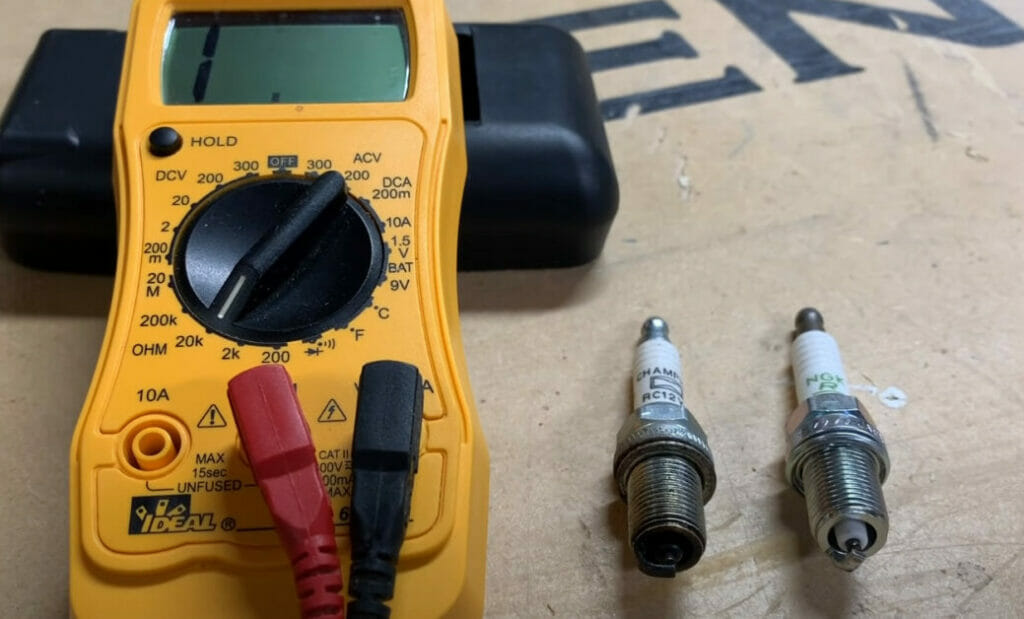
Set the digital multimeter to resistance, often marked with the ohm symbol. Select a range that can measure the expected resistance of the wire.
- ✦ Step 4: Test the wire
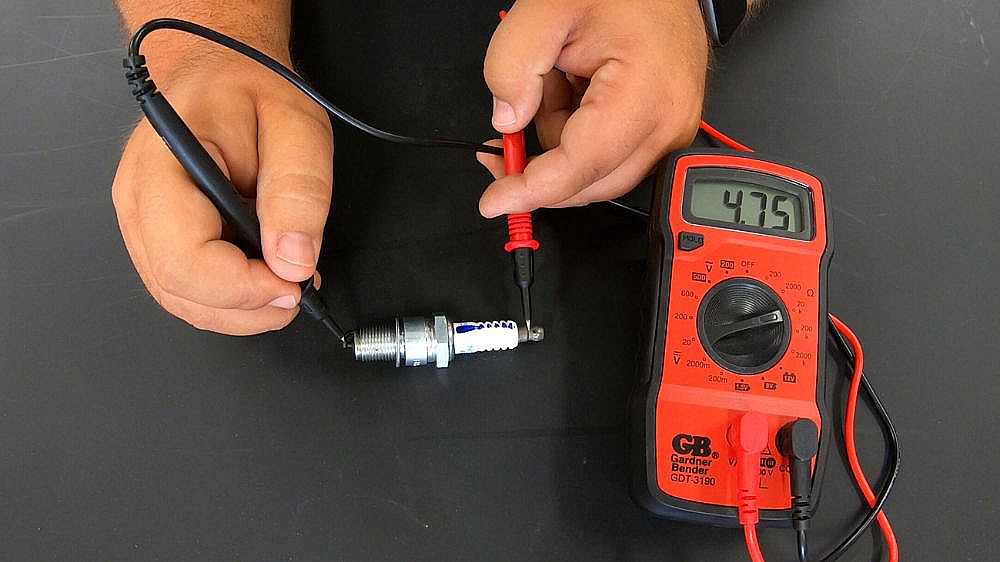
Touch one meter probe to each metal terminal at the ends of the wire. Keep the probes firmly in contact while you read the display.
- ✦ Step 5: Record the result
Write down the reading for each wire. This makes it easier to compare wires and spot one that differs greatly from the others.
- ✦ Step 6: Compare with specifications
Compare the reading with the exact specification for your vehicle. Do not use a single resistance number for every engine because wire construction and length vary.
How to Read the Multimeter Result
A normal reading depends on the wire design, length, and the vehicle maker’s specification. Longer resistance-type wires may show more resistance than shorter wires. That does not automatically mean the longer wire is bad.
A meter that shows OL, infinite resistance, or no continuity can indicate an open circuit. A reading far outside the specified range can also point to a faulty wire. Use the service data before making the final call.
- ✦ Very high or infinite resistance
This may point to a broken conductor, failed terminal connection, or another internal fault.
- ✦ Much lower than expected
A low reading can be a clue, but it must be judged against the wire design and factory specifications.
- ✦ Similar readings
Similar readings across wires can be reassuring, but they do not prove that every wire works correctly under high voltage.
Test the Meter Before Testing the Wire
Touch the two meter probes together before you test the cable. The meter should show a very low resistance, although the exact value depends on the meter and probe leads.
If the display jumps around or gives an unexpected reading with the probes touching, check the meter setting, batteries, and probe connections first. A bad meter setup can lead to a false diagnosis.
How to Test Spark Plug Wires Without a Multimeter
You can learn a lot from a careful visual inspection even without a meter. Look at the full length of each wire and inspect both boots and terminals.
A visual check cannot measure internal resistance, so it should not replace a proper electrical test when the cause of a misfire remains unclear.
- ✦ Look for cracks
Cracks in the insulation can allow high voltage to escape and may become worse as the engine heats up.
- ✦ Check for burn marks
A wire touching an exhaust manifold or other hot part may become hard, melted, or burned.
- ✦ Inspect the boots
Look for tears, carbon tracking, oil damage, moisture, or a boot that does not fit tightly.
- ✦ Check the routing
Make sure wires stay away from sharp edges and very hot surfaces. Factory separators and clips help prevent unwanted contact.
Look for Arc Tracking
Arc tracking can leave thin dark lines on the boot or nearby insulation. It can happen when high voltage finds an easier path to ground instead of reaching the spark plug.
A dark mark does not always prove that the wire alone caused the fault. Inspect the plug, boot, nearby parts, and routing as part of the same diagnosis.
How to Test Spark Plug Wires by Comparing Them
Comparing all the wires can make a fault easier to spot. If several wires have similar resistance and one has a much different reading, that wire deserves closer inspection.
Still, comparison is not a substitute for factory data. Wires can have different lengths, and some engines use different wire designs. A longer wire may naturally have more resistance than a short one.

- ✦ Record every reading
Write down each wire’s resistance and identify it by cylinder. This gives you a clear record instead of relying on memory.
- ✦ Compare wire length
Consider length when comparing readings. A longer wire can have more resistance than a shorter wire of the same type.
- ✦ Use factory limits
The vehicle maker’s service data should guide the final decision about whether resistance is acceptable.
Why Resistance Alone Does Not Prove a Wire Is Good
A resistance test checks the wire with the engine off. It does not fully reproduce the heat, vibration, moisture, and high voltage that the wire sees during normal driving.
A wire may pass a basic resistance test and still have an insulation fault that appears only when the engine is hot or under load. If the engine still misfires, continue the diagnosis instead of assuming the wire is perfect.
How to Test Spark Plug Wires for Intermittent Problems
Some ignition faults appear only when the engine moves, heats up, or gets wet. A wire can pass a cold bench test and still fail during real driving.
If a fault comes and goes, inspect the wire while gently flexing it by hand with the engine off. Do not bend it sharply or damage the insulation. Look for cracks that open as the wire moves.

- ✦ Inspect when hot only with care
If the problem occurs after the engine warms up, use the vehicle’s service procedure for hot testing. Avoid touching hot engine parts or energized ignition components.
- ✦ Check moisture
Water around the plugs or ignition parts can contribute to misfire. Dry the area and inspect seals and boots for damage.
- ✦ Check wire movement
A loose wire or poor terminal connection can cause an intermittent fault when the engine vibrates.
A Simple Misfire Clue
If the engine runs worse during damp weather, inspect the ignition wires and boots closely. Moisture can make it easier for high voltage to leak from a damaged insulation surface.
Do not use an improvised test that involves holding an ignition wire or bringing your body close to a live ignition circuit. Use safe diagnostic tools and the vehicle maker’s procedure.
What a Bad Spark Plug Wire Can Look Like
A failed wire can have a clear physical defect, but not every bad wire looks damaged. That is why visual inspection and electrical testing work best together.
If you find one damaged wire, inspect the rest of the set. Heat, age, oil, and poor routing can affect several wires at the same time.
- ✦ Cracked insulation
Cracks can allow high-voltage leakage and may become more serious with heat and movement.
- ✦ Melted insulation
A melted section often means the wire contacted a hot engine component or stayed too close to an extreme heat source.
- ✦ Damaged terminal
A loose, corroded, or damaged terminal can create a poor connection even when the wire itself looks normal.
- ✦ Oil-soaked boot
Oil can damage some rubber materials over time and may point to a separate leak that should also be repaired.
Do You Replace One Wire or the Whole Set?
The answer depends on the vehicle, wire set, age, and manufacturer’s guidance. If one wire has failed on an old set, replacing the full set may be considered so all wires have similar age and condition.
If the wires are relatively new and one has clear damage from a local cause, replacing only the failed part may be possible. Follow the vehicle maker’s recommendations and use wires made for the exact engine.
Common Mistakes When Testing Spark Plug Wires
A spark plug wire test is simple, but small mistakes can lead to a wrong diagnosis. The most common problem is using a generic resistance value instead of the specification for the exact vehicle.
Another mistake is testing only one wire. A complete check gives you a better picture of the ignition system and can show whether one wire stands out from the others.
- ✦ Testing a hot wire by hand
Never touch an energized ignition wire to look for a spark or feel for a shock. Use safe test equipment instead.
- ✦ Mixing up wire locations
Remove and replace one wire at a time when possible. Mark wires before removal if the routing is not obvious.
- ✦ Ignoring the boots
The boot and terminal are part of the ignition connection. Check them for damage, corrosion, looseness, and carbon tracking.
- ✦ Relying only on resistance
A resistance reading cannot reveal every insulation or high-voltage problem. Consider the full symptom pattern.
When the Wire Test Passes but the Engine Still Misfires
If all wires test within specification but the engine still misfires, the fault may lie elsewhere. Possible causes include a worn spark plug, ignition coil problem, fuel issue, vacuum leak, sensor fault, or engine problem.
Read diagnostic trouble codes if the vehicle supports OBD-II. A scan tool can help identify the affected cylinder and guide the next test. Avoid replacing parts at random.
A Practical Spark Plug Wire Testing Checklist
A short checklist helps keep the diagnosis safe and organized. Start with the engine off, inspect every wire, then test resistance and compare the results with the correct specifications.
If the results do not explain the vehicle’s symptoms, continue with the rest of the ignition and engine diagnosis. A good test should answer a question rather than simply confirm a guess.
- ✦ Confirm the ignition design
Make sure the engine actually uses separate spark plug wires before starting the test.
- ✦ Inspect each wire
Check insulation, boots, terminals, routing, heat damage, moisture, and signs of arcing.
- ✦ Measure resistance
Use a digital multimeter with the engine off and the wire disconnected as required by the service procedure.
- ✦ Compare readings
Record every reading and compare it with both the other wires and the manufacturer’s specifications.
- ✦ Reinstall correctly
Make sure every boot is fully seated and every wire returns to its correct cylinder and ignition connection.
- ✦ Confirm the repair
After any repair, start the engine safely and check whether the original symptom is gone. Follow normal road-test and scan-tool procedures as needed.
When to Stop and Get Professional Help
Get professional help if you cannot safely access the wires, the ignition system uses a design you do not understand, or the vehicle still has a serious misfire after basic checks.
A persistent misfire can damage the catalytic converter and may point to a fault beyond the plug wires. A proper scan and test plan can prevent unnecessary parts replacement.