
A stripped spark plug hole is a common problem on engines with aluminum cylinder heads. The plug may no longer tighten, or it may push out when the engine runs. In many cases, you can repair the hole without replacing the whole cylinder head.
The key is to restore the hole to a strong, accurate thread. Most repairs use a thread insert made for spark plug applications. The insert gives the spark plug a fresh set of threads and restores the original plug size.
Before starting, confirm the exact spark plug thread size and the repair system recommended for your engine. Do not guess. A wrong tap or insert can damage the head beyond simple repair.
This guide explains **how to rethread a spark plug hole** with a thread insert. It also covers when a simple thread chase may be enough, how to keep chips out of the cylinder, and when the job should go to a professional.
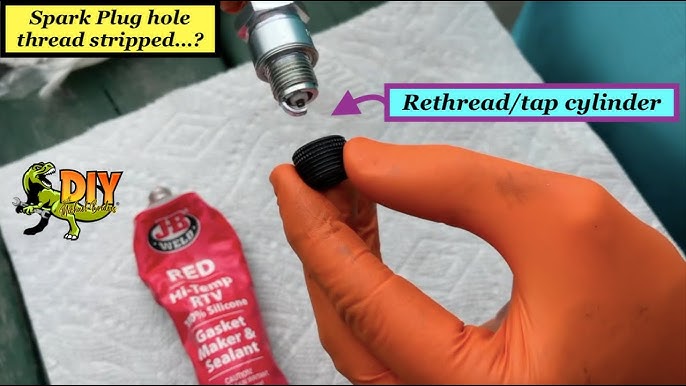
What Does It Mean to Rethread a Spark Plug Hole?
A spark plug screws into a threaded hole in the cylinder head. On many modern engines, that head is aluminum. Aluminum is light and works well, but its threads can be damaged if the plug is cross-threaded, over-tightened, or removed when the engine is too hot.
When the threads are stripped, the spark plug may spin without tightening. It may also sit at the wrong depth or work loose during engine operation. In a severe case, combustion pressure can force the plug out of the head.
Rethreading does not always mean simply cutting the old threads again. If the original threads have lost too much material, a larger tap is used to create new threads for a **thread repair insert**. The insert then provides the correct internal thread for the original spark plug.

- ✦ Thread chasing
A thread chaser cleans and reshapes lightly damaged threads. It removes dirt and small burrs without removing much metal.
- ✦ Thread repair
A repair tap creates a new thread for an insert when the original spark plug threads are badly damaged.
- ✦ Thread insert
The insert restores the original spark plug thread size while using stronger, newly cut threads in the cylinder head.
When Is a Simple Thread Chase Enough?
If the plug still starts by hand and only feels rough, the threads may not be fully stripped. A spark plug thread chaser can sometimes restore the damaged area. This is less invasive than drilling and tapping the hole for an insert.
Do not use a thread chaser as a way to hide badly damaged threads. If the plug will not hold the specified torque, stop and use a proper repair method.
- ✦ Use a chaser
Use one when the threads are dirty, slightly bent, or lightly damaged but still have enough material to hold the plug.
- ✦ Use an insert
Use an insert when the original threads are stripped, pulled out, or unable to hold the specified torque.
Tools and Parts You Need Before Starting
The right repair kit matters more than having a large tool collection. A spark plug thread repair kit should match the original plug size, thread pitch, seat style, and repair depth. Follow the kit maker’s instructions because tap sizes and installation methods differ.
A torque wrench is also important. The final spark plug torque should come from the engine or spark plug manufacturer’s specification. Do not rely on feel, especially after repairing aluminum threads.
Work with a cool engine unless the repair system specifically states otherwise. Disconnect the ignition or fuel system as needed for safe access, and keep loose tools and debris away from the open spark plug hole.

- ✦ Correct repair kit
Choose a kit made for the exact spark plug thread size and application.
- ✦ Repair tap
Use the tap supplied or specified for the insert. Do not substitute a standard tap unless the repair instructions allow it.
- ✦ Drill or drilling guide
Some repair systems require enlarging the damaged hole before tapping. Use the exact drill size and keep it straight.
- ✦ Cutting lubricant
Use the lubricant recommended for the tap and cylinder head material. It helps the tool cut smoothly and reduces heat.
- ✦ Compressed air and cleaning tools
Use suitable cleaning methods to remove chips. Prevent debris from entering the cylinder.
- ✦ Torque wrench
Use a calibrated torque wrench for the final spark plug installation.
Choosing Between a Helical Insert and a Solid Insert
A helical insert uses a coiled wire form. It can restore the original spark plug thread with relatively little added material. It is a common choice when the repair kit and engine application support it.
A solid insert uses a rigid metal sleeve with internal and external threads. Some systems also lock the insert in place with special features. Both styles can work well when installed to the maker’s instructions.
The important point is not the brand name alone. Match the insert system to the engine, available depth, plug seat, and repair instructions.
- ✦ Helical insert
A coiled insert can restore the original thread while using a relatively small amount of space.
- ✦ Solid insert
A solid sleeve provides a rigid repair and may be preferred for some high-load or repeated-service applications.
How to Rethread a Spark Plug Hole Step by Step
The following process explains **how to rethread a spark plug hole** with a thread insert. Exact steps vary by repair kit, so the kit instructions should always take priority over a general guide.
The goal is to make the new threads straight, clean, and deep enough for the insert. Take your time during the cutting steps. A crooked repair can cause the spark plug to sit at an angle and may create sealing or clearance problems.

- ✦ Step 1: Remove the spark plug
Let the engine cool. Remove the ignition coil, plug wire, or other parts needed for access. Use the correct spark plug socket and remove the damaged plug carefully.
- ✦ Step 2: Inspect the hole
Look into the spark plug bore with a light. Check for damaged threads, carbon, broken metal, and signs that the plug has been moving in the hole.
- ✦ Step 3: Protect the cylinder
Use the repair method recommended for your engine to control chips. Keep the piston positioned as instructed by the repair system, and use suitable grease or other chip-control methods only when approved for the job.
- ✦ Step 4: Enlarge the hole if required
If the insert system requires drilling, use the specified drill size. Keep the tool aligned with the original spark plug bore and drill only to the required depth.
- ✦ Step 5: Cut the new threads
Apply the correct cutting lubricant and slowly run the repair tap into the hole. Keep the tap square to the cylinder head and follow the kit instructions for cutting and backing off the tap.
- ✦ Step 6: Clean the bore
Remove every visible chip and cutting residue. Turn the engine only as directed by the repair procedure, then inspect the cylinder and plug bore again.
- ✦ Step 7: Install the insert
Thread the insert onto its installation tool and install it to the depth specified by the kit. Do not force it past the recommended position.
- ✦ Step 8: Finish the insert
Some systems require a tang to be removed. Others use a locking feature or a different finishing step. Follow the exact instructions supplied with the insert.
- ✦ Step 9: Install the spark plug
Start the plug by hand. It should turn smoothly for several turns. If it binds early, stop and inspect the threads rather than forcing it with a ratchet.
- ✦ Step 10: Torque the plug
Use the correct torque specification for the engine and plug. Tighten with a torque wrench and avoid adding extra force after the specified torque is reached.
Keep the Tap Straight
Alignment is one of the most important parts of **how to rethread a spark plug hole**. The new thread must follow the original plug axis. If the tap enters at an angle, the insert will also sit at an angle.
A long spark plug bore can make alignment easier to judge, but access varies by engine. If the repair area is hard to see or the tap cannot be kept straight, removing the cylinder head may be safer than trying to force an in-place repair.
- ✦ Use light pressure
Let the cutting tool do the work. Heavy pressure can make the tap wander or damage the aluminum.
- ✦ Check alignment often
Pause during the repair and verify that the tool remains in line with the original spark plug bore.
How to Keep Metal Chips Out of the Engine
Chip control is a major concern when learning **how to rethread a spark plug hole**. Cutting or drilling can create small metal particles. If those particles enter the combustion chamber, they can cause damage or create problems when the engine starts.
There is no single chip-control method that fits every engine. The best approach depends on the piston position, cylinder design, access, and repair kit. Follow the repair kit instructions and the engine service procedure rather than relying on a one-size-fits-all trick.
If the engine design makes it hard to control debris, consider removing the cylinder head. The extra work may provide much better access and allow the bore to be cleaned and inspected directly.

- ✦ Clean before cutting
Remove dirt and loose carbon around the plug opening before putting cutting tools into the bore.
- ✦ Control cutting debris
Use the chip-control method specified by the repair system. Grease may help capture chips in some procedures, but it should not be used blindly.
- ✦ Clean after tapping
Remove all loose chips from the bore and surrounding area before installing the plug.
- ✦ Inspect before starting
A final visual inspection can catch metal fragments, damaged threads, or an incorrectly installed insert.
Why Compressed Air Needs Care
Compressed air can move debris, but blowing directly into an open cylinder can send chips deeper into the engine or into places you cannot inspect. Use air only as part of a controlled cleaning process.
A vacuum designed for the task can help remove loose material around the opening. Use care so the tool does not contact delicate engine parts or pull the insert from its intended position.
- ✦ Avoid uncontrolled blowing
Do not blast debris into the cylinder just because it is quick. Control where the chips go.
- ✦ Inspect twice
Clean the area, then inspect it again before the spark plug goes back in.
How to Install and Torque the Repaired Spark Plug
After the insert is installed, the spark plug must enter the new threads smoothly. Start it by hand. If the plug needs a wrench to start threading, stop and check the alignment.
The plug must also reach the correct depth. A spark plug that sits too far in or out can create clearance, sealing, or combustion problems. Compare the repaired installation with the engine’s service information before final tightening.
Use the specified spark plug torque. The correct value can depend on the engine, plug design, gasket or seat type, and manufacturer instructions. A repaired thread is not a reason to tighten the plug harder.

- ✦ Start by hand
Turn the plug slowly by hand before using a ratchet. This helps detect cross-threading early.
- ✦ Check the seat
Make sure the plug’s gasket or tapered seat matches the cylinder head and spark plug design.
- ✦ Use a torque wrench
Apply the exact torque listed for the engine and spark plug combination.
- ✦ Do not over-tighten
Excess torque can damage the repaired threads, insert, plug, or cylinder head.
Should You Use Anti-Seize on the Spark Plug?
Do not assume anti-seize is required. Some spark plug makers and engine makers advise against it because it can change the friction between the threads and cause the plug to receive more clamping force than intended at the same torque setting.
Follow the spark plug and engine manufacturer’s instructions. If the manufacturer says to install the plug dry, do so. If a specific product is approved, use it exactly as directed.
- ✦ Follow the plug maker
The spark plug manufacturer’s installation guidance should be checked before adding any thread compound.
- ✦ Do not guess at torque
Changing the thread condition can affect the torque relationship, so use the correct procedure for the product.
Common Mistakes When Rethreading a Spark Plug Hole
Many failed repairs come from rushing the alignment or skipping the cleaning step. Aluminum threads are easy to damage when a tap is forced, and a small error can make the insert sit crooked.
Another common mistake is using a repair kit without checking the engine’s plug dimensions. Spark plugs can look similar while using different thread sizes, reaches, seats, or heat ranges. Confirm the exact part before cutting the head.
Understanding these mistakes is an important part of **how to rethread a spark plug hole**. A careful repair is usually slower than a rushed repair, but it reduces the chance of having to remove the head or repeat the job.

- ✦ Using the wrong tap
A tap with the wrong diameter or pitch can destroy the remaining material and make the hole unsuitable for the intended insert.
- ✦ Tapping at an angle
A crooked tap creates a crooked insert and may prevent the spark plug from seating correctly.
- ✦ Drilling too deep
Going beyond the specified depth can damage internal engine parts or create a hole that is too deep for the insert.
- ✦ Skipping chip control
Metal chips can enter the combustion chamber and should be controlled and removed.
- ✦ Forcing the spark plug
A plug should start smoothly. Forcing it can cross-thread the new repair.
- ✦ Ignoring torque
Too little torque can allow movement and poor sealing, while too much can damage the repaired thread.
- ✦ Choosing an insert that is too short
The insert needs enough engagement for the application. Use the length specified by the repair system.
What If the Spark Plug Keeps Loosening?
A spark plug that keeps loosening after repair needs attention. Do not simply tighten it harder. Check the insert, plug condition, thread engagement, seat, and torque procedure.
If the insert has moved, pulled out, or was installed at the wrong depth, the repair may need to be redone. Continued driving can make the damage worse.
- ✦ Stop and inspect
Do not keep driving with a loose spark plug. Inspect the repaired area before further engine operation.
- ✦ Check the insert
Verify that the insert remains fully seated and that its locking or retention feature was completed correctly.
When You Should Have a Professional Rethread the Spark Plug Hole
Not every spark plug repair belongs in a home garage. If you cannot keep the tap straight, cannot control metal chips, or cannot confirm the correct repair depth, professional service may be the safer choice.
A professional repair is also worth considering when the cylinder head has severe damage, the spark plug has broken, access is poor, or the insert has already failed. Some engines require special tools or procedures that are not practical for a basic tool kit.
A machine shop or experienced automotive technician can also remove the cylinder head when needed. This gives direct access to the damaged area and makes it easier to inspect, machine, clean, and test the repair.

- ✦ Severe thread damage
If the hole is badly enlarged, cracked, or missing too much material, a basic insert kit may not be enough.
- ✦ Poor tool access
If you cannot hold the drill or tap square to the bore, the repair can become misaligned.
- ✦ Broken spark plug
A broken plug may require extraction tools and a different repair plan.
- ✦ Possible head damage
Cracks, damaged valve components, or other signs of cylinder-head failure require more than a simple thread repair.
- ✦ Previous failed insert
A second repair may require a larger insert or professional machining, depending on the remaining material.
Is It Worth Repairing Instead of Replacing the Cylinder Head?
Often, a sound thread insert repair can save the cost and labor of replacing a cylinder head. The actual choice depends on the engine, damage, access, parts cost, labor time, and condition of the head.
A repair makes less sense when the head has several major problems or when the damaged area cannot safely accept an insert. Compare the full repair plan with the cost of a replacement head before deciding.
- ✦ Consider the damage
A single stripped hole in an otherwise healthy head may be a good repair candidate.
- ✦ Consider the engine
Engine design, access, age, value, and future service needs all affect the practical repair choice.
How to Check the Repair After Installation
Once you finish **how to rethread a spark plug hole**, inspect the repair before starting the engine. The spark plug should sit at the correct depth, turn smoothly during installation, and reach the specified torque without unusual resistance.
Start the engine and listen for abnormal sounds. A damaged or poorly seated plug may cause a misfire, rough running, or a combustion leak. If the engine runs poorly after the repair, shut it down and inspect the plug and ignition system.
After the first drive, it is sensible to inspect the area for signs of leakage or movement. Do not automatically retighten the plug. If the torque has changed or the plug has loosened, find the cause before driving further.

- ✦ Inspect the plug position
Confirm that the plug reaches the correct depth and does not sit unusually high or low.
- ✦ Check engine operation
Watch for misfires, rough idle, unusual sounds, or other signs that the repair needs inspection.
- ✦ Look for leakage
Check the plug area for signs of combustion leakage, damaged sealing surfaces, or other abnormal conditions.
- ✦ Recheck the cause of any loosening
A loose plug after repair can point to a damaged insert, incorrect installation, wrong torque, or another problem.
A Simple Final Inspection
A good final check is simple. Confirm the correct plug, correct thread engagement, correct seat, correct insert depth, and correct torque. Then make sure all tools and cleaning materials are removed from the engine bay.
Keep the repair kit instructions and engine service information with your maintenance records. If the engine needs another spark plug service later, the repaired hole deserves the same care as the original.
- ✦ Correct plug
Verify the plug part number and dimensions before installation.
- ✦ Correct torque
Use the specified value rather than a general torque number found for another engine.