
Learning how to gap spark plugs with feeler gauge is a simple skill that can help you do basic engine work with more care. The job takes only a few minutes when you have the right gauge and the correct gap spec. The key is to measure the gap with care and avoid bending the center electrode or damaging the plug.
Spark plug gaps are not one-size-fits-all. The correct setting depends on the engine, plug design, ignition system, and the maker’s instructions. For a U.S. vehicle, the best starting point is the owner’s manual, service information, or the spark plug maker’s listed specification.
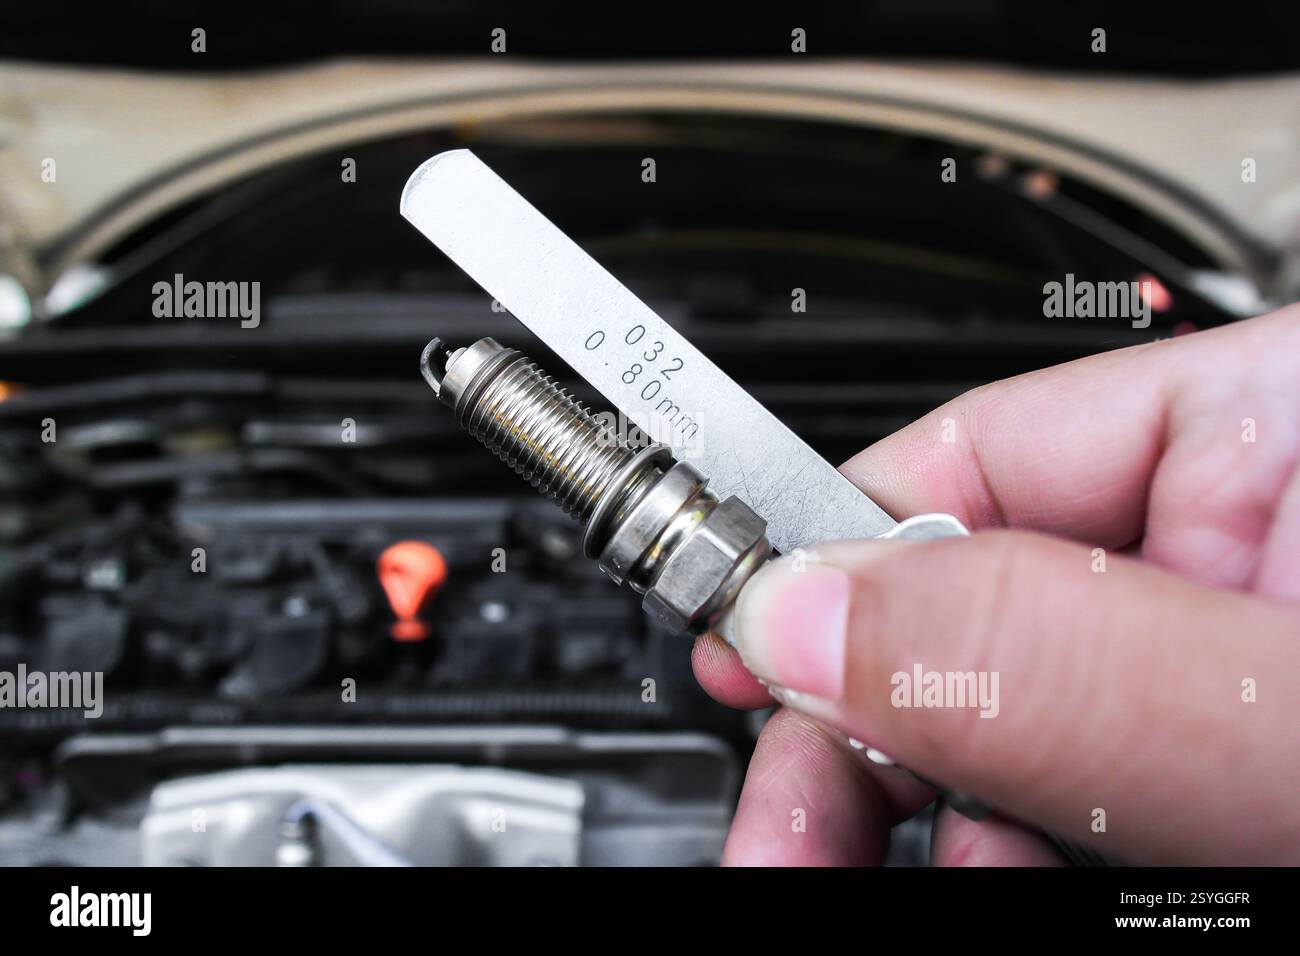 display: block; margin: 0 auto; border-radius: 12px; box-shadow: 0 8px 25px rgba(0, 0, 0, 0.12);”>
What Is Spark Plug Gap and Why Does It Matter?
The spark plug gap is the small space between the center electrode and the ground electrode. When the ignition system fires, the spark must jump across this space. The gap affects how easily the spark forms and how well the plug works under engine load.
A gap that is too wide can need more voltage to create a spark. A gap that is too small can reduce the spark path. Either condition can cause poor ignition when the gap is outside the range set for the engine and plug.
That is why knowing how to gap spark plugs with feeler gauge matters. A feeler gauge lets you check the space with a known thickness instead of judging it by eye.

- ✦ **Too wide**
A wide gap may make spark formation harder, especially when cylinder pressure rises during engine load.
- ✦ **Too narrow**
A narrow gap changes the intended spark path and may reduce ignition performance.
- ✦ **Correct gap**
The correct gap matches the specification for the specific engine and spark plug.
What Is a Feeler Gauge?
A feeler gauge is a set of thin metal blades with marked thickness values. Each blade has a known thickness, often shown in inches, millimeters, or both. You use the blade to compare its thickness with the space between two parts.
For spark plugs, the gauge helps you check whether the electrode gap matches the required setting. A wire-style spark plug gauge can also work, but a flat feeler gauge is useful when its thickness and shape suit the plug.
- ✦ Blade thickness
The number marked on the blade tells you its thickness.
- ✦ Light drag
The correct blade should pass through the gap with a slight, smooth drag rather than being forced.
What You Need Before You Gap a Spark Plug
Before you start, get the exact spark plug gap for your application. Do not rely on a generic gap range just because the plug fits the engine. Different engines and plug types can call for different settings.
You also need a clean work area. Dirt on the plug or gauge can affect the measurement, while rough handling can damage the electrode. If the plug has a special electrode design, read the maker’s instructions before changing its gap.
Knowing how to gap spark plugs with feeler gauge is mostly about using simple tools in the right order. A careful setup makes the actual adjustment much easier.

- ✦ Correct spark plug specification
Use the gap listed for your exact vehicle, engine, and plug application.
- ✦ Feeler gauge
Use a clean gauge with a blade close to the specified gap.
- ✦ Spark plug gap tool
A suitable gap tool can help move the ground electrode in small steps.
- ✦ Clean cloth
Use a clean cloth to remove loose dirt from the plug and your hands.
- ✦ Good lighting
Bright light helps you see the electrode edges and place the gauge correctly.
Check the Gap Specification First
The correct number is the most important part of the job. A common mistake is to use a gap printed on another plug or a setting from a different engine. Always match the specification to the application.
If the plug maker says the plug is pre-gapped, still check it when the application requires a specific gap. Shipping and handling can change a gap, and a quick measurement can confirm the setting before installation.
- ✦ Use the exact application
Match the engine, model, year, and spark plug part number when checking the required gap.
- ✦ Do not guess
A visual estimate is not accurate enough for a precise spark plug gap.
How to Gap Spark Plugs With Feeler Gauge Step by Step
The process for how to gap spark plugs with feeler gauge is straightforward. Measure first, make a small adjustment if needed, and measure again. Do not make a large bend in one move.
Work with the plug out of the engine unless the service procedure for your specific application says otherwise. Hold the plug by its metal shell and keep the ceramic insulator away from hard impacts.

- ✦ 1. Find the correct blade
Select the feeler gauge blade that matches the specified spark plug gap.
- ✦ 2. Place the blade in the gap
Insert the blade between the center electrode and ground electrode without forcing it.
- ✦ 3. Check the drag
A correct blade should move through the gap with a light, even drag.
- ✦ 4. Adjust if needed
If the gap is wrong, use a proper spark plug gap tool to move the ground electrode in small steps.
- ✦ 5. Measure again
Reinsert the gauge after each adjustment until the gap matches the required setting.
- ✦ 6. Inspect the plug
Check the electrode, ceramic insulator, and shell for damage before installation.
Step 1: Hold the Spark Plug Correctly
Place the spark plug on a clean surface or hold it by the metal shell. Avoid squeezing or striking the ceramic insulator. The electrode area should stay clean while you measure.
- ✦ Keep it steady
A stable plug makes it easier to insert the feeler gauge at the right angle.
Step 2: Insert the Feeler Gauge
Choose the blade that matches the target gap. Slide it into the space between the electrodes. The blade should enter without force and should not scrape hard against either electrode.
- ✦ Use light pressure
Never force a blade into a gap that is too small.
Step 3: Read the Gap by Feel
A useful feel is a small amount of drag as the blade passes through. If the blade moves with no resistance, the gap may be too wide. If it will not enter or needs force, the gap may be too small.
- ✦ Light drag
This usually indicates that the blade thickness and gap are close.
Step 4: Adjust the Ground Electrode
If adjustment is needed, use a tool designed for spark plugs. Move the ground electrode in small steps. Do not pry against the center electrode or the ceramic insulator.
For a gap that is too wide, carefully move the ground electrode toward the center electrode. For a gap that is too narrow, move it away in a controlled way. The exact tool method can vary by tool design, so follow its instructions.
- ✦ Small changes
Make one small adjustment at a time and check the gap after each change.
- ✦ Protect the center electrode
Do not use the center electrode or ceramic insulator as a bending point.
Step 5: Recheck the Gap
After every adjustment, measure the gap again. This is a key part of how to gap spark plugs with feeler gauge because the electrode can move more than expected with a small tool movement.
Keep checking until the specified measurement gives the proper light drag. Then inspect the plug one more time before installation.
- ✦ Measure twice or more
Repeated checks help confirm that the final setting is correct.
How to Tell if the Spark Plug Gap Is Correct
Knowing how to gap spark plugs with feeler gauge is not only about reading a number. You also need to use the gauge correctly. The blade should sit in the gap without being tilted in a way that gives a false reading.
Use the blade that matches the specified measurement. If your gauge has nearby sizes, you can use them to confirm the result. The target blade should pass with slight drag, while a noticeably thicker blade should not fit in the same way.

- ✦ Target blade fits
The blade at the specified thickness should pass through with light drag.
- ✦ Thicker blade does not fit freely
A thicker blade should not pass through the same gap with the same light feel.
- ✦ Electrode looks even
The ground electrode should sit evenly over the center electrode without obvious side-to-side misalignment.
- ✦ No visible damage
The ceramic, center electrode, ground electrode, and sealing area should be free from damage.
Inches Versus Millimeters
Feeler gauges may show both inches and millimeters. For example, a specification may be written in inches while your gauge is easier to read in millimeters. Use the same unit as the specification or convert it carefully before measuring.
Do not round a value too much when the required gap is precise. If your gauge does not contain the exact size, use a gauge set that lets you make a reliable measurement.
- ✦ Check the unit
Make sure you know whether the required gap is listed in inches or millimeters.
Common Mistakes When Gapping Spark Plugs
Most spark plug gapping errors come from rushing the measurement or using the wrong adjustment method. A spark plug may look fine while its gap is still outside the required setting. Careful measurement is faster than replacing a plug after a poor adjustment.
The most important rule in how to gap spark plugs with feeler gauge is to avoid force. Spark plug electrodes are small, and some modern plugs use fine-wire or precious-metal electrodes that need extra care.

- ✦ Guessing the gap by sight
The gap is too small to judge reliably with your eyes. Use a gauge.
- ✦ Using the wrong specification
A gap that works for one engine may not be correct for another.
- ✦ Forcing the gauge
Forcing a blade into the gap can move the electrode or damage its edge.
- ✦ Bending the center electrode
Adjust the ground electrode with a suitable tool instead of pushing on the center electrode.
- ✦ Making one large adjustment
Large movements make it harder to control the final gap.
- ✦ Ignoring plug design
Fine-wire and special-electrode plugs may have specific adjustment limits or instructions.
- ✦ Failing to recheck
Always measure again after changing the electrode position.
Be Careful With Fine-Wire Spark Plugs
Some spark plugs use fine-wire center electrodes made from materials such as iridium or platinum. These designs can use a small electrode tip, so rough handling can cause damage.
If the manufacturer says not to adjust the gap, follow that instruction. Do not assume every plug should be adjusted in the same way just because it can be measured with a feeler gauge.
- ✦ Follow plug instructions
The plug maker’s instructions take priority over a general gapping method.
Feeler Gauge vs. Other Spark Plug Gap Tools
A flat feeler gauge is not the only way to check spark plug gap. You may also see wire-style gauges and round disc-style gap tools. Each tool can work well when used correctly, but the tool must suit the plug and the measurement you need.
For someone learning how to gap spark plugs with feeler gauge, a quality feeler gauge offers a clear way to compare a known blade thickness with the electrode gap. The main benefit is that the measurement comes from the marked blade thickness rather than a visual estimate.

- ✦ Flat feeler gauge
Uses thin blades of known thickness to measure the gap.
- ✦ Wire gauge
Uses wires or shaped edges to check a gap and can work well for many conventional spark plugs.
- ✦ Disc-style gap tool
Uses a stepped or tapered edge to compare the electrode gap with marked measurements.
- ✦ Dedicated adjustment tool
Helps move the ground electrode in a controlled manner after the gap has been measured.
Why a Feeler Gauge Can Be Useful
A feeler gauge gives you a direct thickness reference. This makes it useful for checking whether a narrow space matches a known measurement. It can also be used for many other mechanical jobs, so it is a handy tool for a home garage.
The important point is to use the gauge as a measuring tool, not as a lever. The blade should slide into the gap, not force the electrode into a new position.
- ✦ Measure first
Use the gauge to determine the current gap before changing it.
- ✦ Adjust separately
Use a proper spark plug adjustment tool when the electrode needs to move.
What to Do After Gapping the Spark Plugs
Once you know how to gap spark plugs with feeler gauge and have set the correct gap, the next step is installation. Make sure the plug is clean and undamaged. If you are replacing several plugs, check each one rather than assuming they all have the same gap.
Use the vehicle or plug manufacturer’s installation instructions for thread condition, torque, and any required procedures. Do not use spark plug torque values from a different engine unless they match your application.
After installation, start the engine and pay attention to its operation. If the engine develops a misfire, rough running, warning light, or other problem, stop and check the installation and the correct parts before continuing to drive.

- ✦ Inspect each plug
Look for cracked ceramic, damaged threads, or damaged electrodes before installation.
- ✦ Use the correct torque
Follow the vehicle or spark plug maker’s specified tightening method and torque.
- ✦ Keep dirt out
Keep the plug seat and surrounding area clean so debris does not enter the cylinder.
- ✦ Check your work
Confirm that every plug is the correct part and has the intended gap.
When You Should Replace Instead of Adjust
Gapping is not a repair for every damaged spark plug. Replace a plug if the electrode is badly worn, the ceramic is cracked, the threads are damaged, or the plug maker says the gap should not be adjusted.
If the gap changes again after careful adjustment, inspect the plug for wear or damage. A plug that cannot hold the required gap may not be suitable for continued use.
- ✦ Cracked ceramic
Do not install a spark plug with a damaged insulator.
- ✦ Badly worn electrode
A worn electrode can change spark behavior even when the measured gap looks correct.
- ✦ Manufacturer says no adjustment
Use the plug as supplied or replace it with the correct part when adjustment is not permitted.